
Building a Heavy-Duty Piano Drawer
by Steven K. Roberts
Nomadic Research Labs
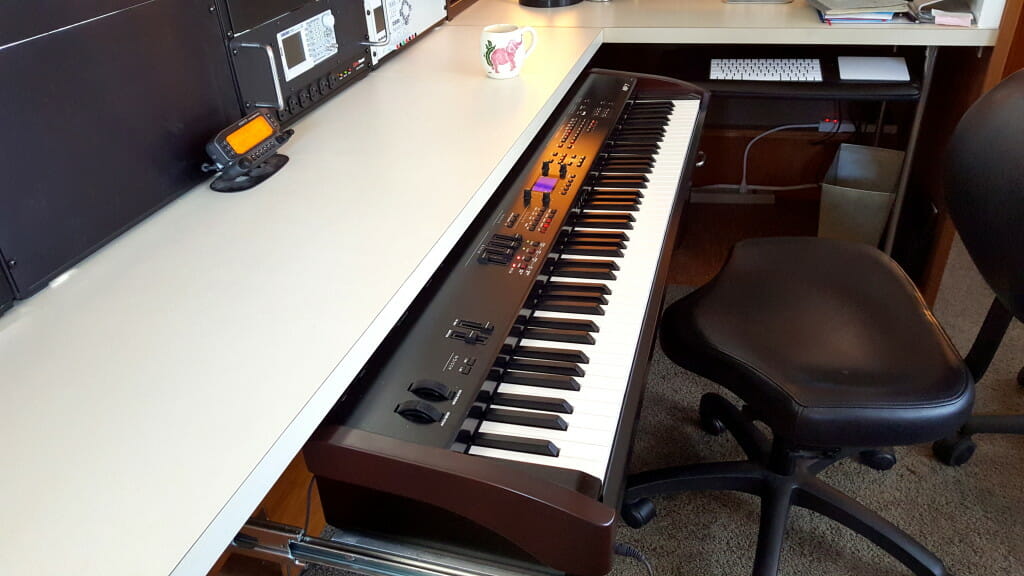
A key requirement for my floating lab/studio was to have a digital piano aboard, but limited space dictates a deployment system that lets it stow away when not in use. I designed the console around this, and built a piano drawer that can handle a quarter-ton.

It was important that the drawer not interfere with other uses of the desk… electronics lab, writing, ham shack, video production, and software development. This dictated maximum knee clearance to keep the workspace comfortable, and when retracted, it effectively disappears. Extended, the piano dominates the space, and the computer keyboard is also on a pull-out drawer so they can be used at the same time.
Any project like this is highly implementation-specific; this article includes the details of my own solution, but it was designed with very tight tolerances to make maximum use of available space. If you clone this for a different keyboard, you’ll probably want to tweak the dimensions. My digital piano in the photo above is a Kawai MP7, which weighs 46 pounds (21 kg) and is a bit bulky at 53 ¼” W x 13 ⅓” D x 6 ¾” H (1352 x 339 x 171 mm). I do love this thing, but it sure looked huge when I hauled it aboard and stared at it!
Fabrication
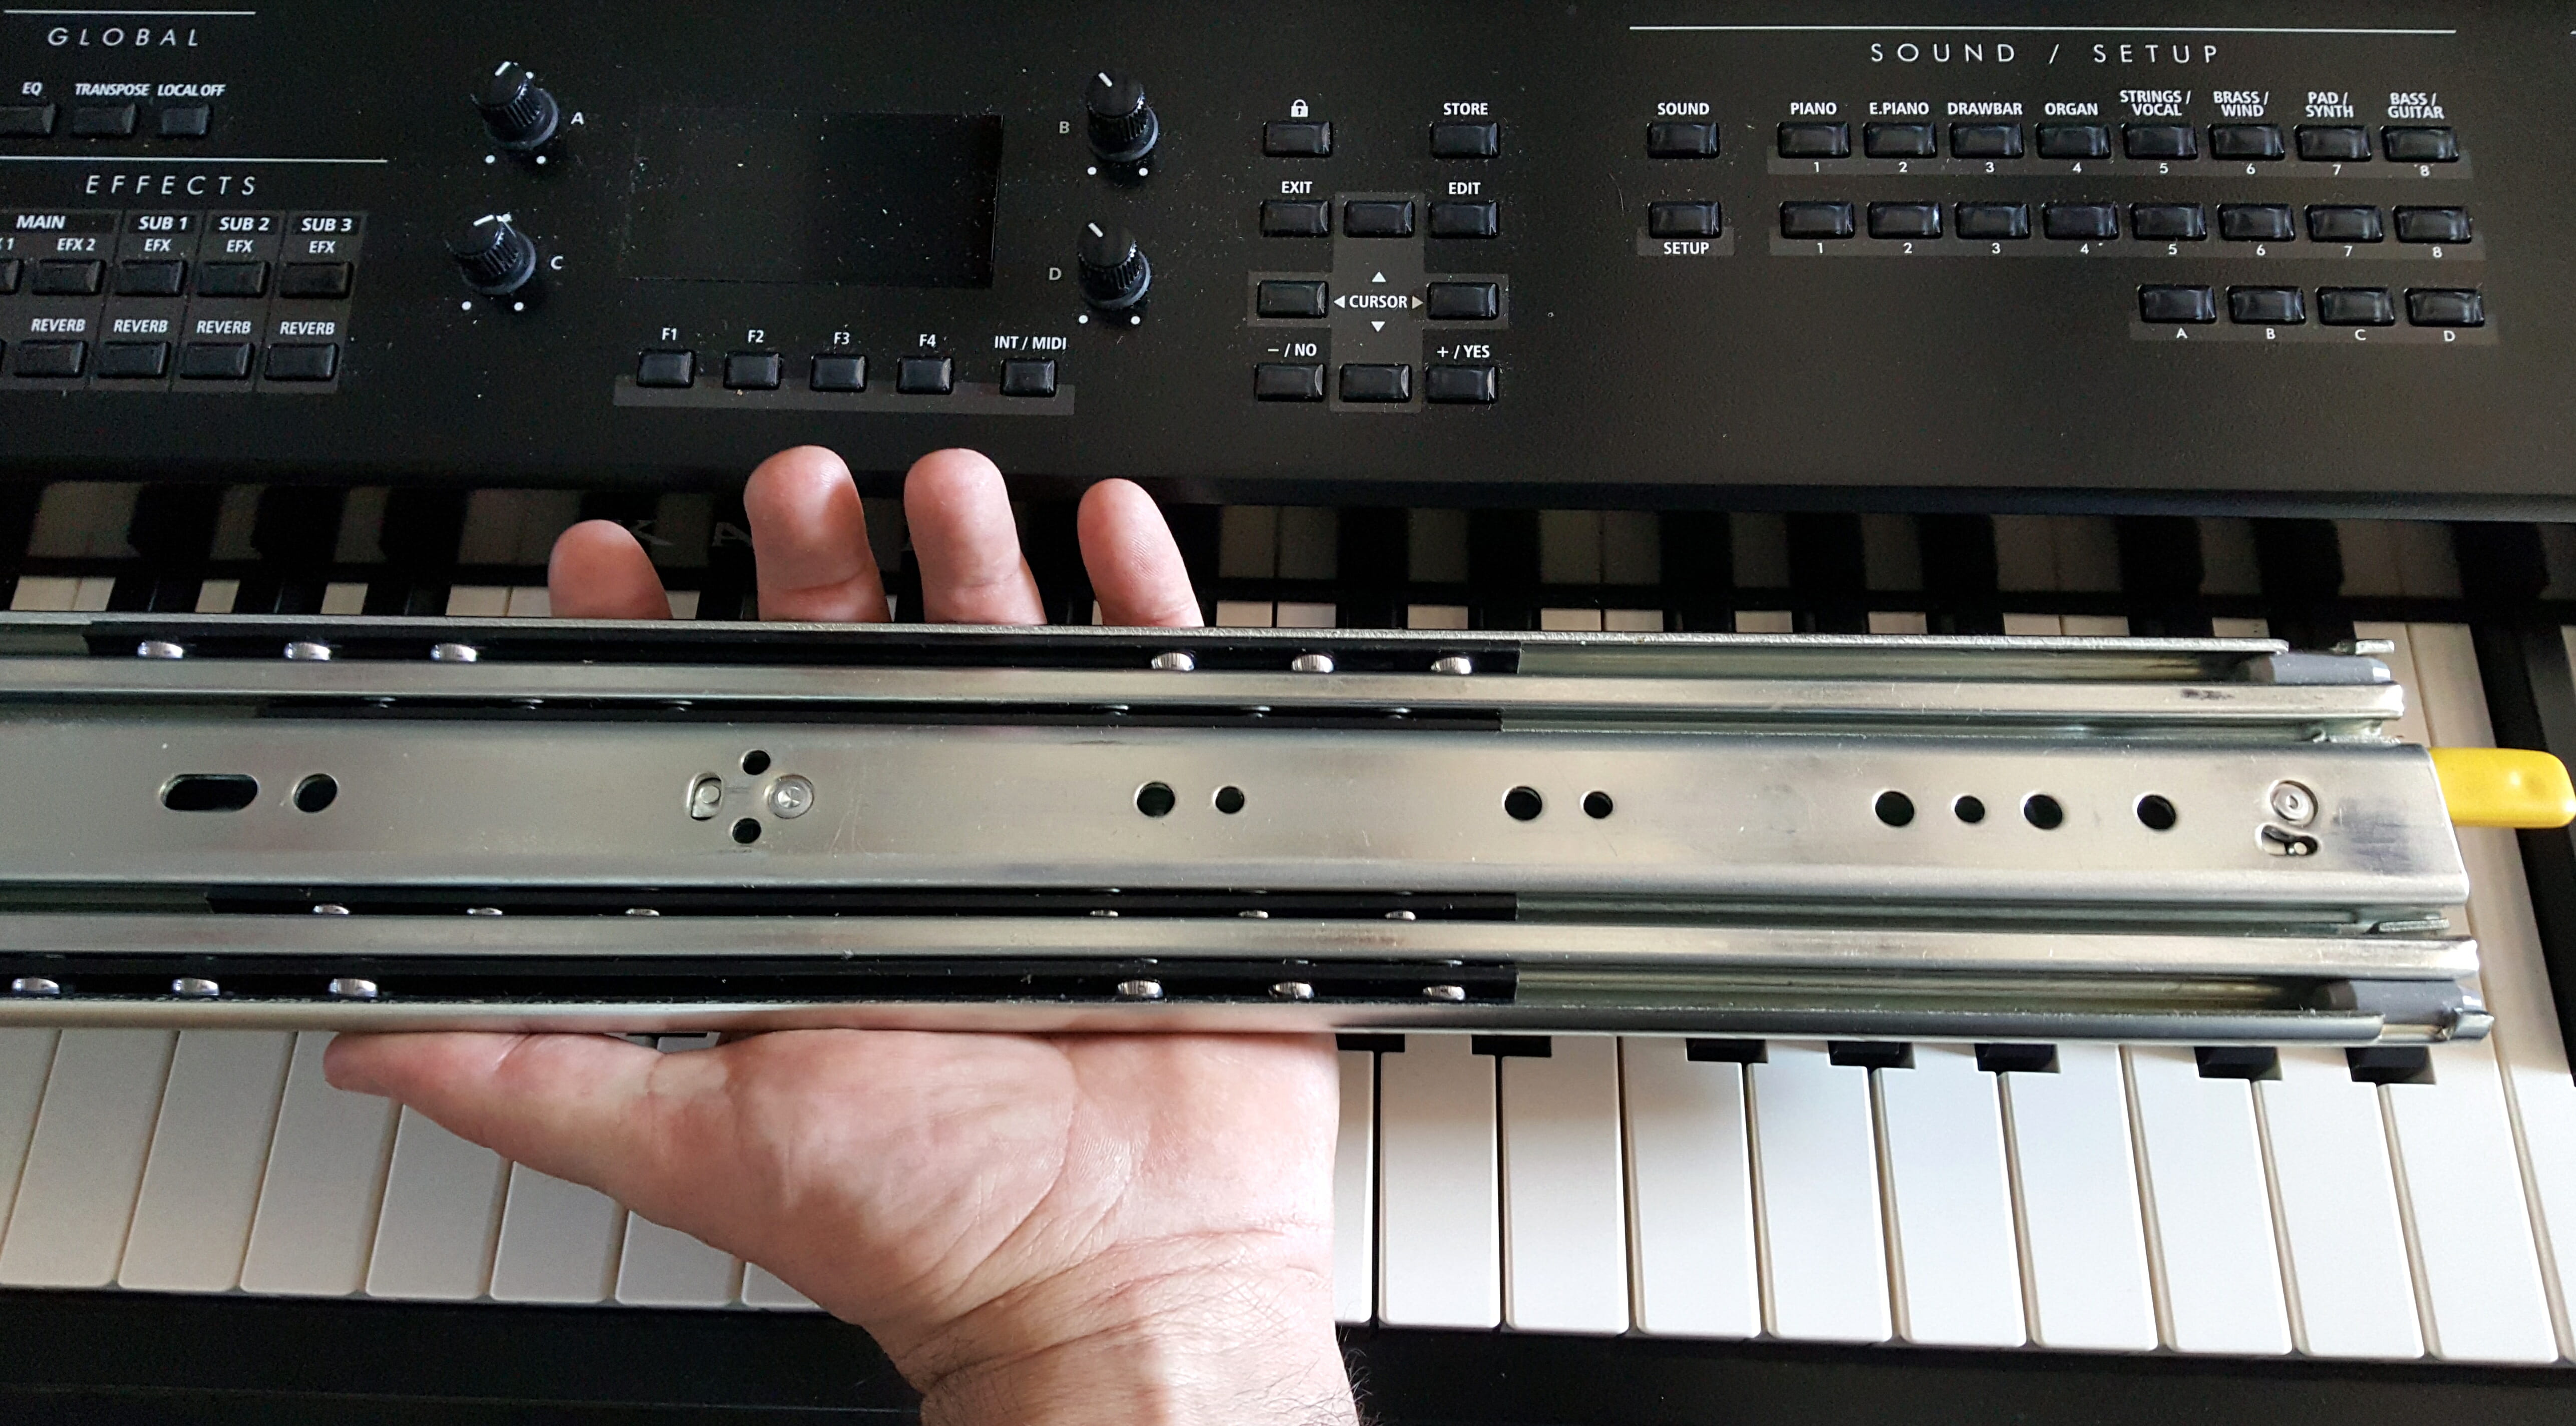
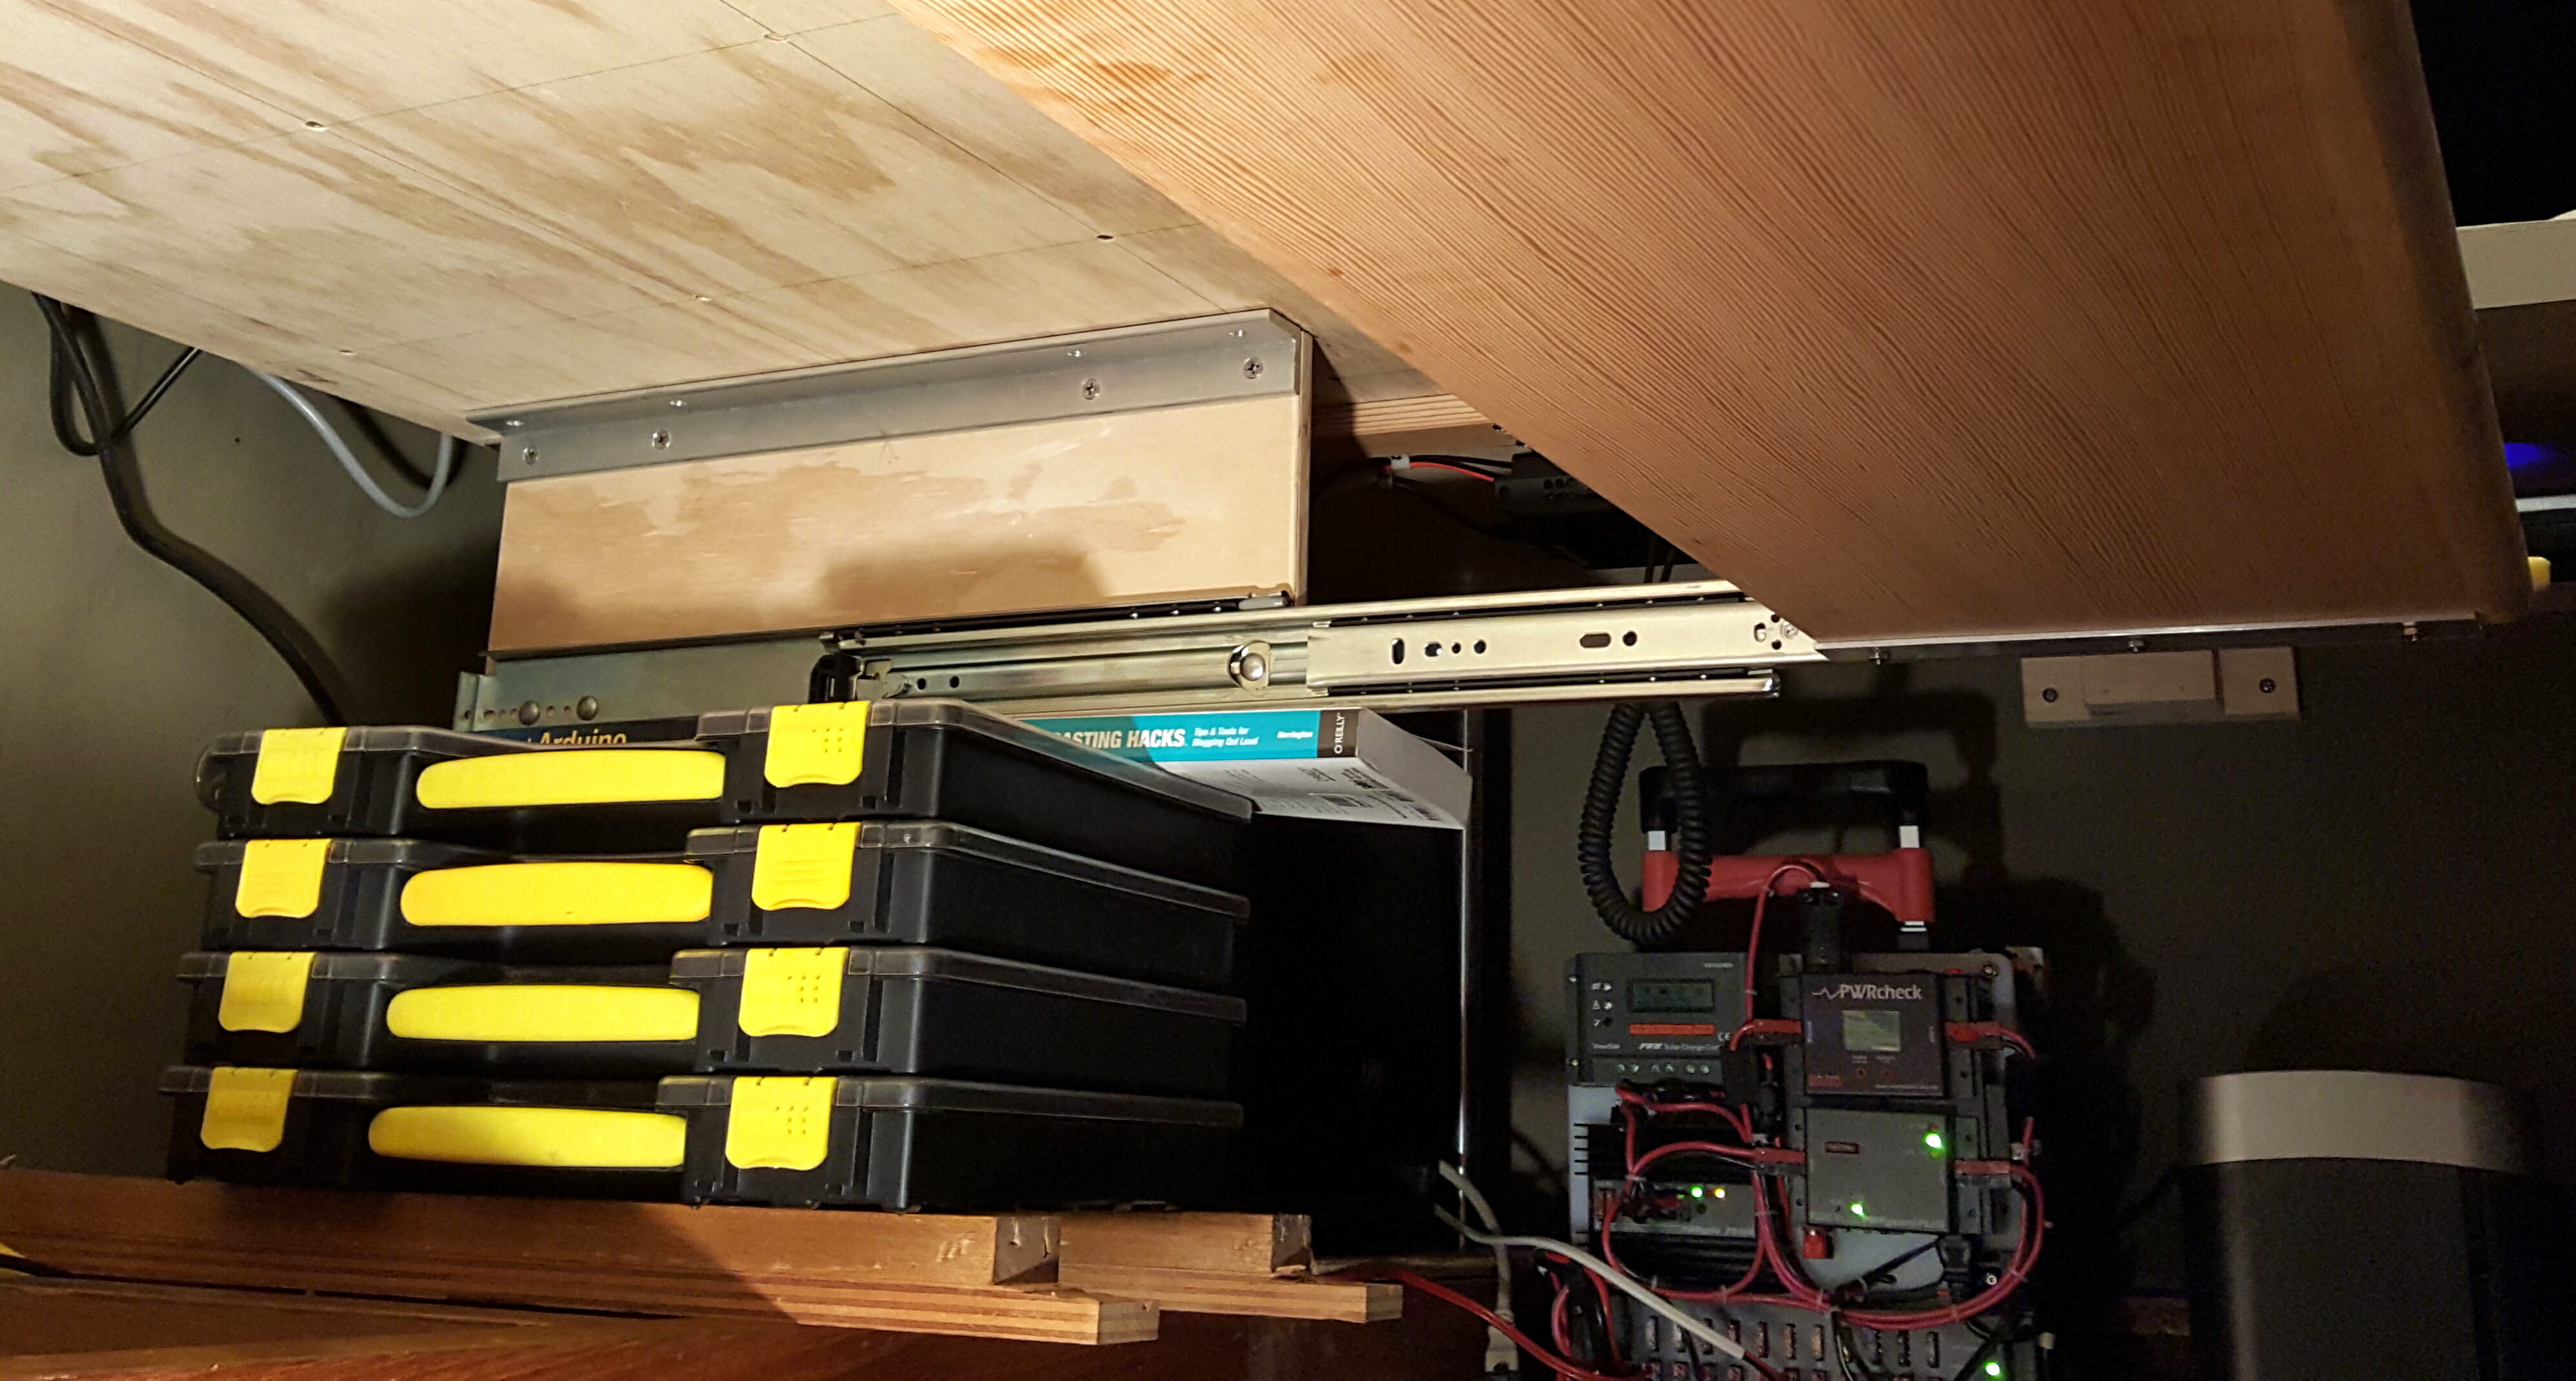
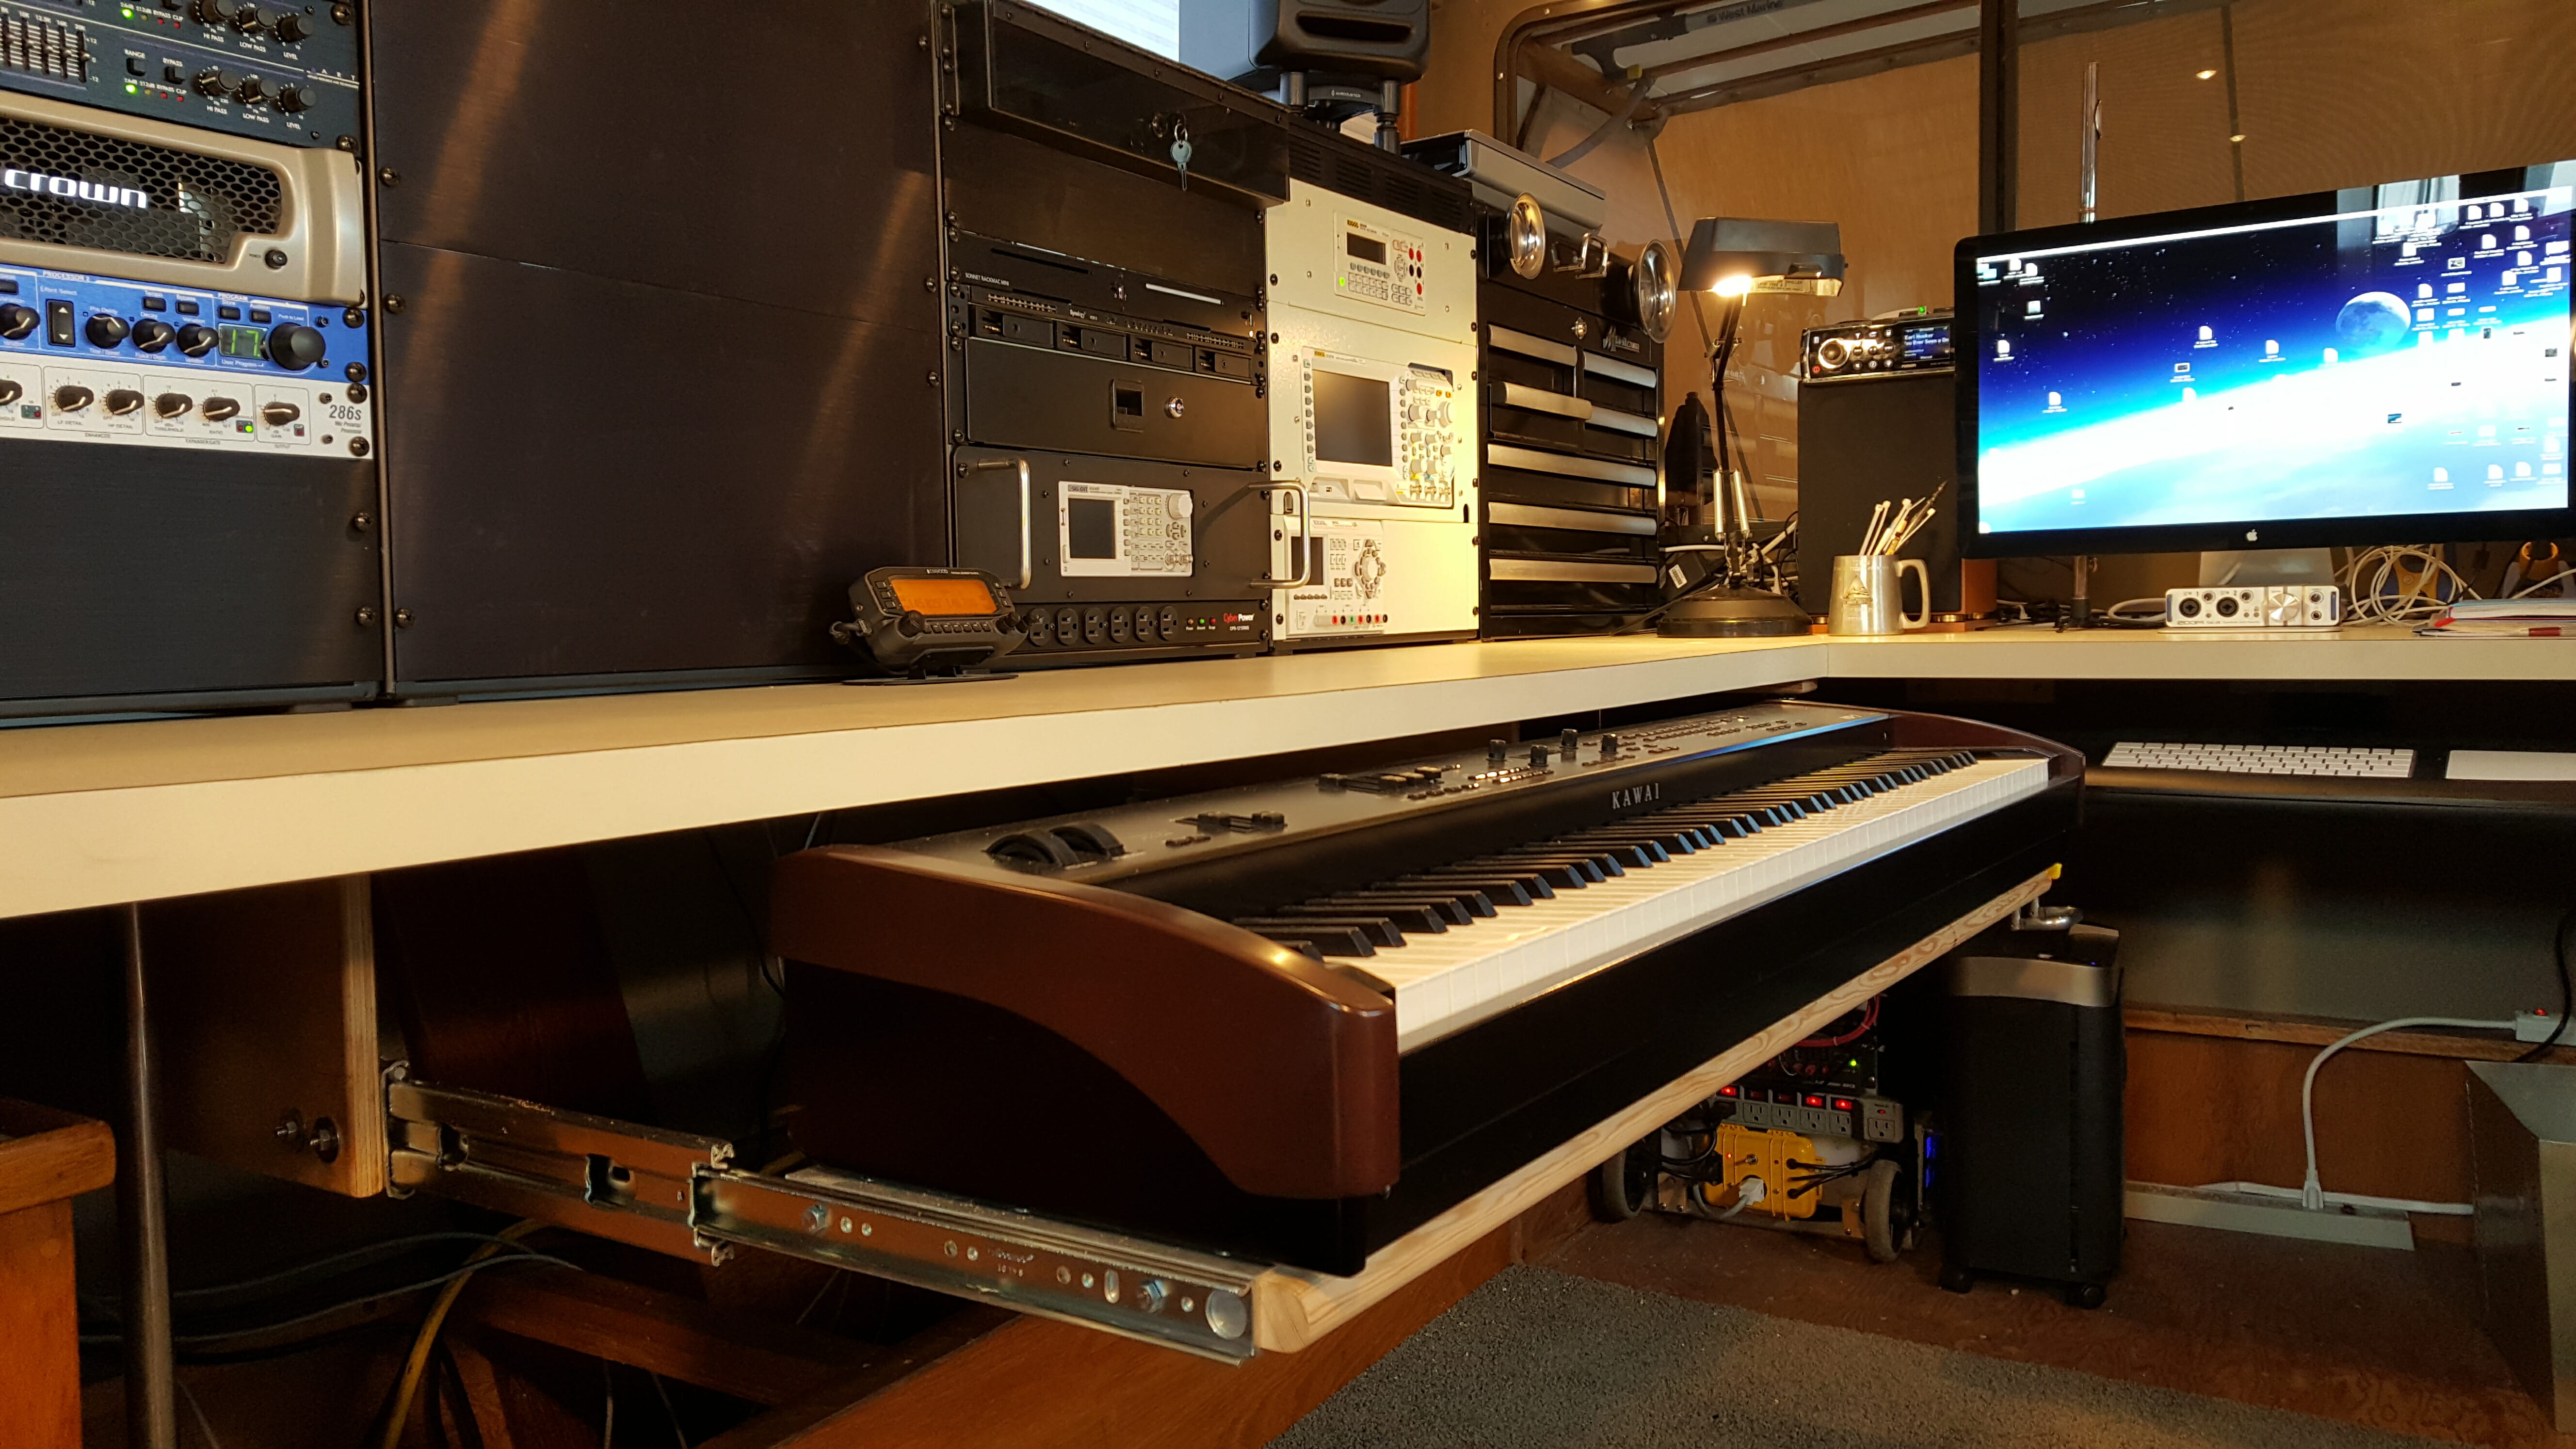
I am fond of heavy-duty, industrial-scale hardware, so my first decision involved the drawer slides. Given the dimensions of keyboard and desk, I went with a high-capacity side-mount full-extension locking slide from McMaster-Carr, good for 500 pounds (Accuride 9301 heavy-duty slides in various lengths are on Amazon, but most of them are without locks). These were not cheap at $129/pair (early 2016) and closer to $200 in 2023, but I wanted something I could count on. The outer frame (against my hand in the photo) is 3 inches wide, and that yellow lever at the right end is the lock release. Shop carefully for both closed length and travel length, and if you want the locking ones, the best source is McMaster-Carr.
While placing that order, I picked up four feet of 1.5 x 1.5 aluminum angle with ¼” thickness, which was another $36. This was to become the bracketry that hangs the vertical walls from the desktop, and would be my primary defense against annoying side-to-side wobble… while supporting the fastener loads of a body hitting the extended drawer at full extension (my rule on any boat is that everything must be able to handle dynamic body weight).
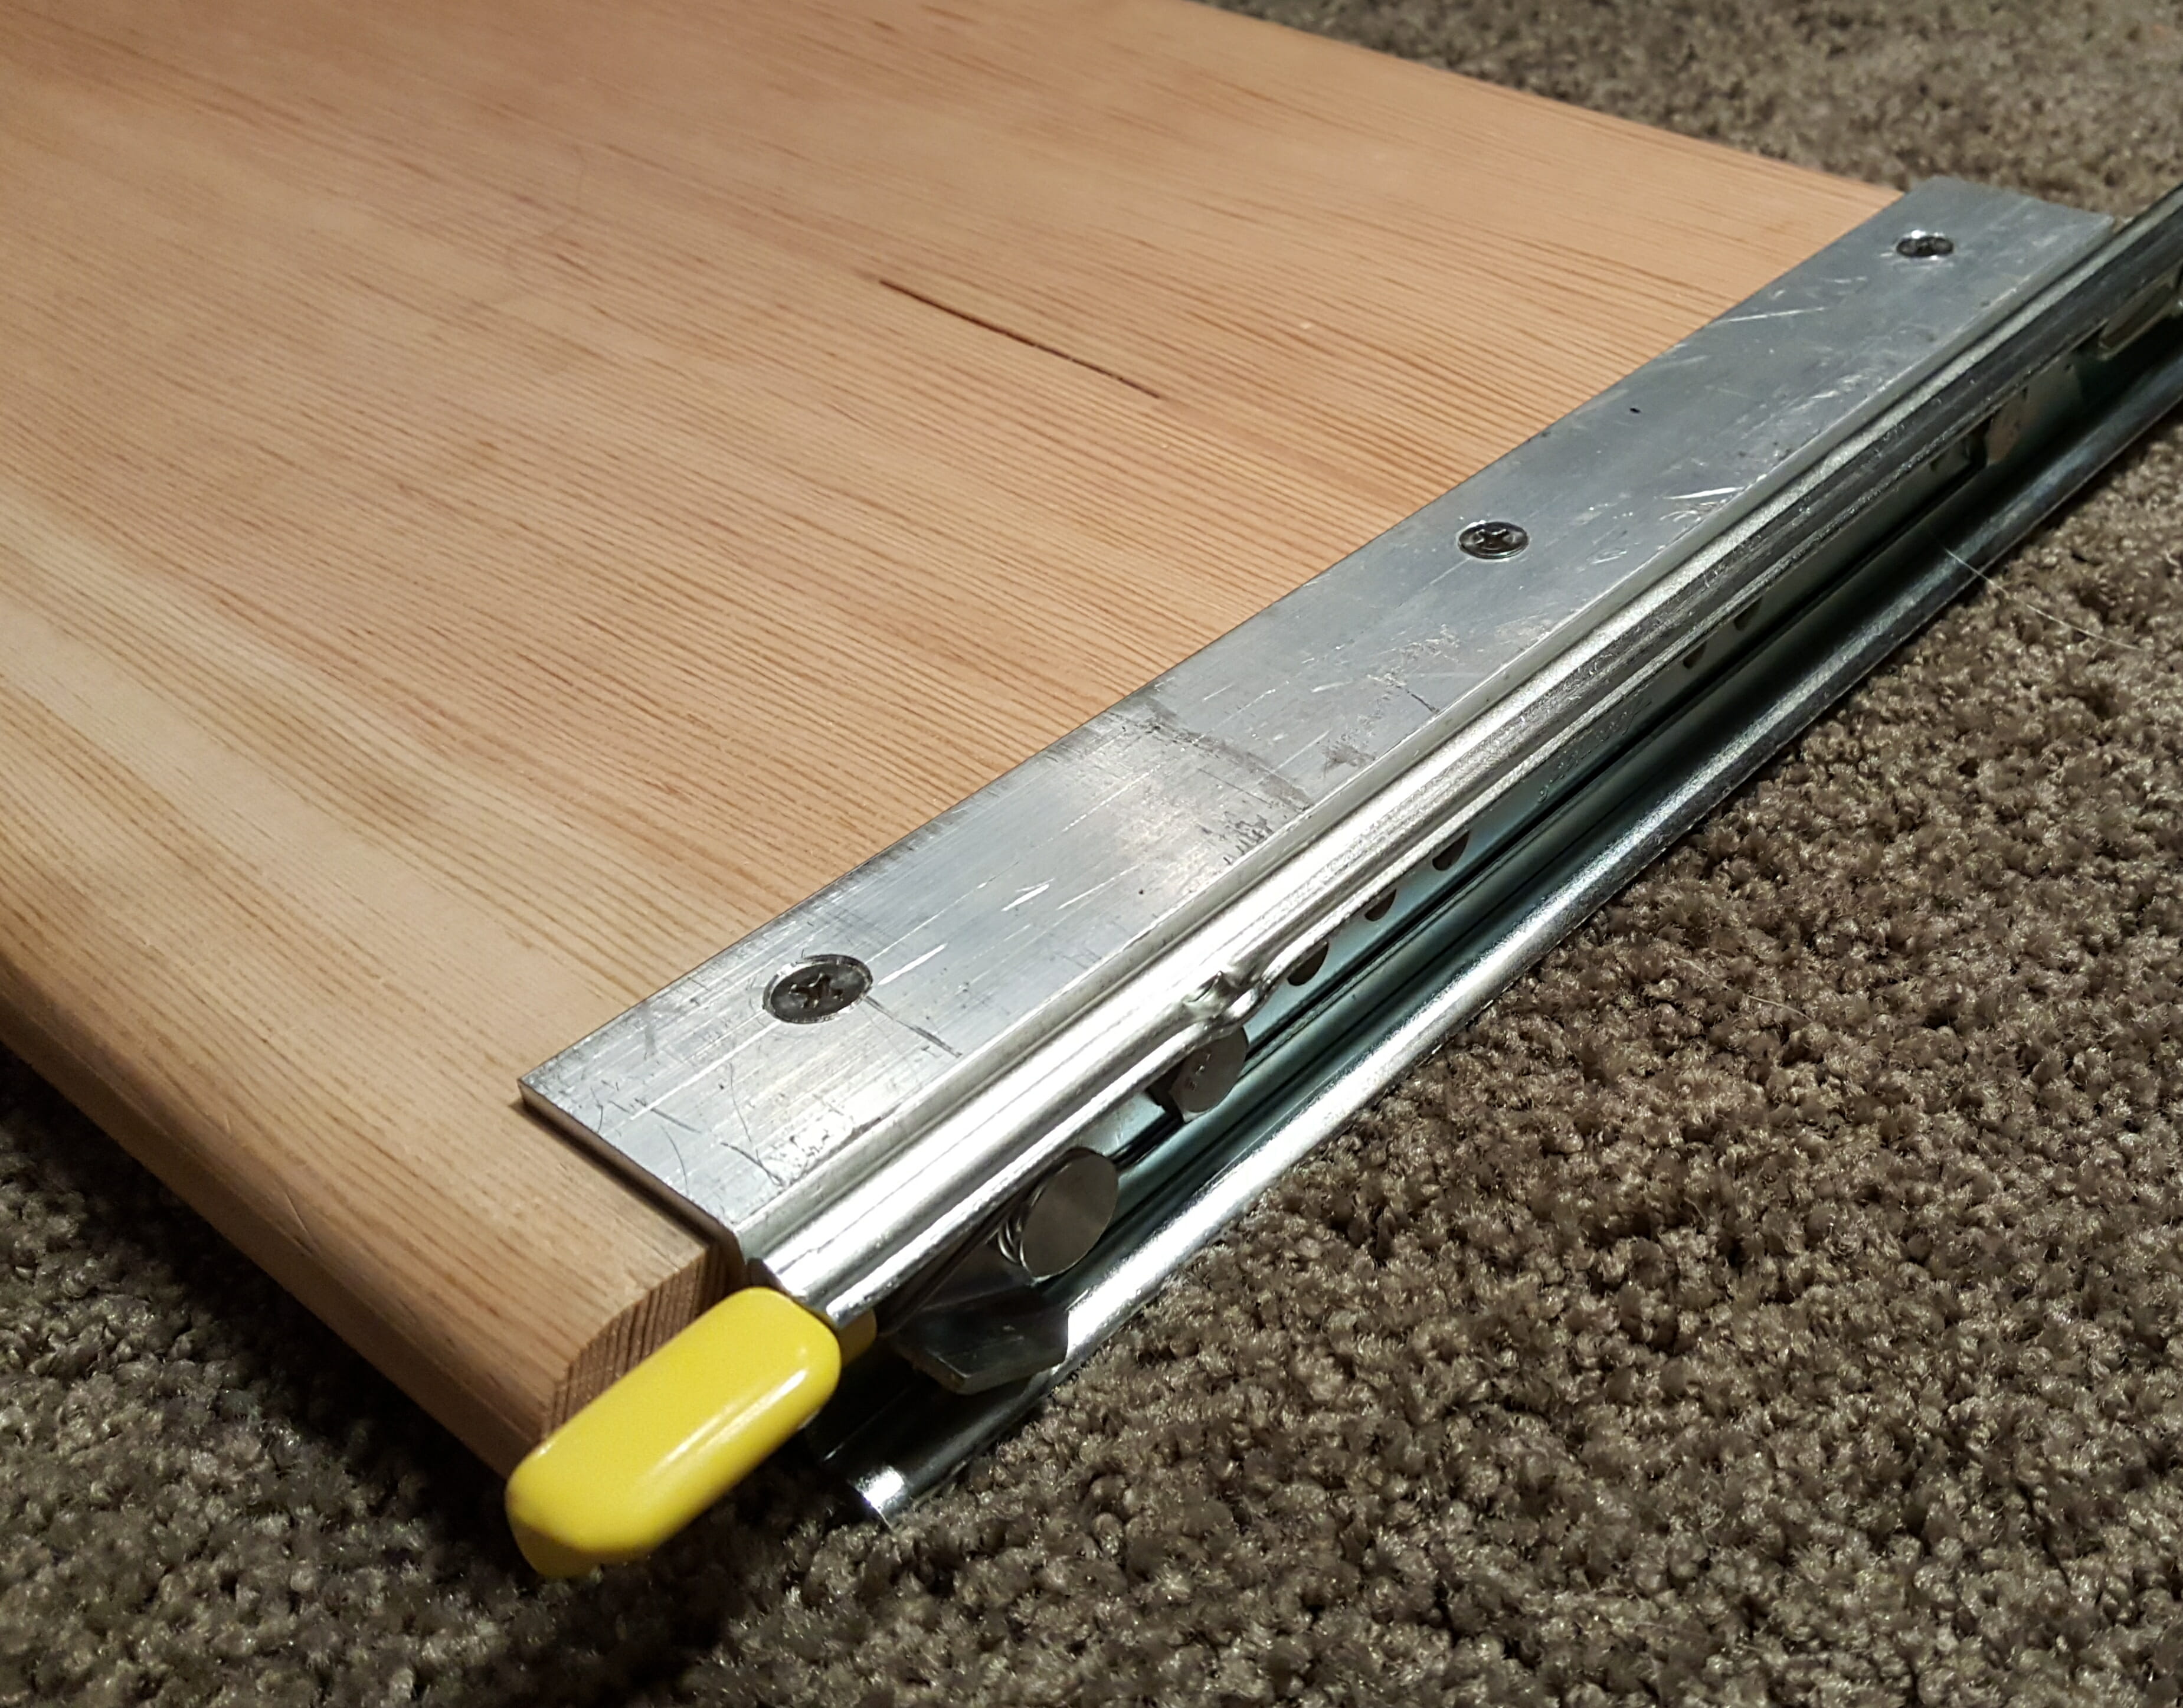
For the shelf, I chose fir stair tread 1″ thick (5/4″ in lumber industry parlance), a foot deep with a bullnose front edge. This was annoying at $13/foot for a flawed piece on this island, but it was important that it be able to take screws into the ends. Even at that, I worried about the weak link in the whole system being end grain fastening, so I dug up some heavy 1″ aluminum channel to encapsulate this high-load region, then attached it with ¼-20 flathead screws before driving ¼” lag screws into the ends.

The drawer slides are supported by vertical walls of ¾” plywood, 22″ long and 8½” tall, attached to the side walls by stainless carriage bolts. The overall design of this is simple, though my obsession with tight tolerances made for some tricky details. I spent an inordinate amount of time measuring the piano, which is always fun on a curvy thing with bits sticking out here and there… as bad as a boat! The worst offender is the group of knobs around the display, which are the tallest part of the machine. I had to be sure that these would not get broken the first time I closed the piano drawer, so lacking a long dependable straight-edge aboard, I used a laser level to establish a reference. The resulting data let me shorten the original side walls by a half inch.

With the wood parts cut, the next task was to use that heavy angle I mentioned earlier… this is what makes the connection from the walls to the underside of the desk. In both cases, fastener dimensions were critical to allow the piano to fit as tightly as possible, since I was constrained by the existing stainless posts (and their end fittings) that I had used to build the desk structure. I prepped two 22″ chunks of angle with countersunk ¼” holes for the walls, and 3/8″ holes for lag screws up into the 1½” desktop.

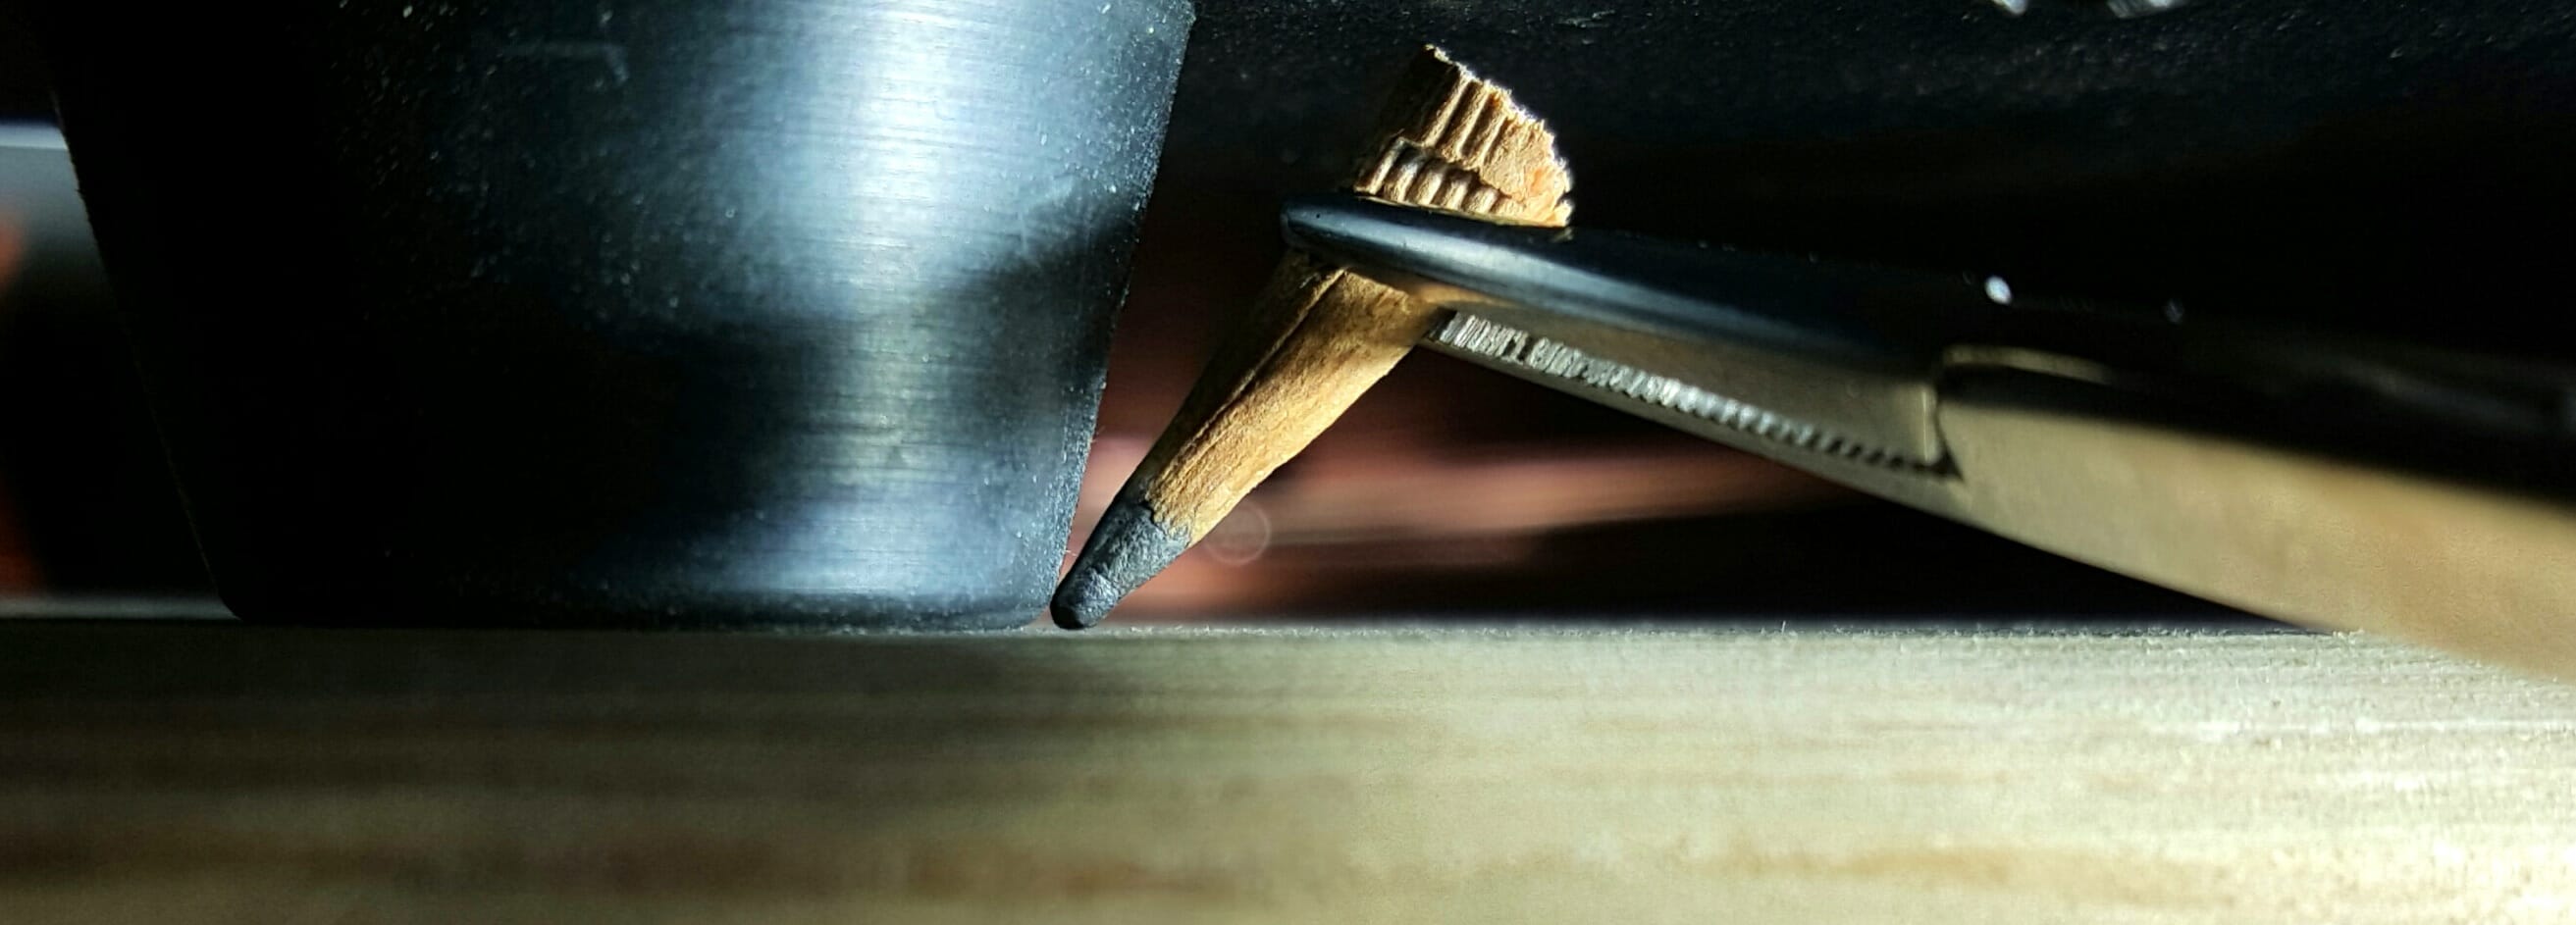
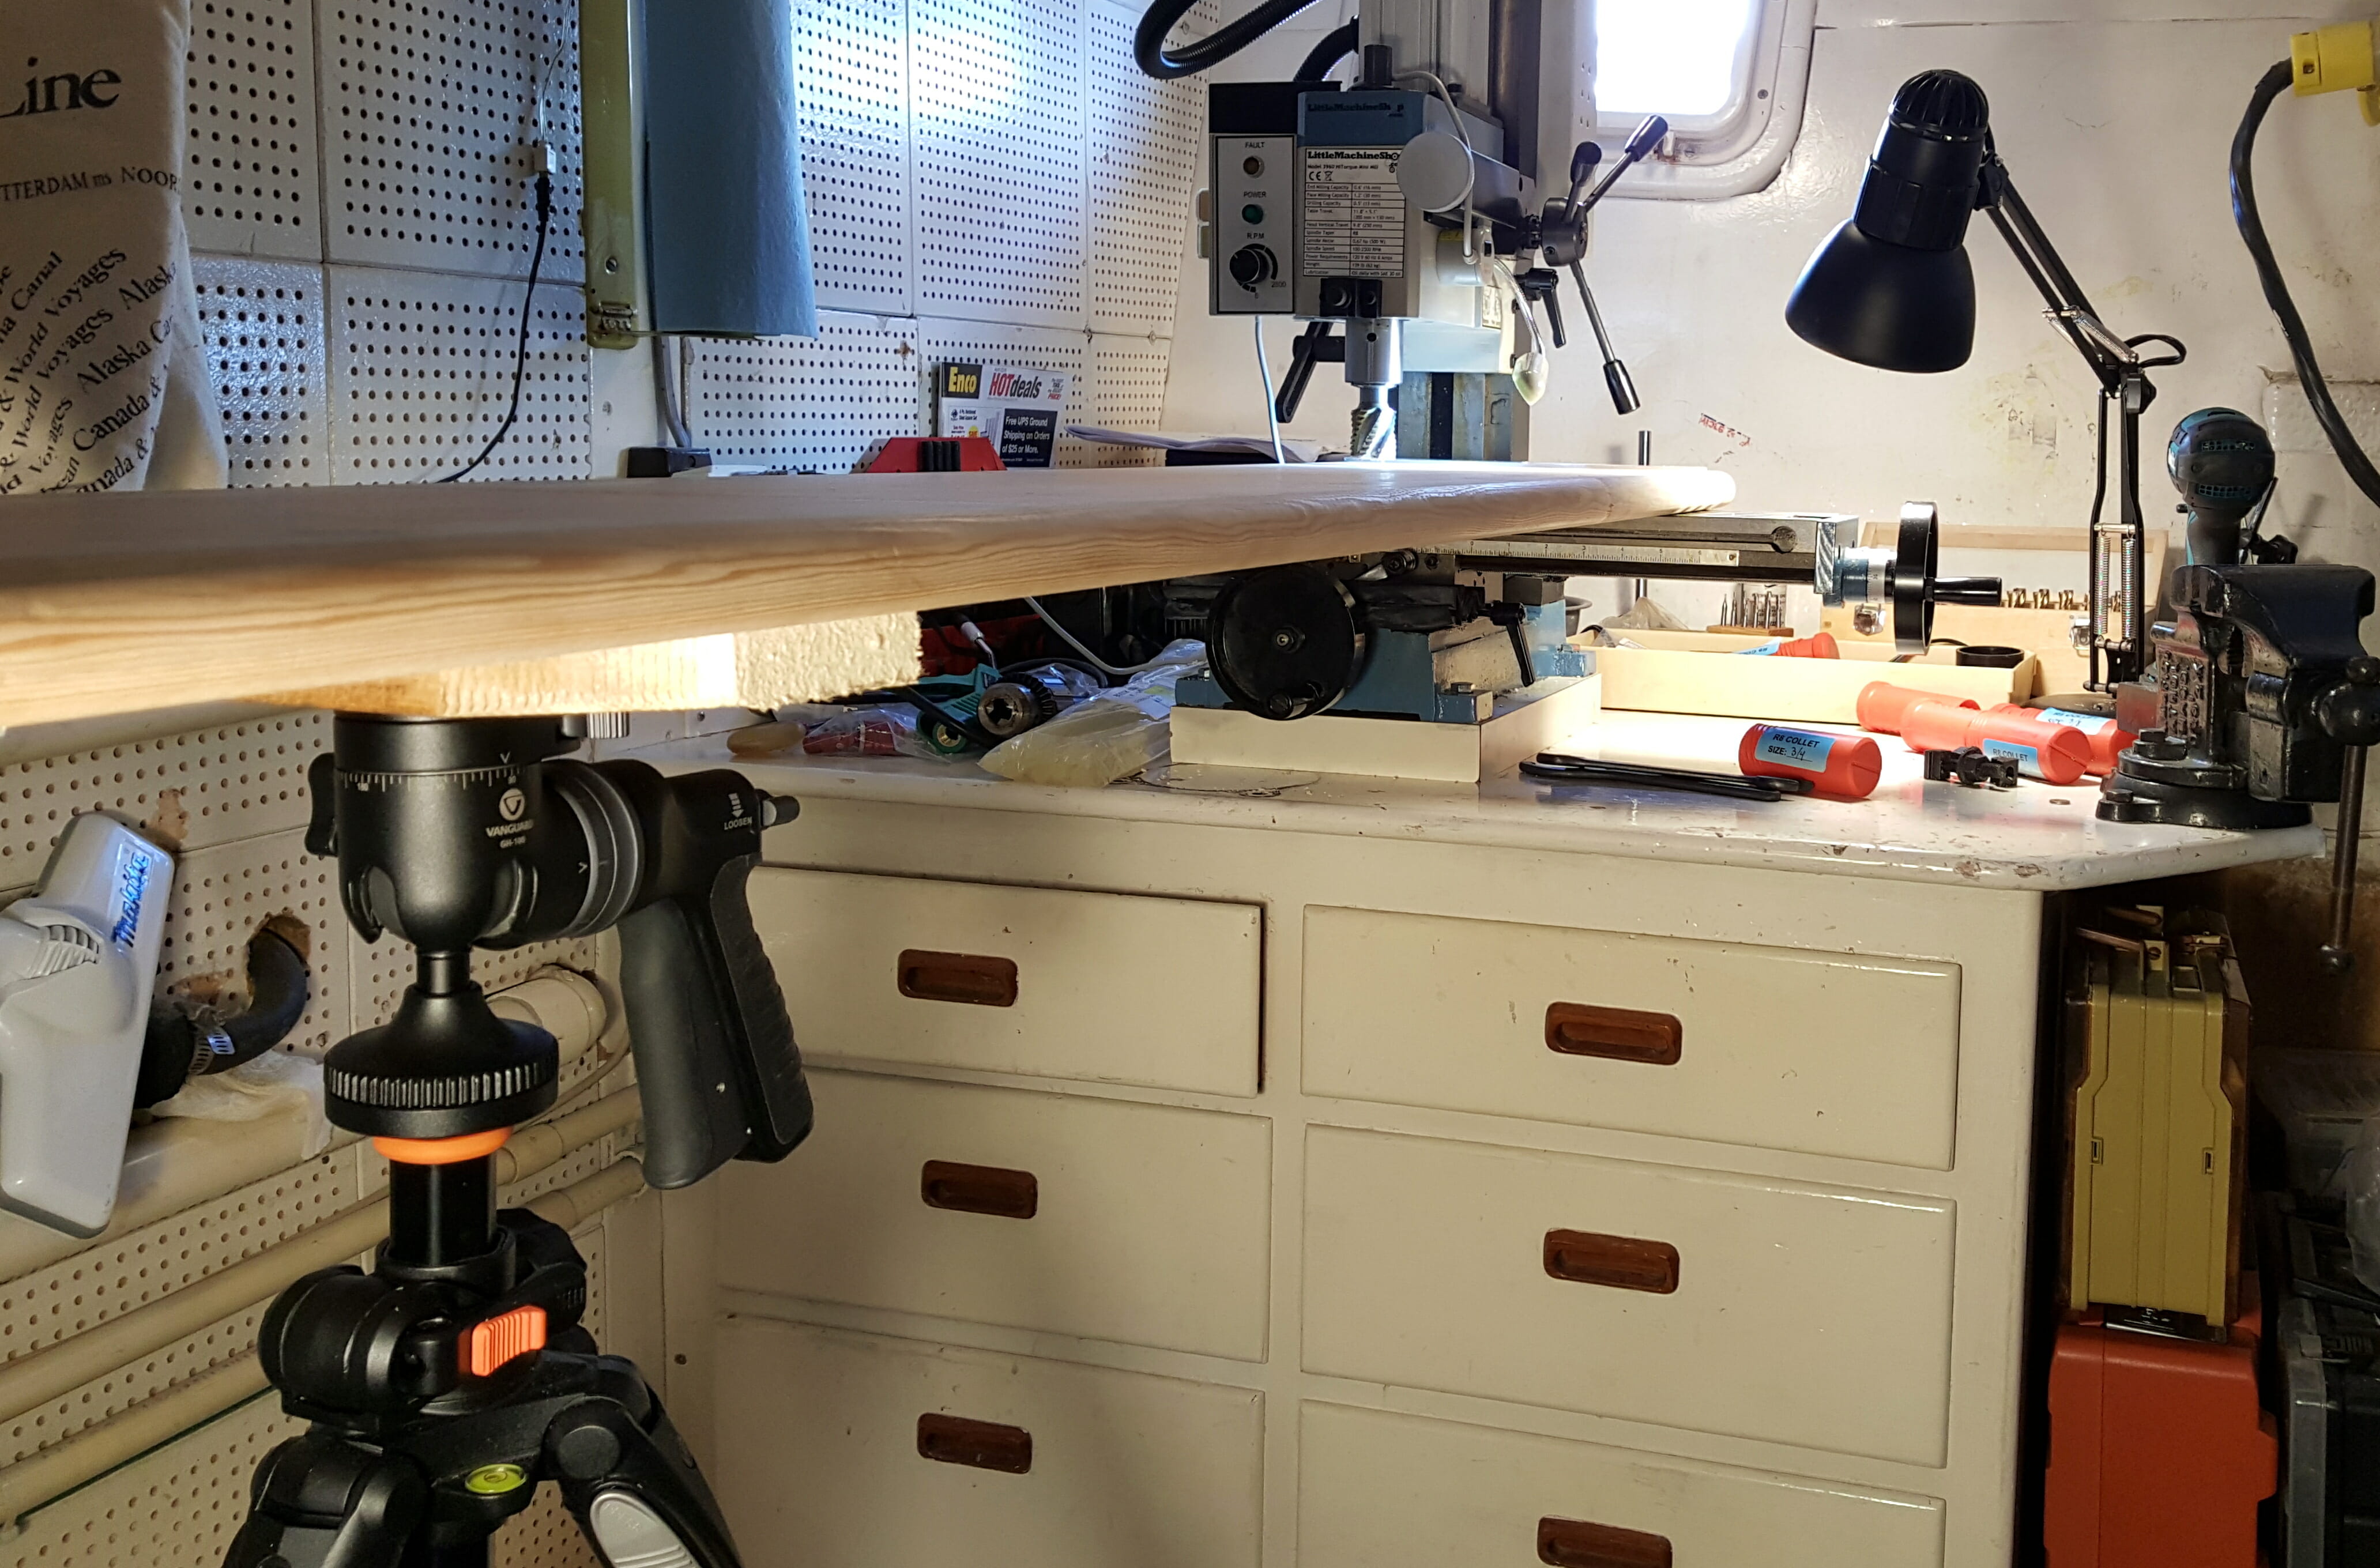
For all of this metalwork, having the little milling machine aboard was invaluable. It turned out to be useful for a wood job as well… I needed to provide uniform wells to receive the four feet of the piano, both to gain another bit of space and to keep it from sliding around. I happened to have a 1″ roughing end mill aboard, but the first challenge was measurement… how could I get under there and mark accurately around the feet (not trusting measurement or the placement of scuff marks)? Easy! Just nip the end off an old pencil, grab it with hemostats, and reach in through the gap between piano and shelf:
A little procedural aside here… as all this was being fabricated aboard the boat, there were a few moments of awkward maneuvering due to limited space. For one who is used to bumbling around a cavernous building to work on multiple projects at once, trying to remember where I left tools and getting lost in context-switching overhead, this isn’t all bad… the constraints of a boat enforce focus and efficiency. Still, there are times when the walls are simply too close, or when work tables are too small for whatever is undergoing surgery. Milling ¼” recesses to receive the feet presented one such challenge, but I had the perfect tool aboard… my Vanguard Alta Pro camera tripod. This thing is solid enough to lean on, so I made a quick platform of scrap wood and used it as an adjustable fixture to support the other end of the shelf:
With those done, it started to get fun. Here is one end of the unit, ready for installation:

So now I had this heavy contraption taking up the middle of the lab space, with the piano occupying the easy chair. Even the cat was getting irritated at the disruption of normal life and the blockage of doorways, so it was time to hang the monster!
Mounting to the Desk
There is a messy part of every project, and this was it… with too much crawling around painfully, grunting and cursing, measuring, squaring, and fine-tuning. To hold it in place I stacked Stanley organizers under both ends with bits of wood and books, then went through a few iterations of marking.

By the way, another favorite tool came in handy here… the Milwaukee Right-Angle Drive. This thing is a life-saver in tight quarters, and saw lots of action during the desk installation when I had to drill holes in place for rail fittings (always while contorted in a hopelessly awkward position). Here, I’m using a little baby chuck to drill a pilot hole after first locating it with a transfer punch to make sure it is centered.
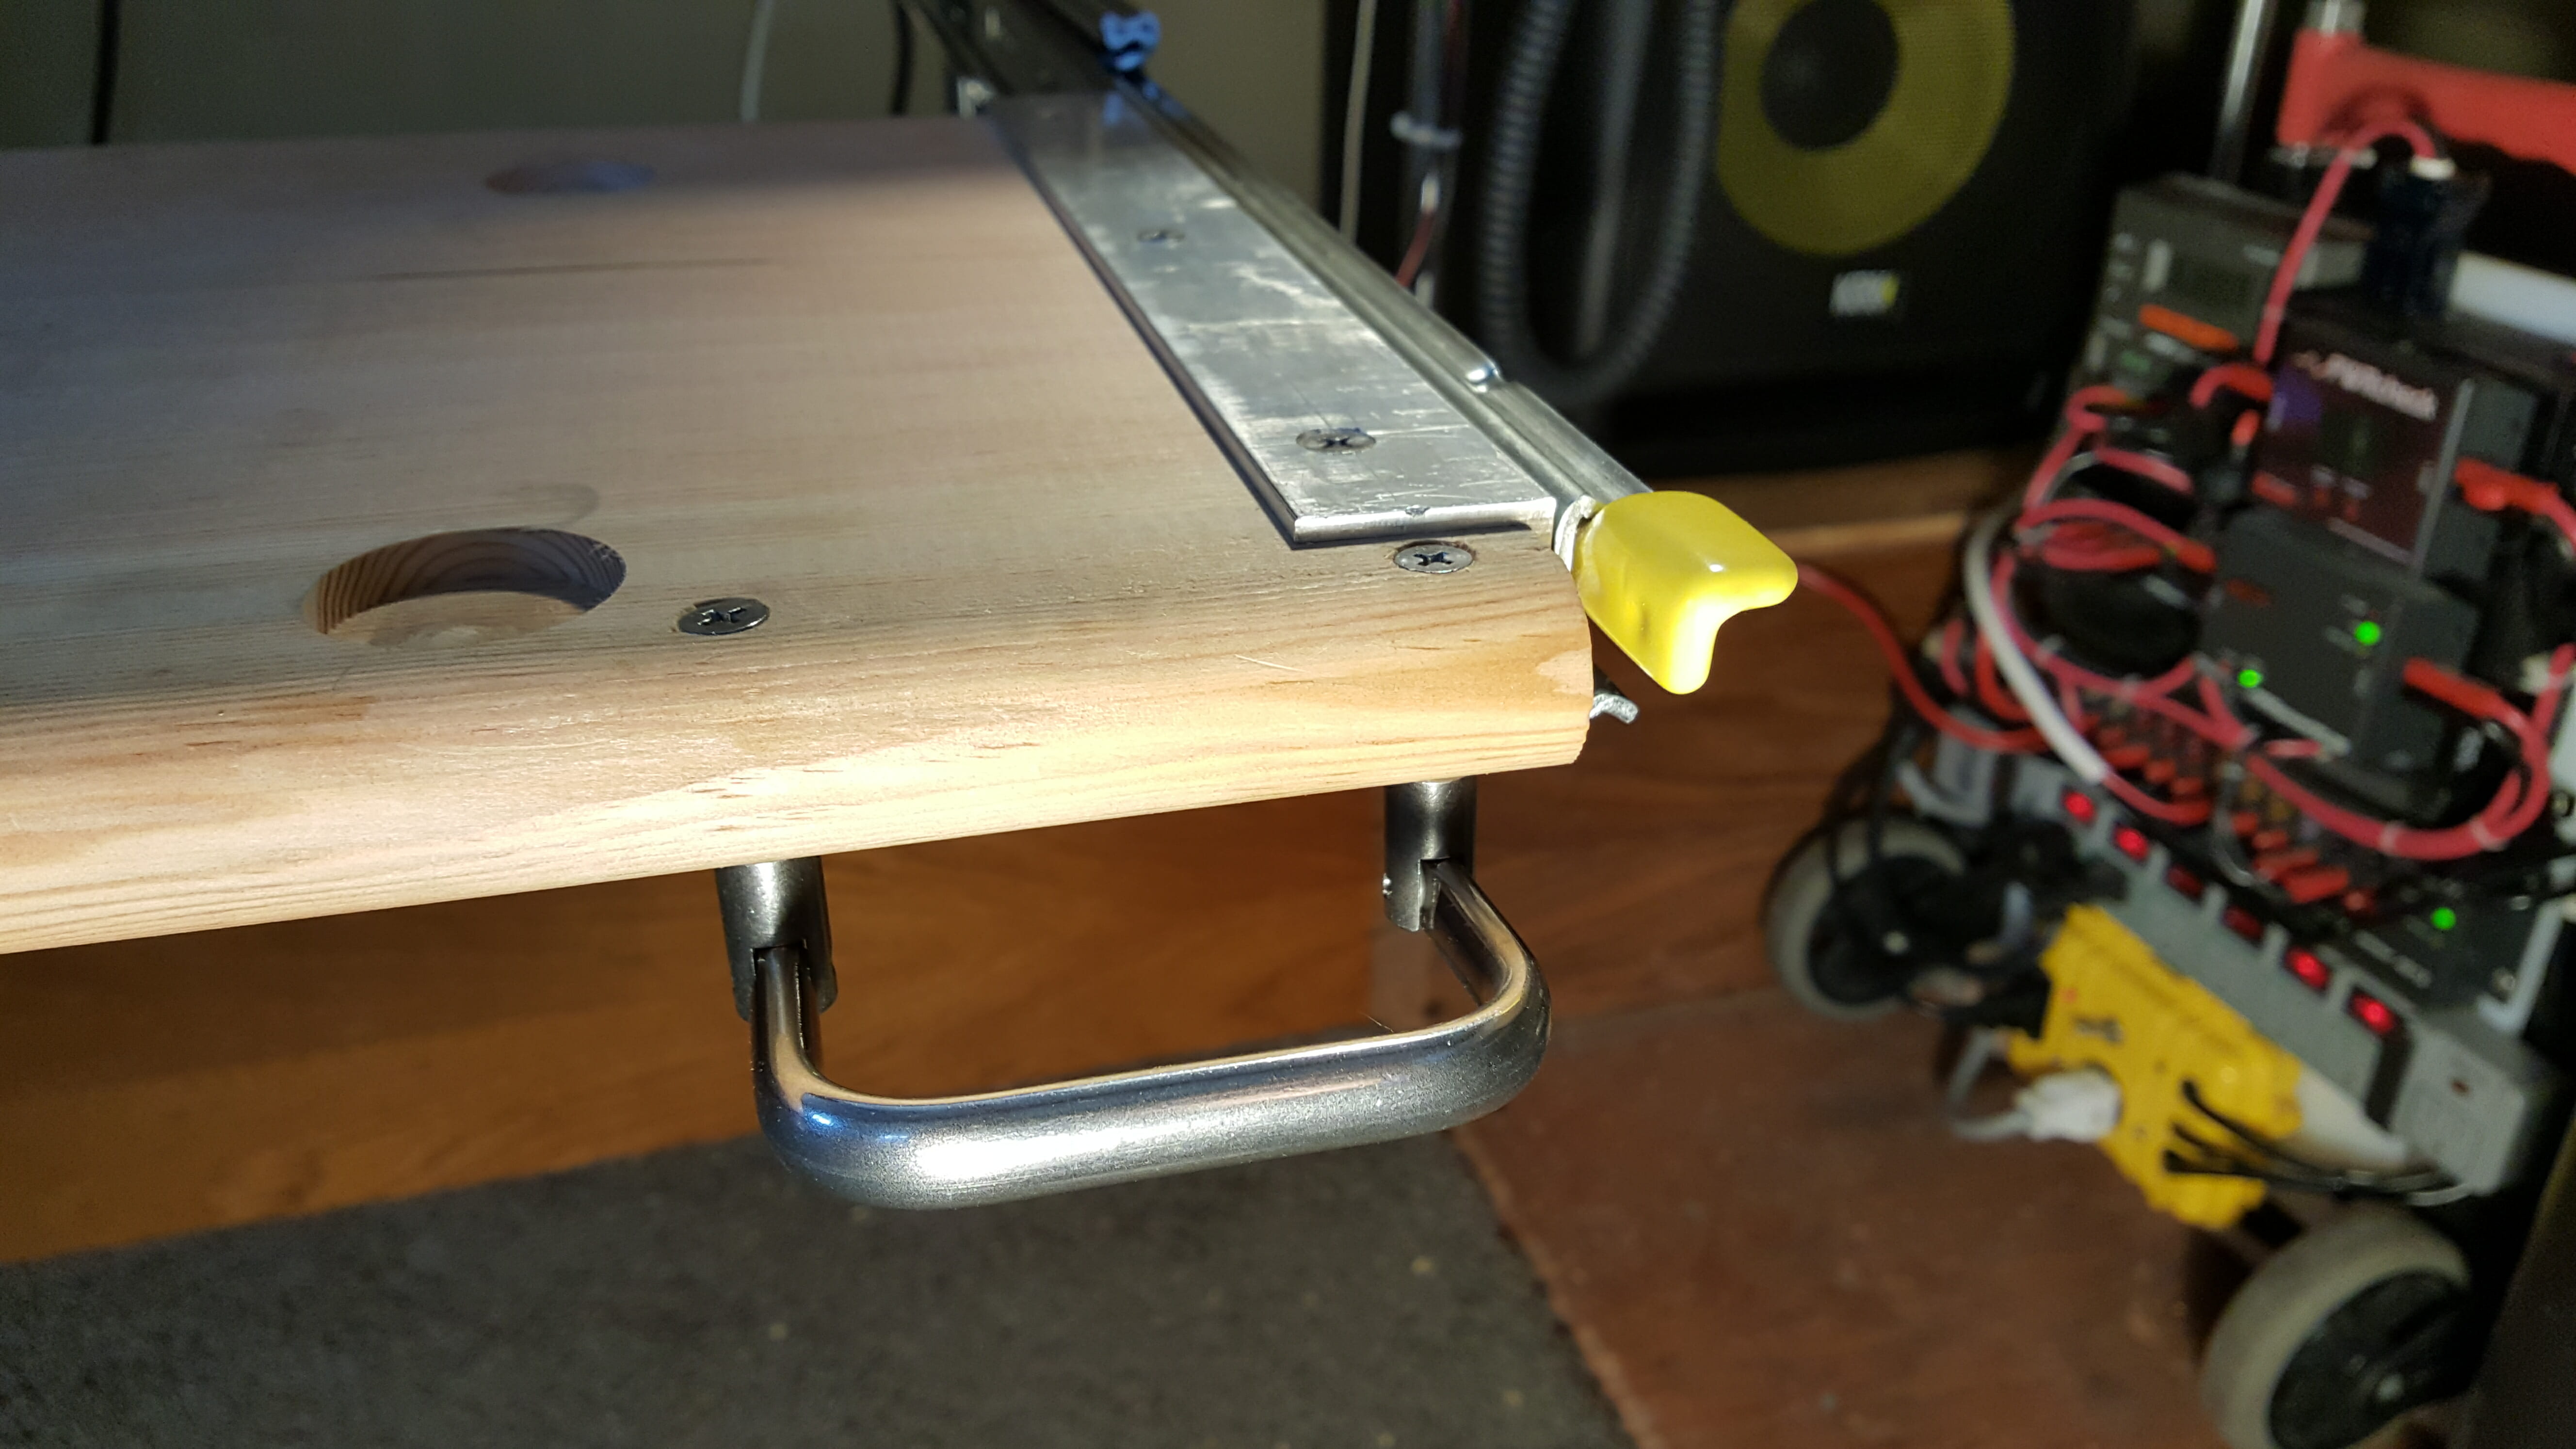
The user interface was an important issue to consider, so I added a folding stainless handle at the right end, right next to the thumb-release for the lock that keeps the drawer open or closed. This involved making a quick jig to ensure a straight hole through the 1″ shelf (an easy mistake to make) and then countersinking for #10-32 flatheads.
I’ll spare you the grisly details of implementation-specific issues unique to this boat, but before long I had it in place, secured with huge 3/8″ lag bolts up into the desktop and, remarkably, still parallel to the front edge of the desk. Here it is stowed, still needing a clear-coat with water-based polyurethane to look like a proper nautical piano. (Before heading into heavy seas, part of the “pre-flight checklist” is to further constrain the piano in place with padding so it can’t get loose from its shelf.)

(In case you’re wondering about the blinky contraption photo-bombing so many of these images, that’s the Shacktopus Power Beast I built last year about this time. It landed a gig on the boat, handling 12-volt roles in the console.)
So now we can step back and see this whole thing in context. There’s a lot more about the boat herself in a recent post (Meet Datawake), but here is the current state of the lab/studio space. I’ve just added HDPE top panels for the console cabinets, and the monitors are currently just sitting on the IsoAcoustic stands… about to be fixtured in place with Southco rubber draw latches lest they become expensive wrecking balls someday.
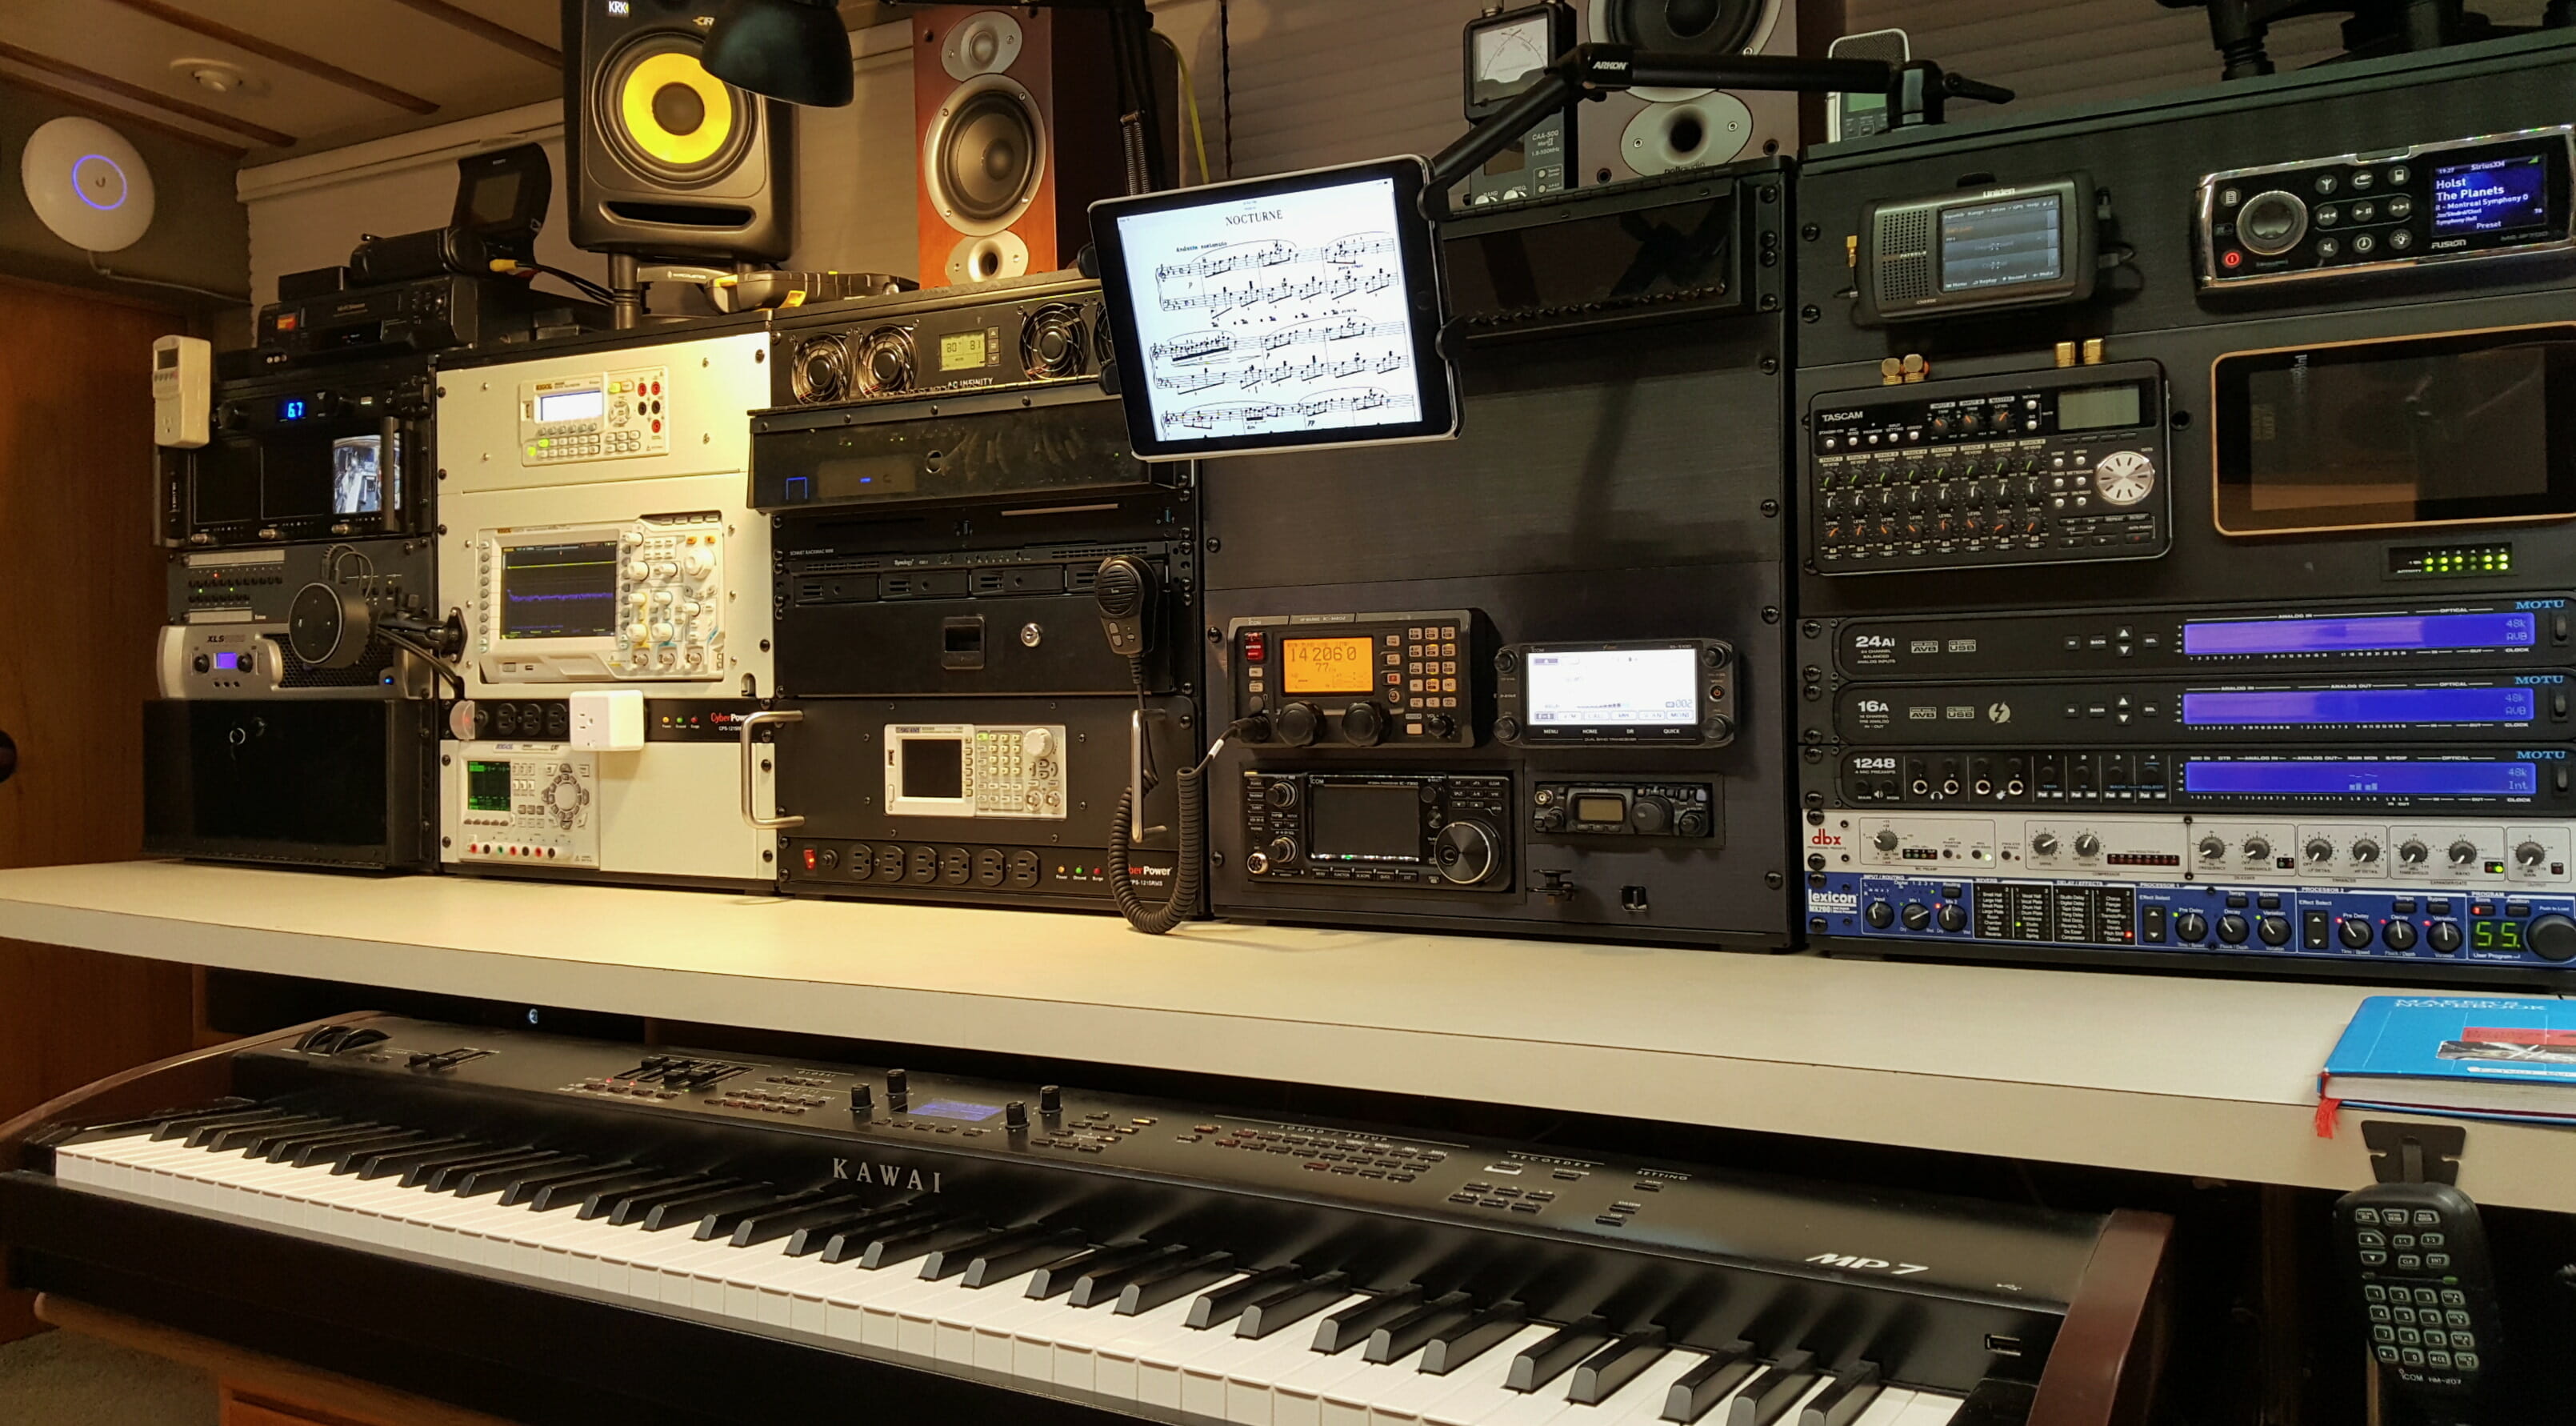
I have only two complaints… the key tops are a bit low at 27½ inches and my knees touch the support shelf when I’m playing. I can’t do anything about the height (the 32″ desktop is 1½ ” thick), but I think I’m going to cut a little knee relief under the center of the piano and then try to match that bullnose edge with the router even though nobody will ever see it besides Isabelle the cat. Also, I can’t use the music stand that came with the Kawai since it mounts on the back of the piano, so have restored the Manhasset 5301 to its original configuration since my modification for the PX-5S three years ago… and it is a loose item that has to be stowed.
Those details aside, the piano drawer is wonderful… it feels rock-solid, and I’m already back to reaching over to play whenever the mood strikes! I’ve been on a Satie kick for a while… here’s my take on the Gnossienne #4 in 2010 (on my Roland RD-700SX, with a corresponding article about studio-desk packaging):
December, 2023 update: This drawer is continuing to work beautifully, and has followed my workbench from the boat to a 48-foot mobile digitizing lab. I’m filming a bit of B-roll to turn this much-read article into a video, and a few folks have sent photos of their versions of this design (always welcome!)
Cheers from Datawake,
Steven K. Roberts
Nomadic Research Labs
Piano Drawer Bill of Materials
(assuming Kawai MP7 and 1.5” thick desktop)
Wood:
1” fir stair tread, 52.5” long (shelf)
2) 22” x 8.5” plywood, 3/4” thick (side walls)
Aluminum:
2) 1” channel, 12” long for end encapsulation
2) 1.5 x 1.5 angle, 1/4” thick, 22” long (McMaster 8982K32)
Slides:
Pair of 22” high-capacity side-mount locking slides (McMaster 6603A47)
(the 9307 slides can be ordered as singles, if you want both sides locking)
Hardware (stainless):
8) 3/8” x 1.5″ lag bolts (brackets to desk)
8) 1/4” Flat head machine screws, washers, & nuts (brackets – walls)
8) 1/4” carriage bolts, 1” long, washers, & nuts (slides – walls)
8) 1/4” lag screws, 1.5” long (slides – shelf)
6) #10 flat-head machine screws 1.5” with nylock nuts (channels to shelf)
1) grab handle with suitable hardware
Miscellaneous:
Water-based polyurethane or other suitable finish coat
Piano Drawers Built by Others
I would like to create a little gallery here of photos from folks who have used the design above to build their own… these might offer some useful ideas.
The first is from Matt Rufe (Alexandria, Virginia), who writes: “I wanted to reach out and express my gratitude for your article on assembling your sliding/hanging digital piano tray. I used your plans, advice, and (especially helpful) materials list to assemble my own and it is fantastic.” These two photos show his beautiful work:
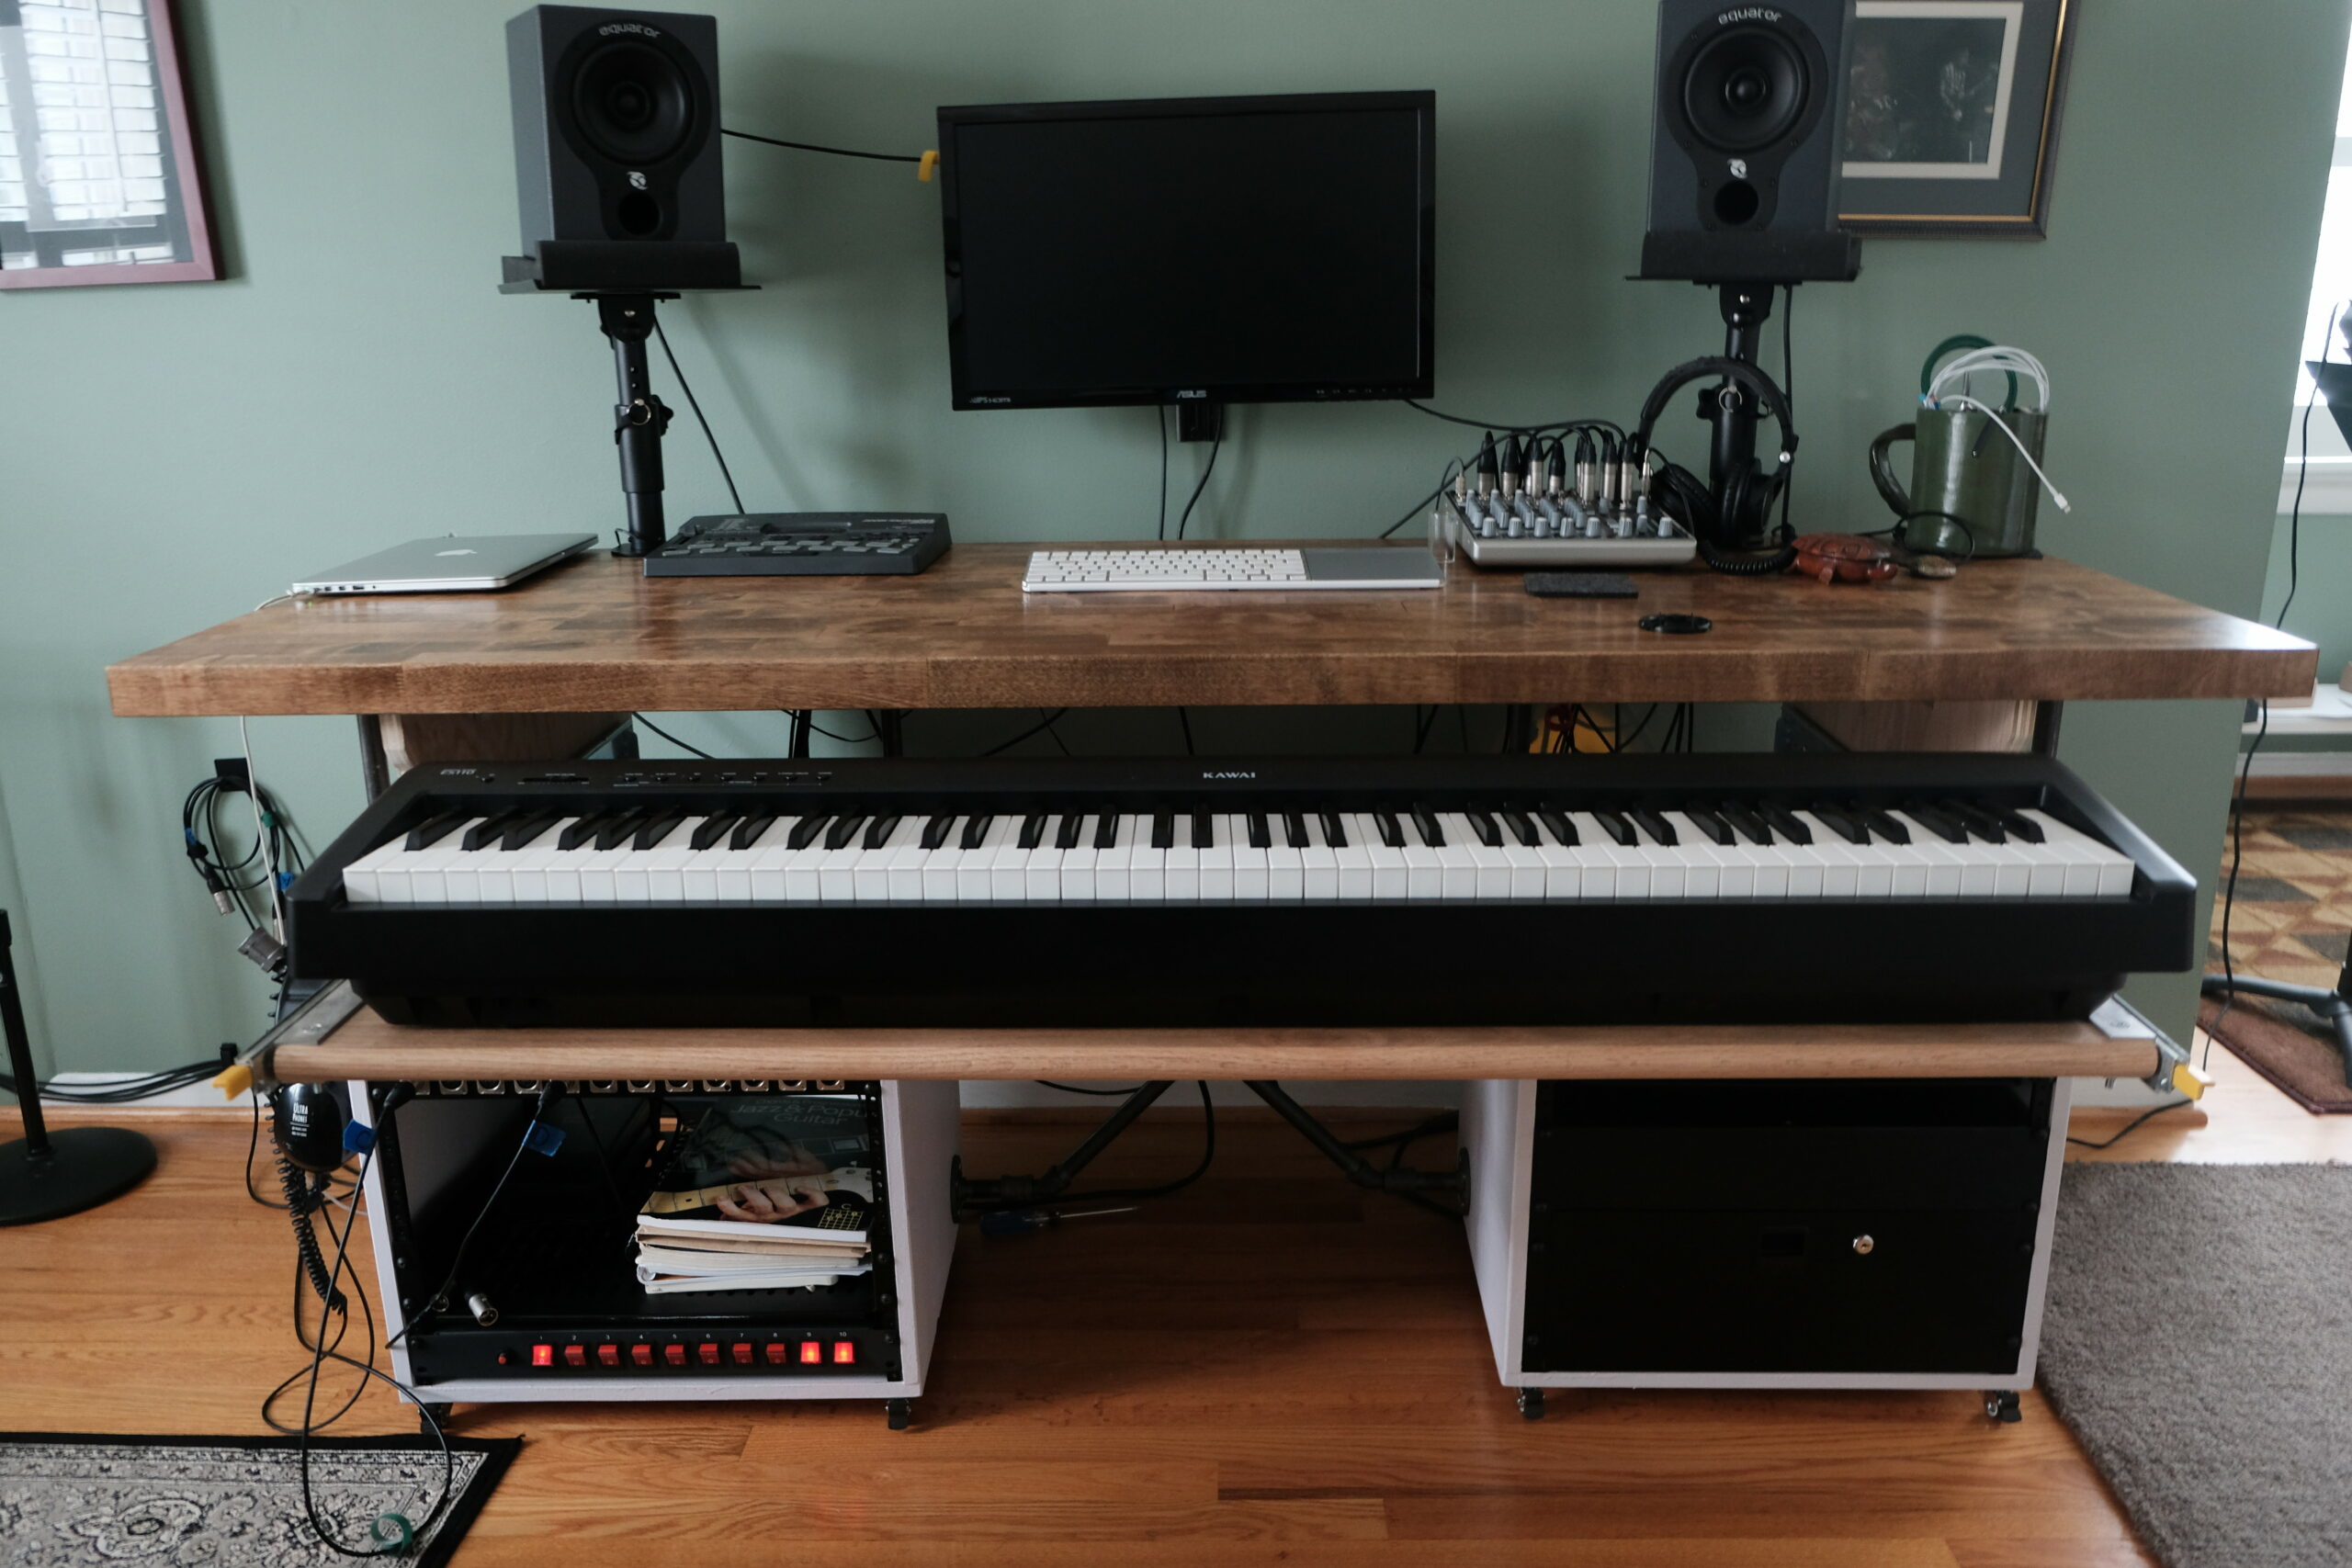

[…] and Recording Studio – Directly under the long section of the desk will be a 52-inch drawer for the Kawai MP7 digital piano… which is why the studio monitors and audio tools […]