


by Steven K. Roberts
Nomadic Research Labs
For the first few months aboard, every attempt to fabricate a part involved clearing a tiny space on the bench, plugging in a funky desk light, and trying to find tools that I had just seen only minutes before. This was demoralizing, so I finally fixed it. This post is a quick look at the Datawake machine shop.
This was a huge issue, especially since I had just sold Cecil (Cecil be ‘da Mill), a beautiful classic Bridgeport that I had in my shop on land in Friday Harbor. I’m trying to get mobile with this boat, and a ton of Big Iron is no longer the right tool for the job… but I miss it:

Not very boatable, at least in a 50-footer! So let’s see what we actually can do aboard Datawake.
First, to put this in context, there are five tech “workspaces” aboard this boat, each optimized for a different class of projects:
- I spend most of my time slouched at the Workstation, adjacent to the two console zones that have the most frequently needed controls (Audio and Communications gear). This has all the essentials, including an Aeron chair, foot massager, boom mics for recording, iPad on an arm, and the Mac with Thunderbolt monitor.
- A few feet away to port is the Media Desk, which contains the movie scanner, fast PC with Oculus Rift (the ship’s holodeck), LulzBot Mini 3D printer, film digitizer, microscopes, office equipment, and 8 full-suspension file drawers. This is the place for paperwork, publishing projects, eBay photography, and other things that require an open work surface.
- Back to starboard is the Electronics Lab, with rackmount test equipment (oscilloscope, triple bench supply, signal source, and DMM) plus small-instrument drawer and ports to ship networks. The shelf of reference books is behind me when I’m seated here. There are lots of photos of the boat lab console in a recent post.
- Up in the pilothouse, there is an Assembly Bench with good light — a place for soldering and debugging with a Tektronix 2465A scope, power supply, hot-air rework station, stereo microscope, and so on. Next to this is a wall of parts inventory with over 800 drawers and bins, and it tends to be the messy spot filled with the clutter of work-in-progress, isolated from the tight workspace at the console.
- Down in the anteroom to the engine room is the Machine Shop, with a mini mill, power tools, sander/grinder, air compressor, shop vacuum, vise, inventory bins, and tool boards on the walls. This is set up for fabrication and making metal chips.
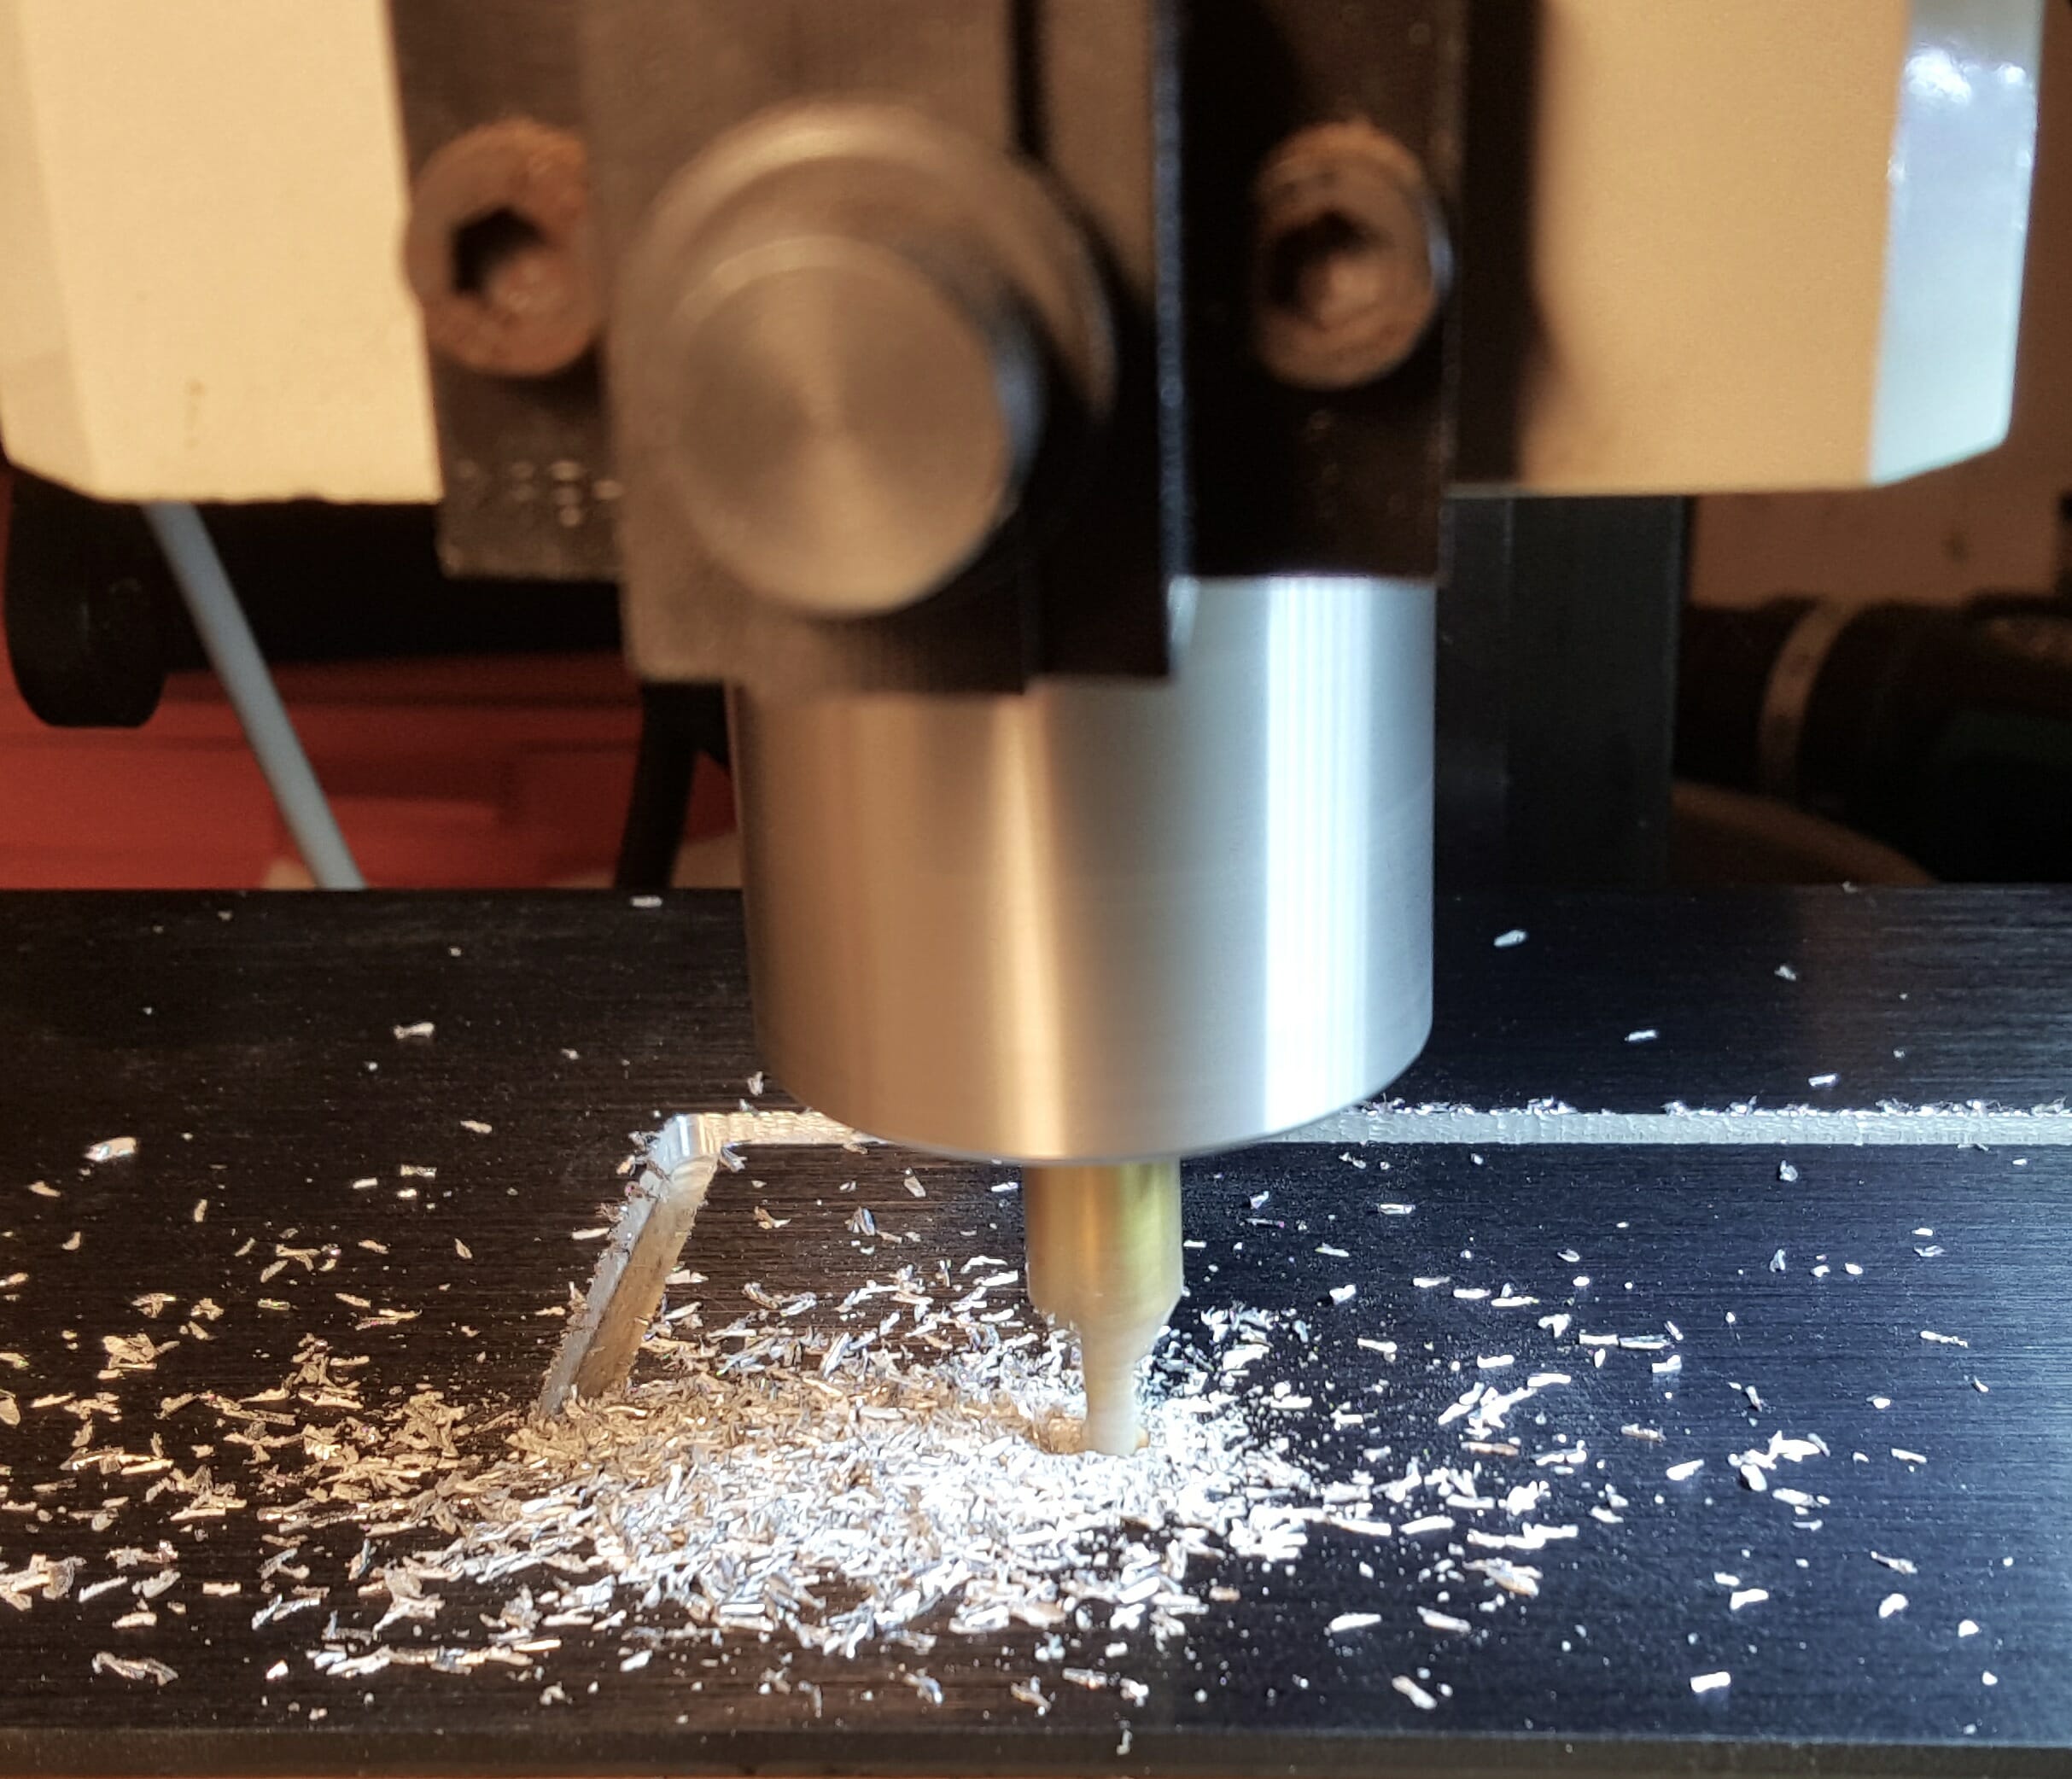
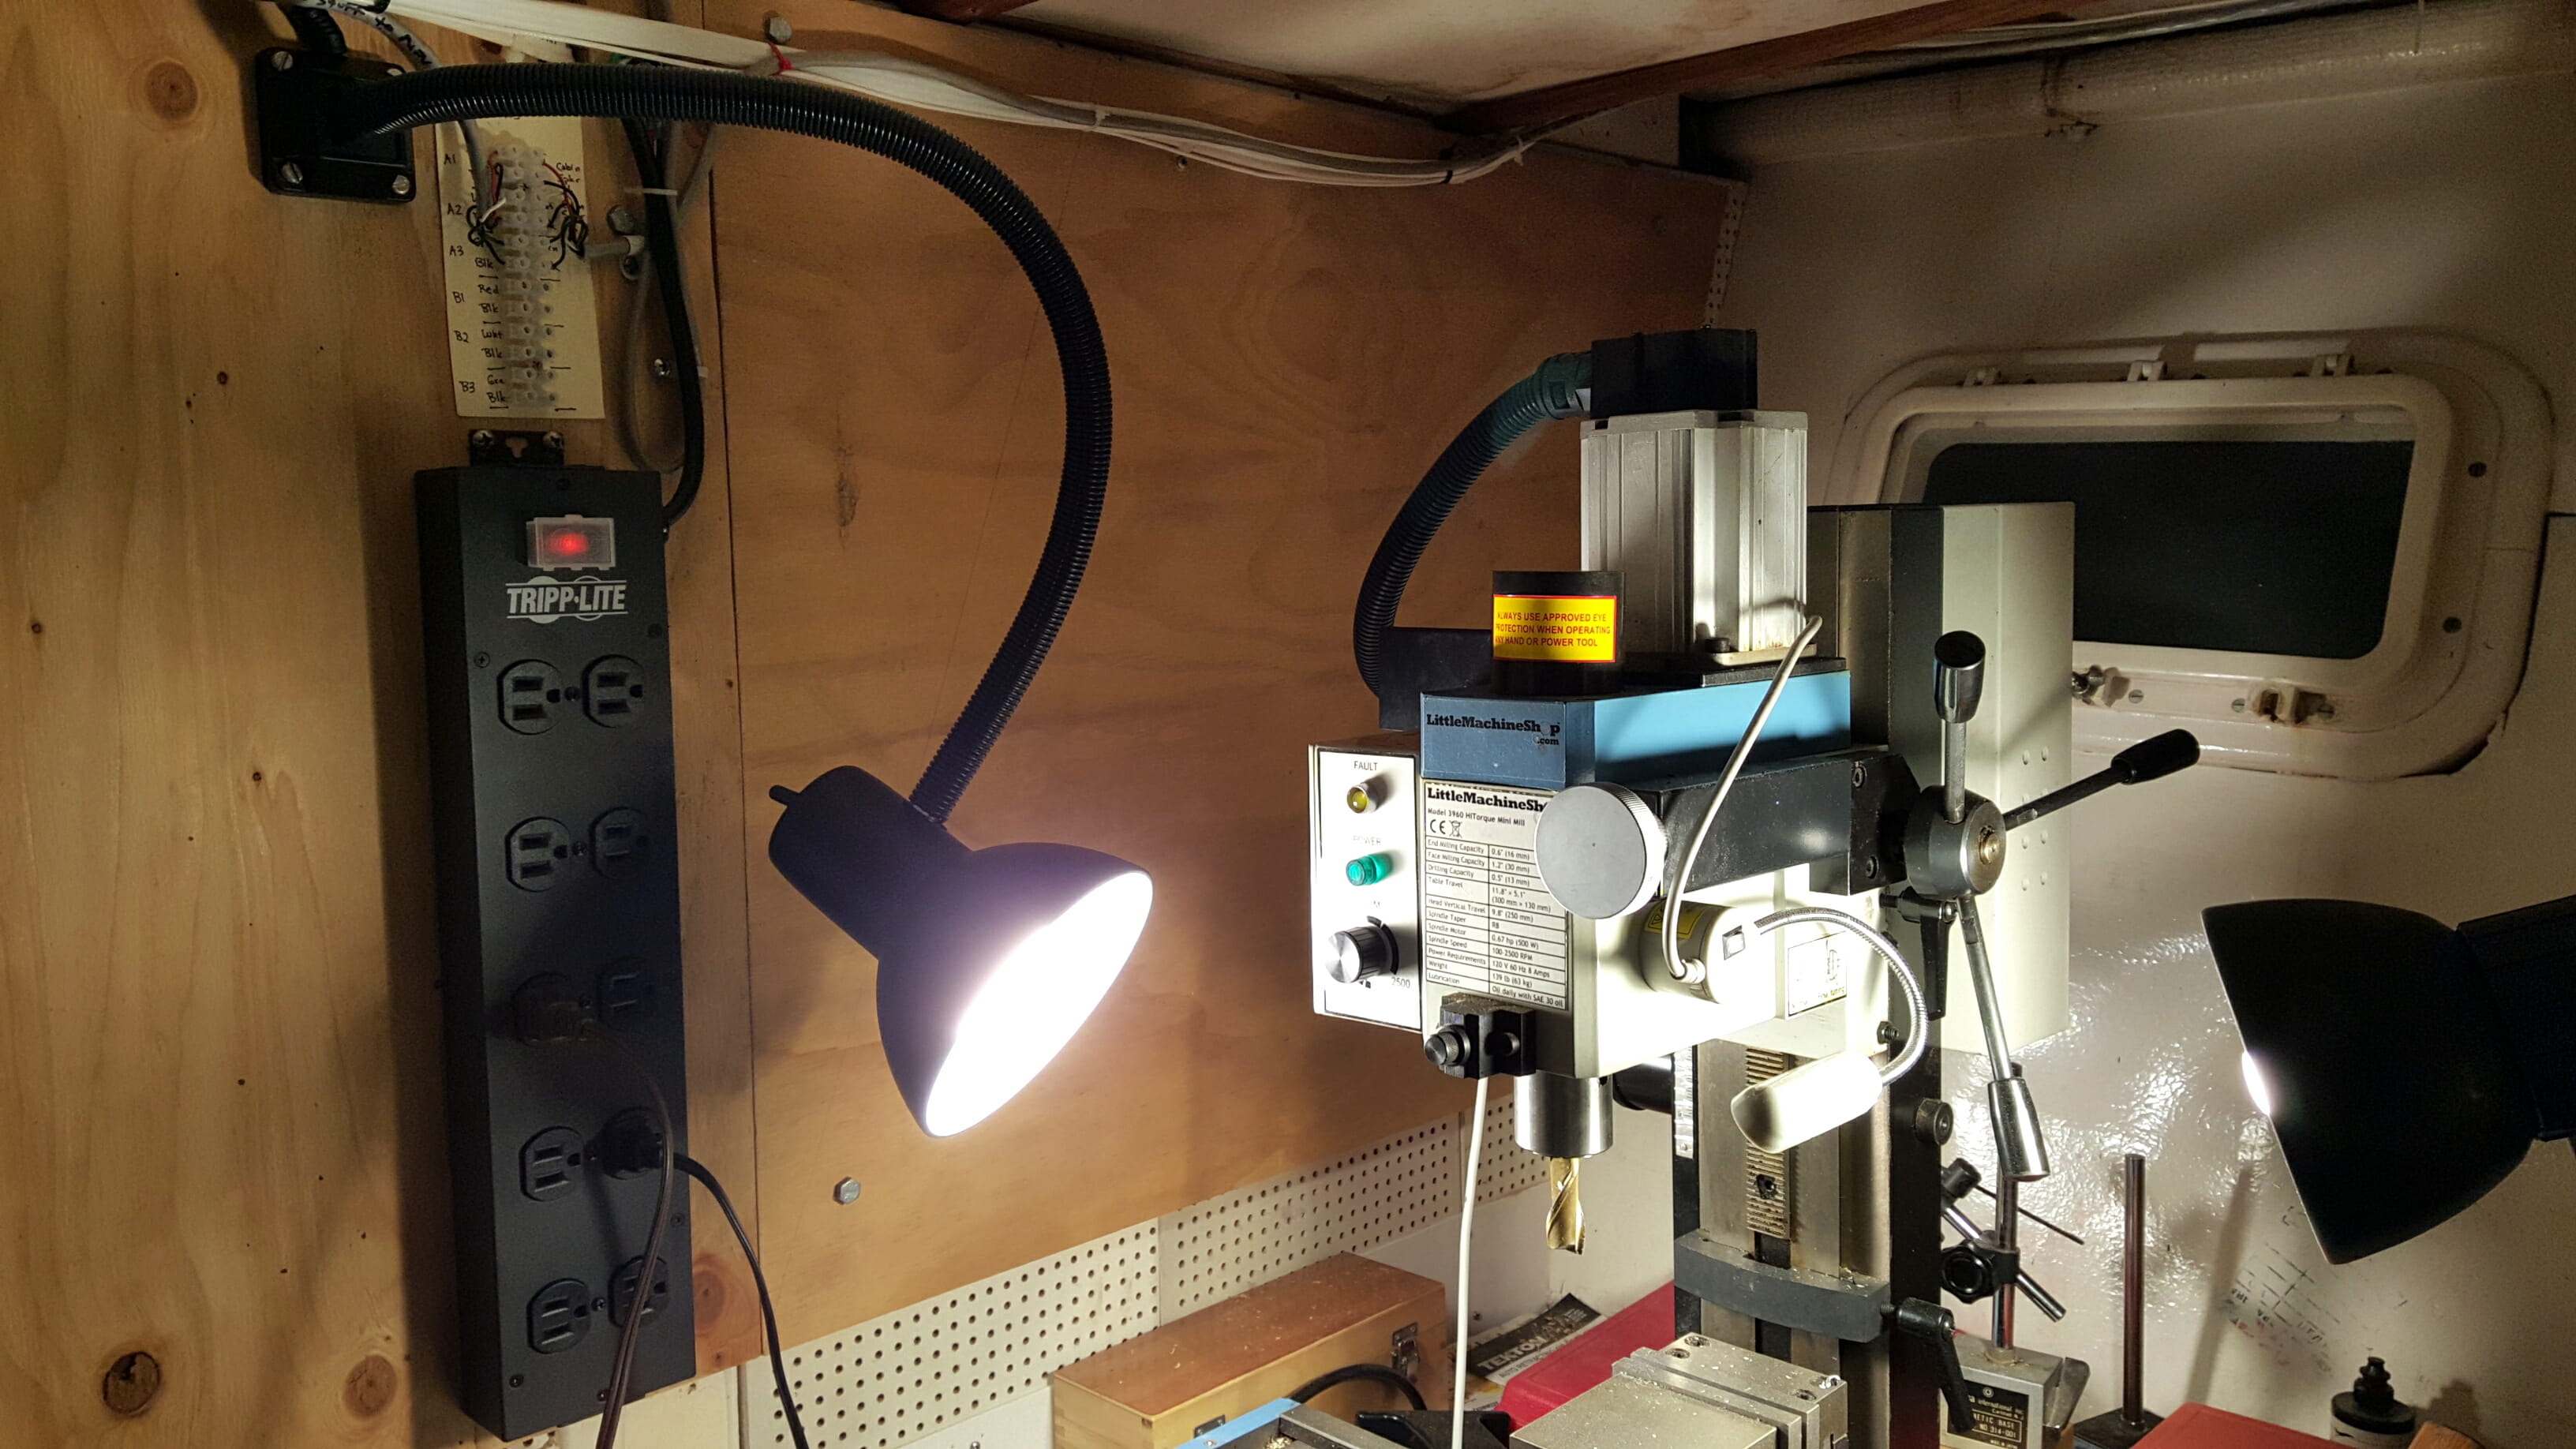
As is typical in a small machine shop, the mill occupies the central spot. This is a HiTorque Mini Mill 3960 (discontinued, but the newer 3990 is here, which adds an air spring to support the head). I love this contraption, and it’s a perfect fit for my constrained space; I was initially trying to figure out how to cram in the larger and heavier Grizzly G0619 (SX3), but my needs coincided with this machine lying idle at Northwest Digital Radio (maker of the UDRC and UDRX)… and Bryan K7UDR kindly donated it to the Datawake project with the proviso that I make a few parts for him on occasion! I’m honored to have them as a sponsor.
In its current state, operation is purely manual… like the Bridgeport I just sold but a fraction of the size, though still with the standard R8 collets. I have no real need for CNC capability that would drive the mill under computer control, but definitely plan on adding a DRO system (Digital Readout) from Dropros to get away from tedious free-handing. I’ll report on that when it happens, but for now, let’s take a general look at the shop space.
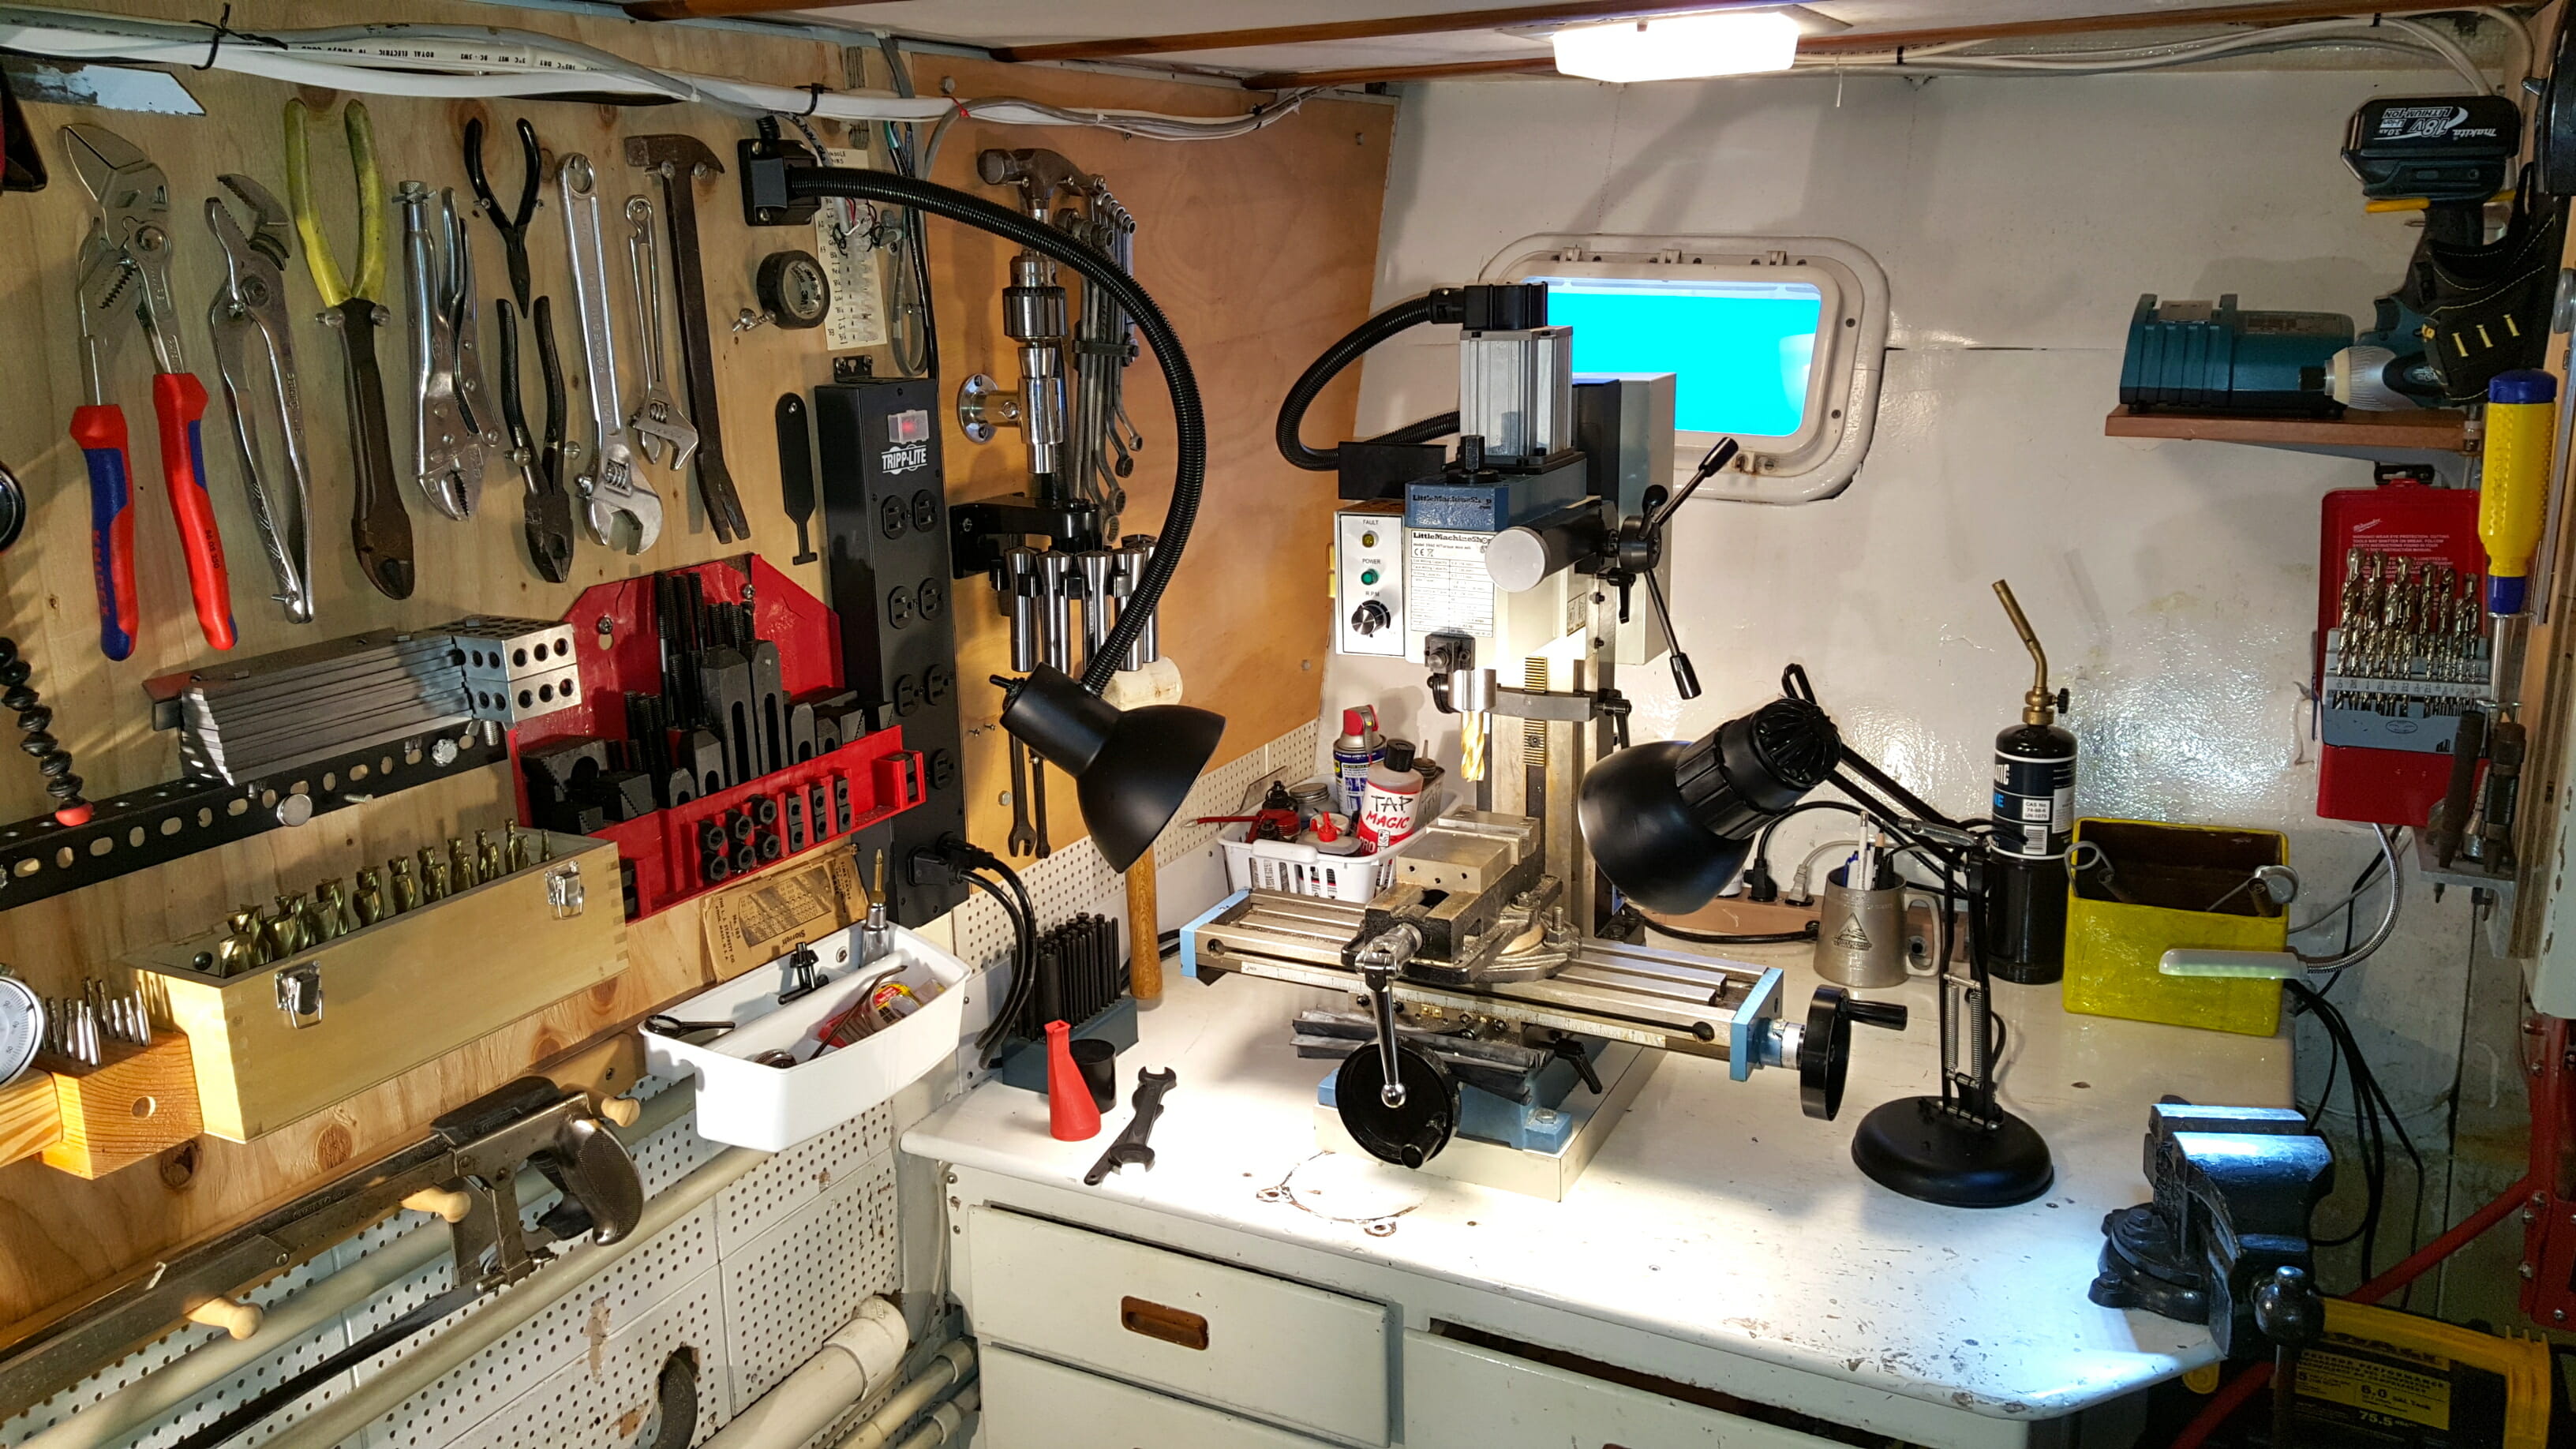
The first task was to locate the mill on the desk, raise it with a pad to provide clearance, then bolt it down. I moved the vise off to the corner and added a couple of bright LED worklights (including this gooseneck model screwed to the wall, a desk version, and a little one over the vise). It’s actually bright enough to work in there now, which makes a huge difference in both quality and sanity.
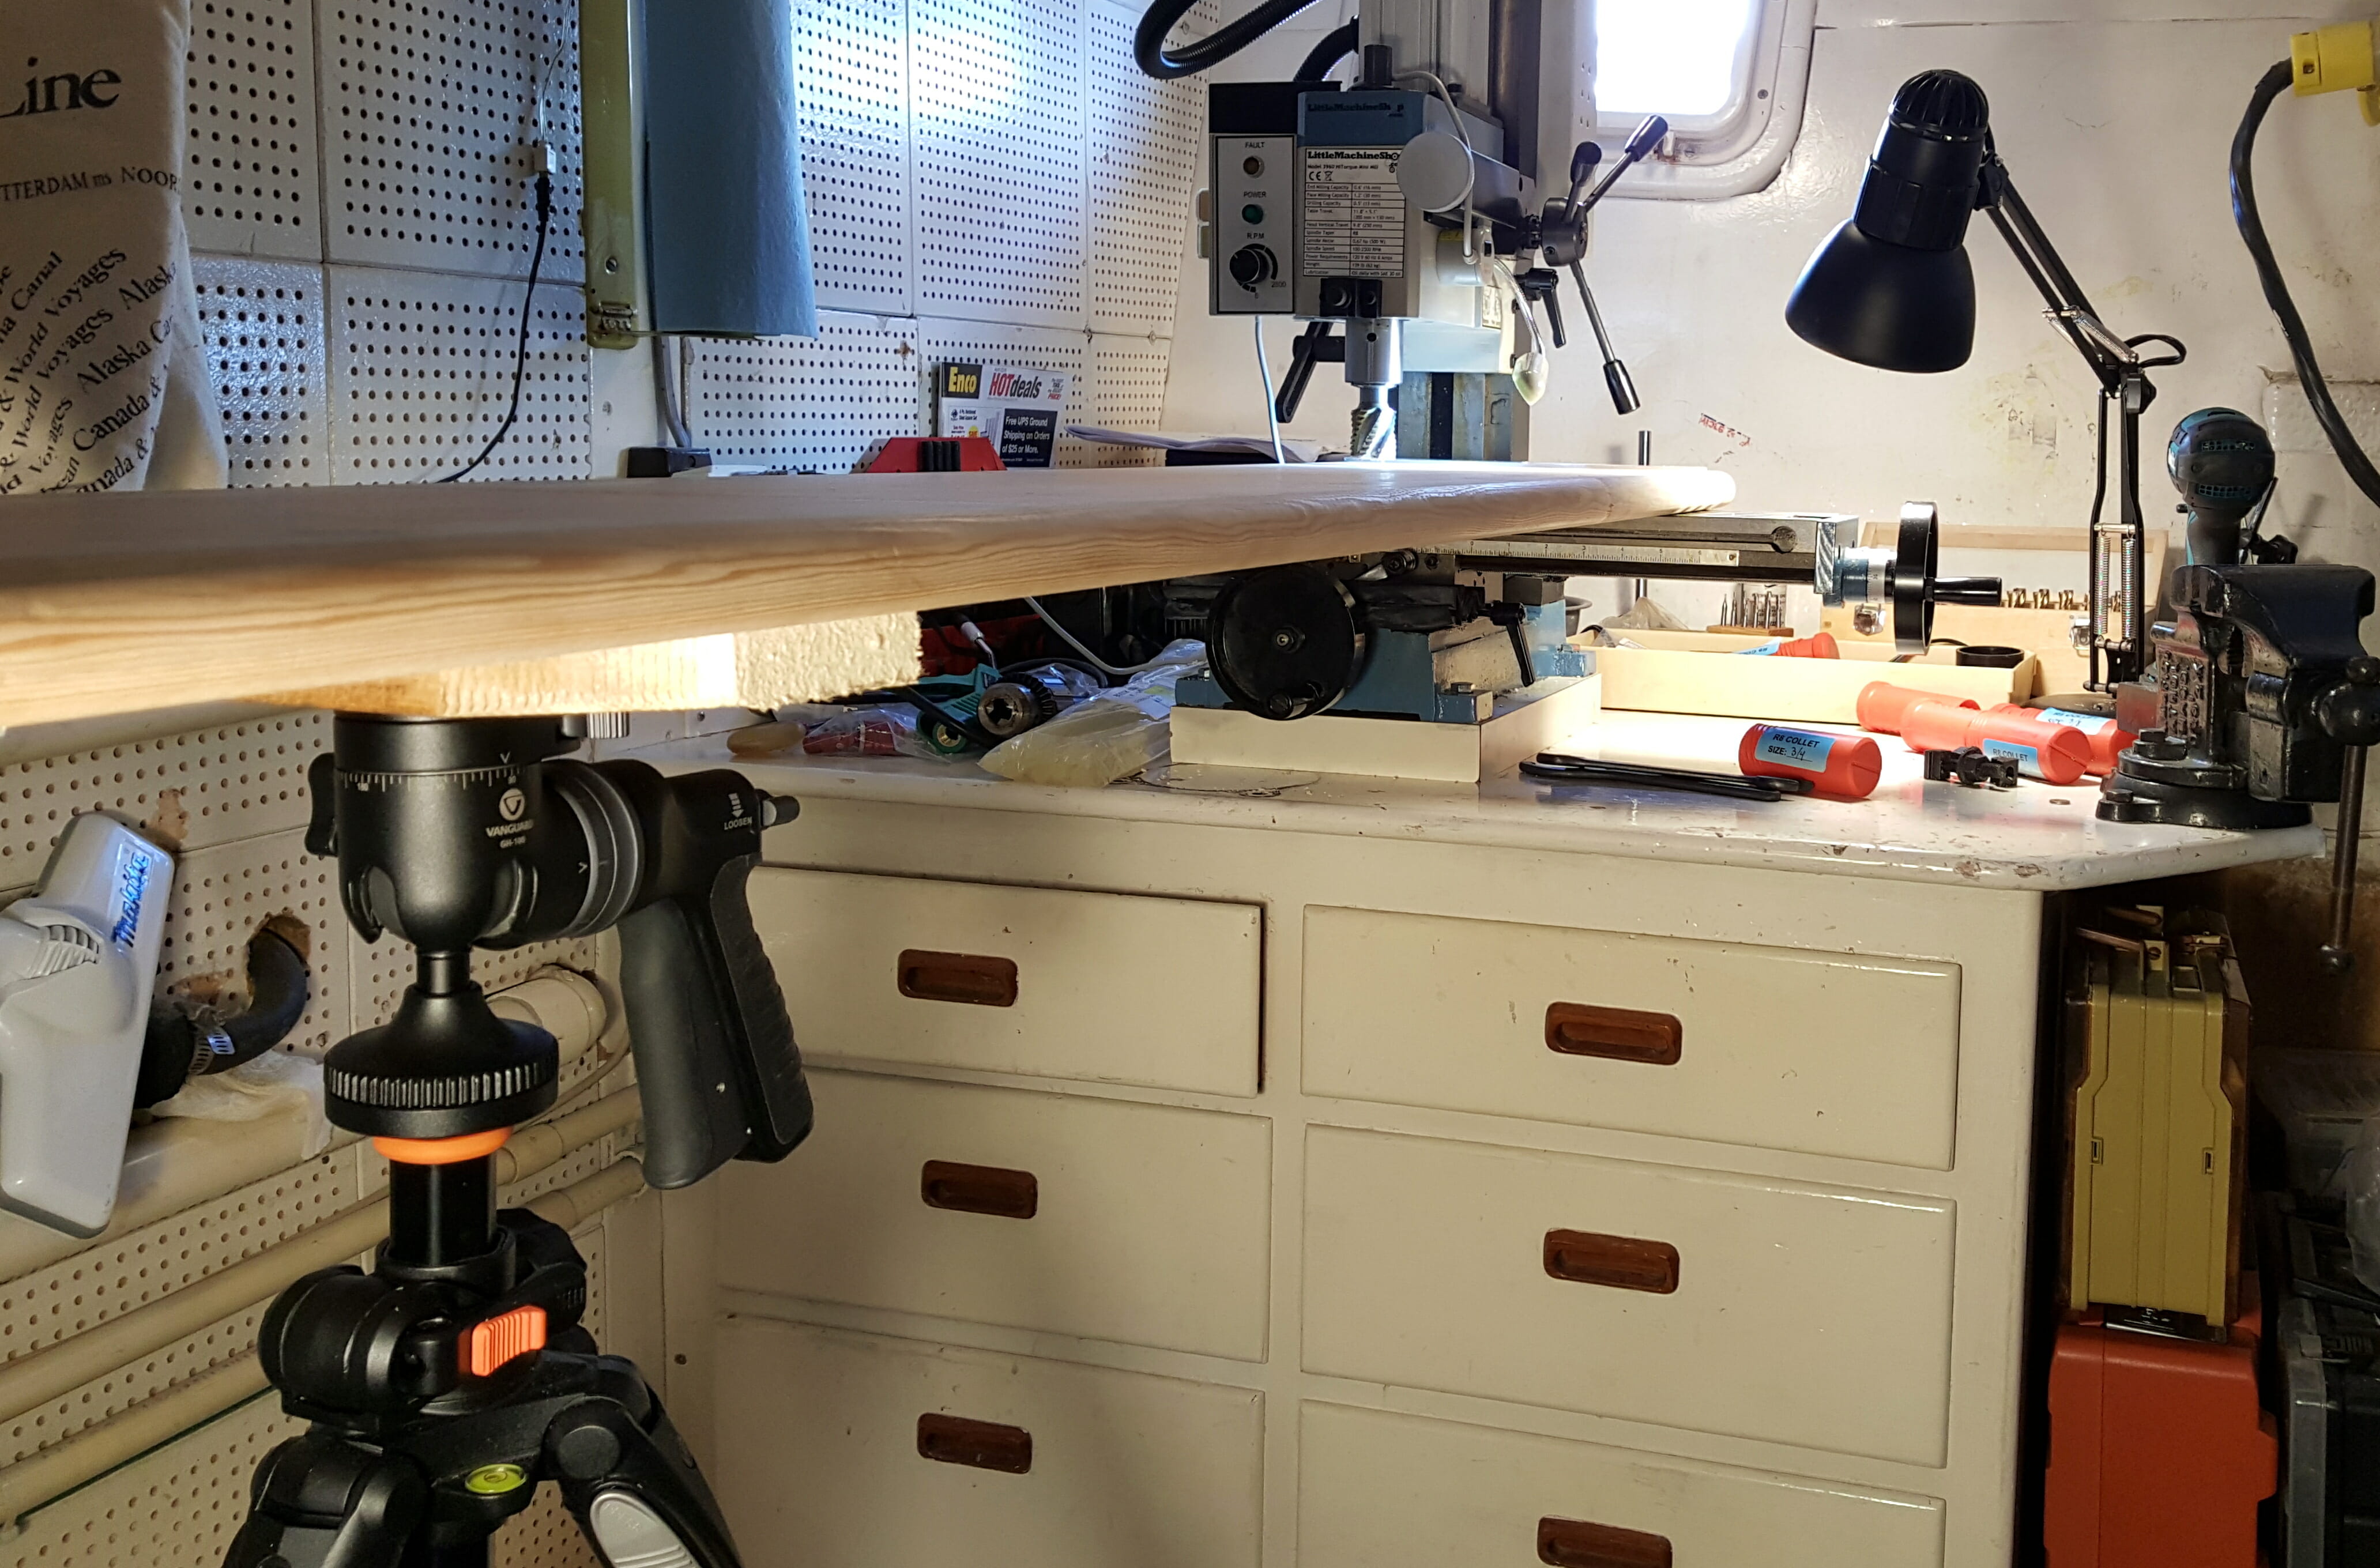
That bench vise is small for my taste, but is all that fits on this work surface; my plan is to build a second bench against the forward bulkhead, then give that my big Wilton as well as a sander/grinder with dust control. But for now this works, and everything in the restricted space of a boat is a compromise… leading to fixturing tricks like using my camera tripod to support the end of the piano drawer while milling recesses for the Kawai feet. As it turns out, the biggest space challenge is cutting equipment cutouts in the 19″ rack panels… not only is the table travel barely enough, but it requires careful planning (and re-fixturing on large holes) to avoid crashing into the wall.

The space to the right of the bench used to be a fuel tank for the monster Webasto furnace; we pulled that before the sale, leaving a dark cavern that became a collection point for hard-to-access things that were then effectively lost.
So that was a prime candidate for another piece of equipment: I opened the little wall with a curved cut to provide access, then installed a Dewalt 6 gallon 165 PSI air compressor and 25-foot retractible hose reel. This works beautifully, without the mess that is the usual pile of coiled air hose (though I do have another 50 feet stowed away if needed).
The space around this is now used by tool kits like the Fein, Porter Cable router, Makita angle grinder, Link socket set, and other things that are easy to identify and reach.
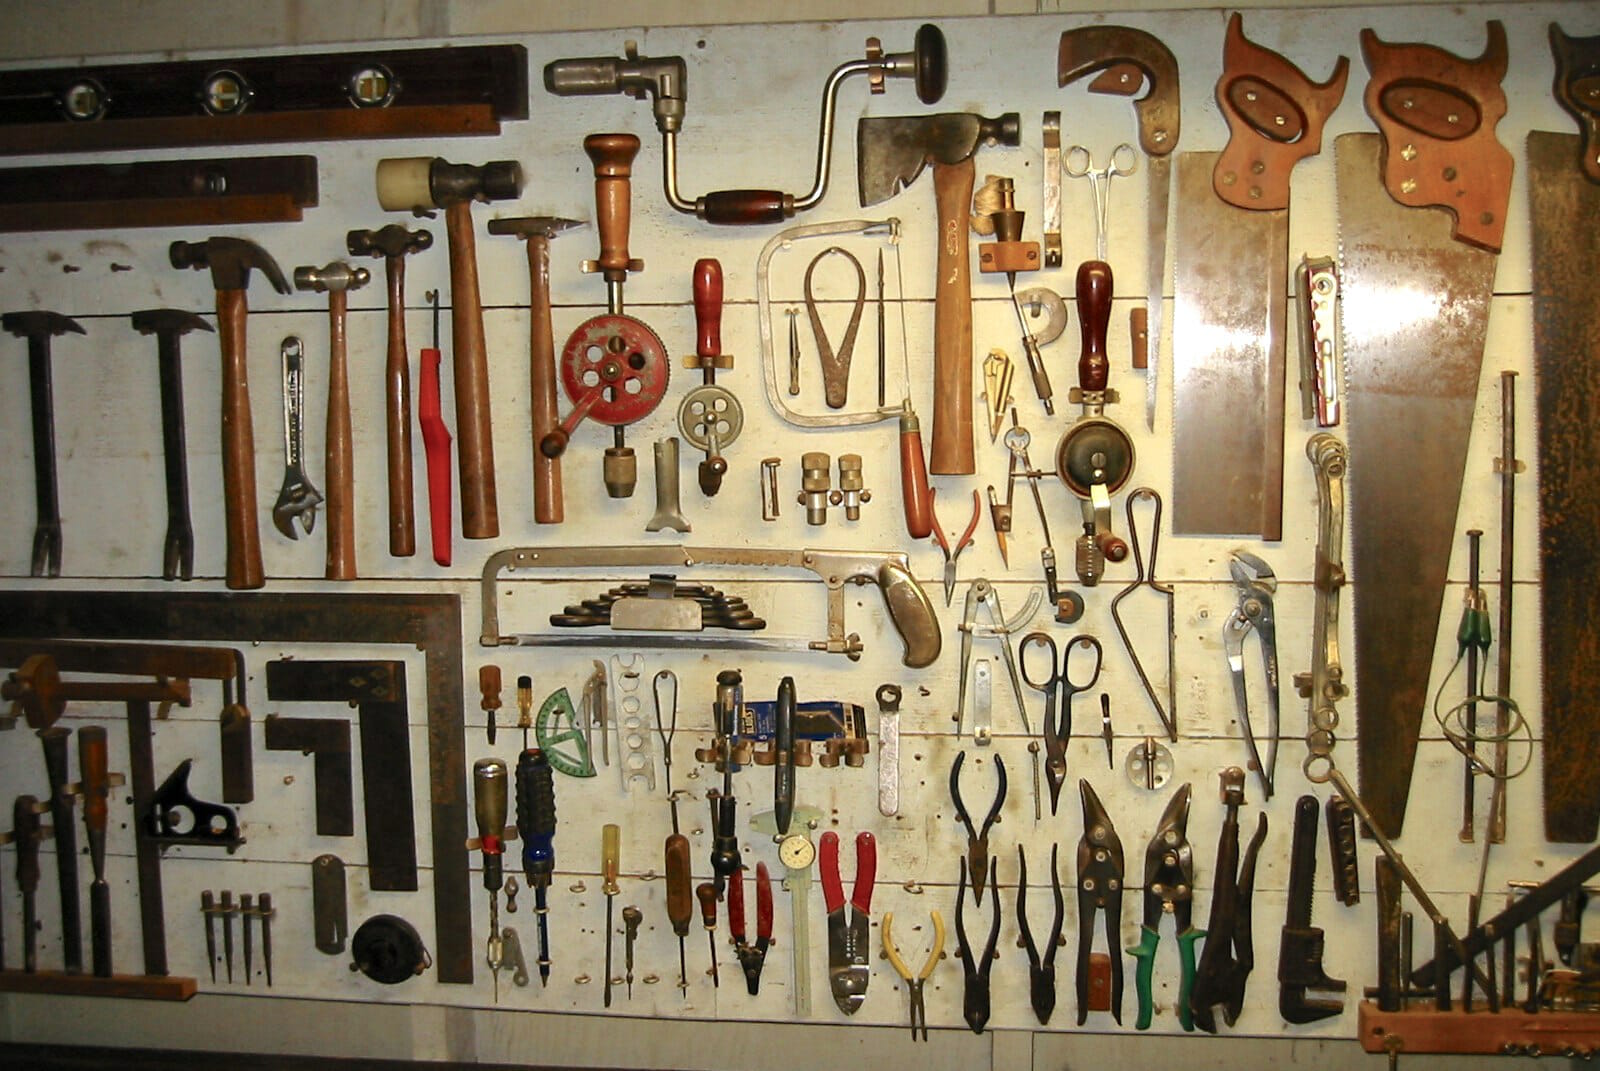
Through all this, the elephant in the room was not the mill, but the small tools… creating confusion since I also had a tool cabinet up in the lab. I was constantly chasing stuff down, and decided that I should identify the subset that are needed when cutting metal, then give them homes on the wall. I have a long history with tool boards… the photo above is the one in my father’s shop when I was a kid, and I can still feel the texture and heft of each.
This turned out to be a fairly easy and incremental process. I rounded up some scrap plywood (5/8 and 3/4), cut it to shape, and lag-screwed it to the wall through the existing layer of mushy acoustical tile over 3/4 ply… and then simply began mounting the most obvious mill-related tool clusters.

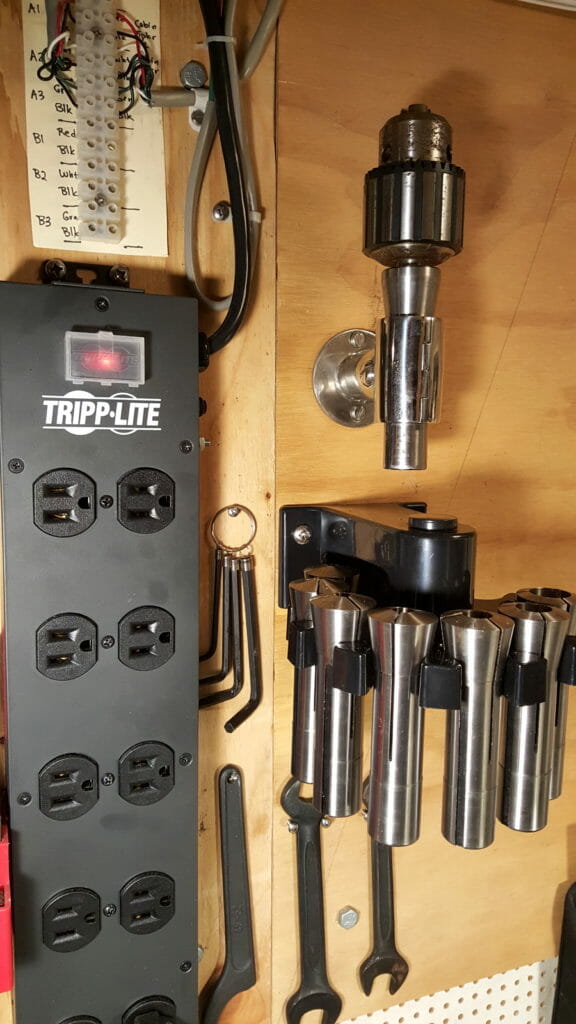
I got lazy on the R8 collet holder, ordering one on Amazon before noticing that I could have printed an equivalent one from a design on Thingiverse. Just above that is a holder for the chuck, made out of a Sea Dog 290904 hinged rail tee and a stray flange base… a satisfyingly robust solution. The wrenches just below those are the ones in constant use when changing tooling. And that heavy Tripp-Lite outlet box is excellent, built of sturdy metal with decent outlets, unlike most power strips.
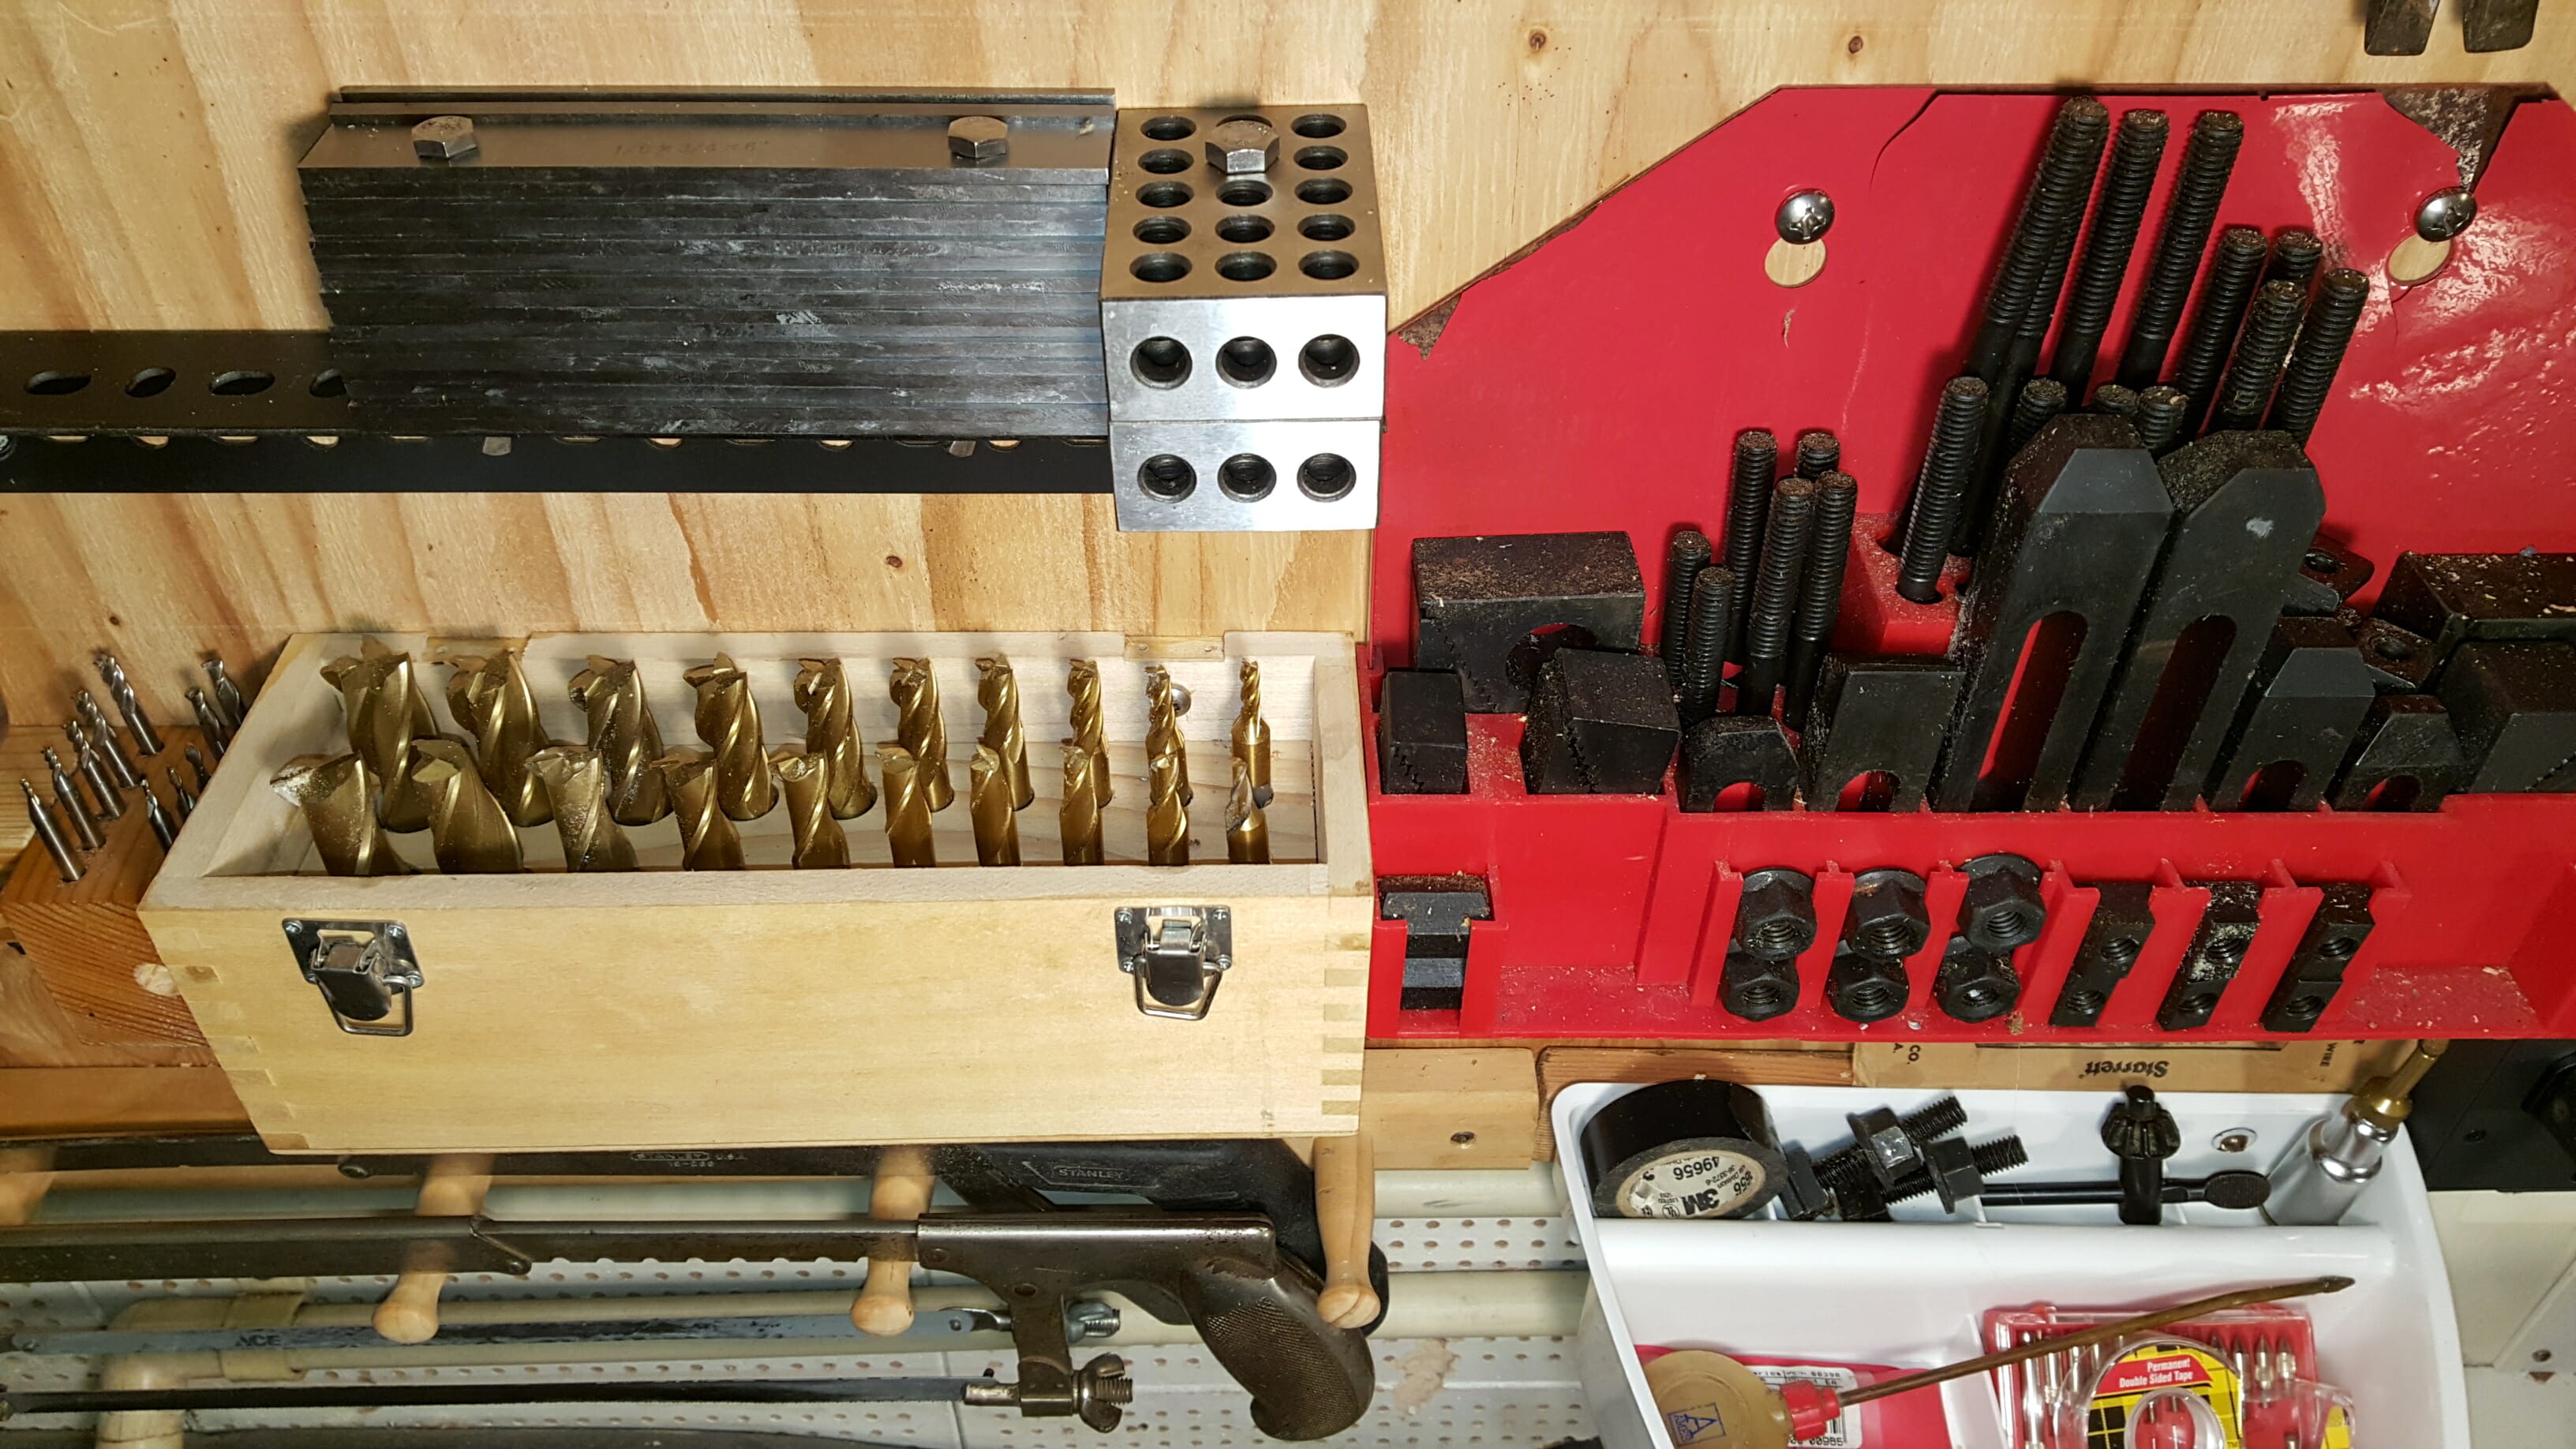
The clamping kit and box of end mills were easy enough, and I epoxy-coated a stray piece of steel perforated angle to provide a substrate for the 1-2-3 blocks and parallel bars. That plastic tray left over from something or other ended up being a perfect spot for little things I always want to put my hands on, and some clothes pegs seemed made for hacksaws.
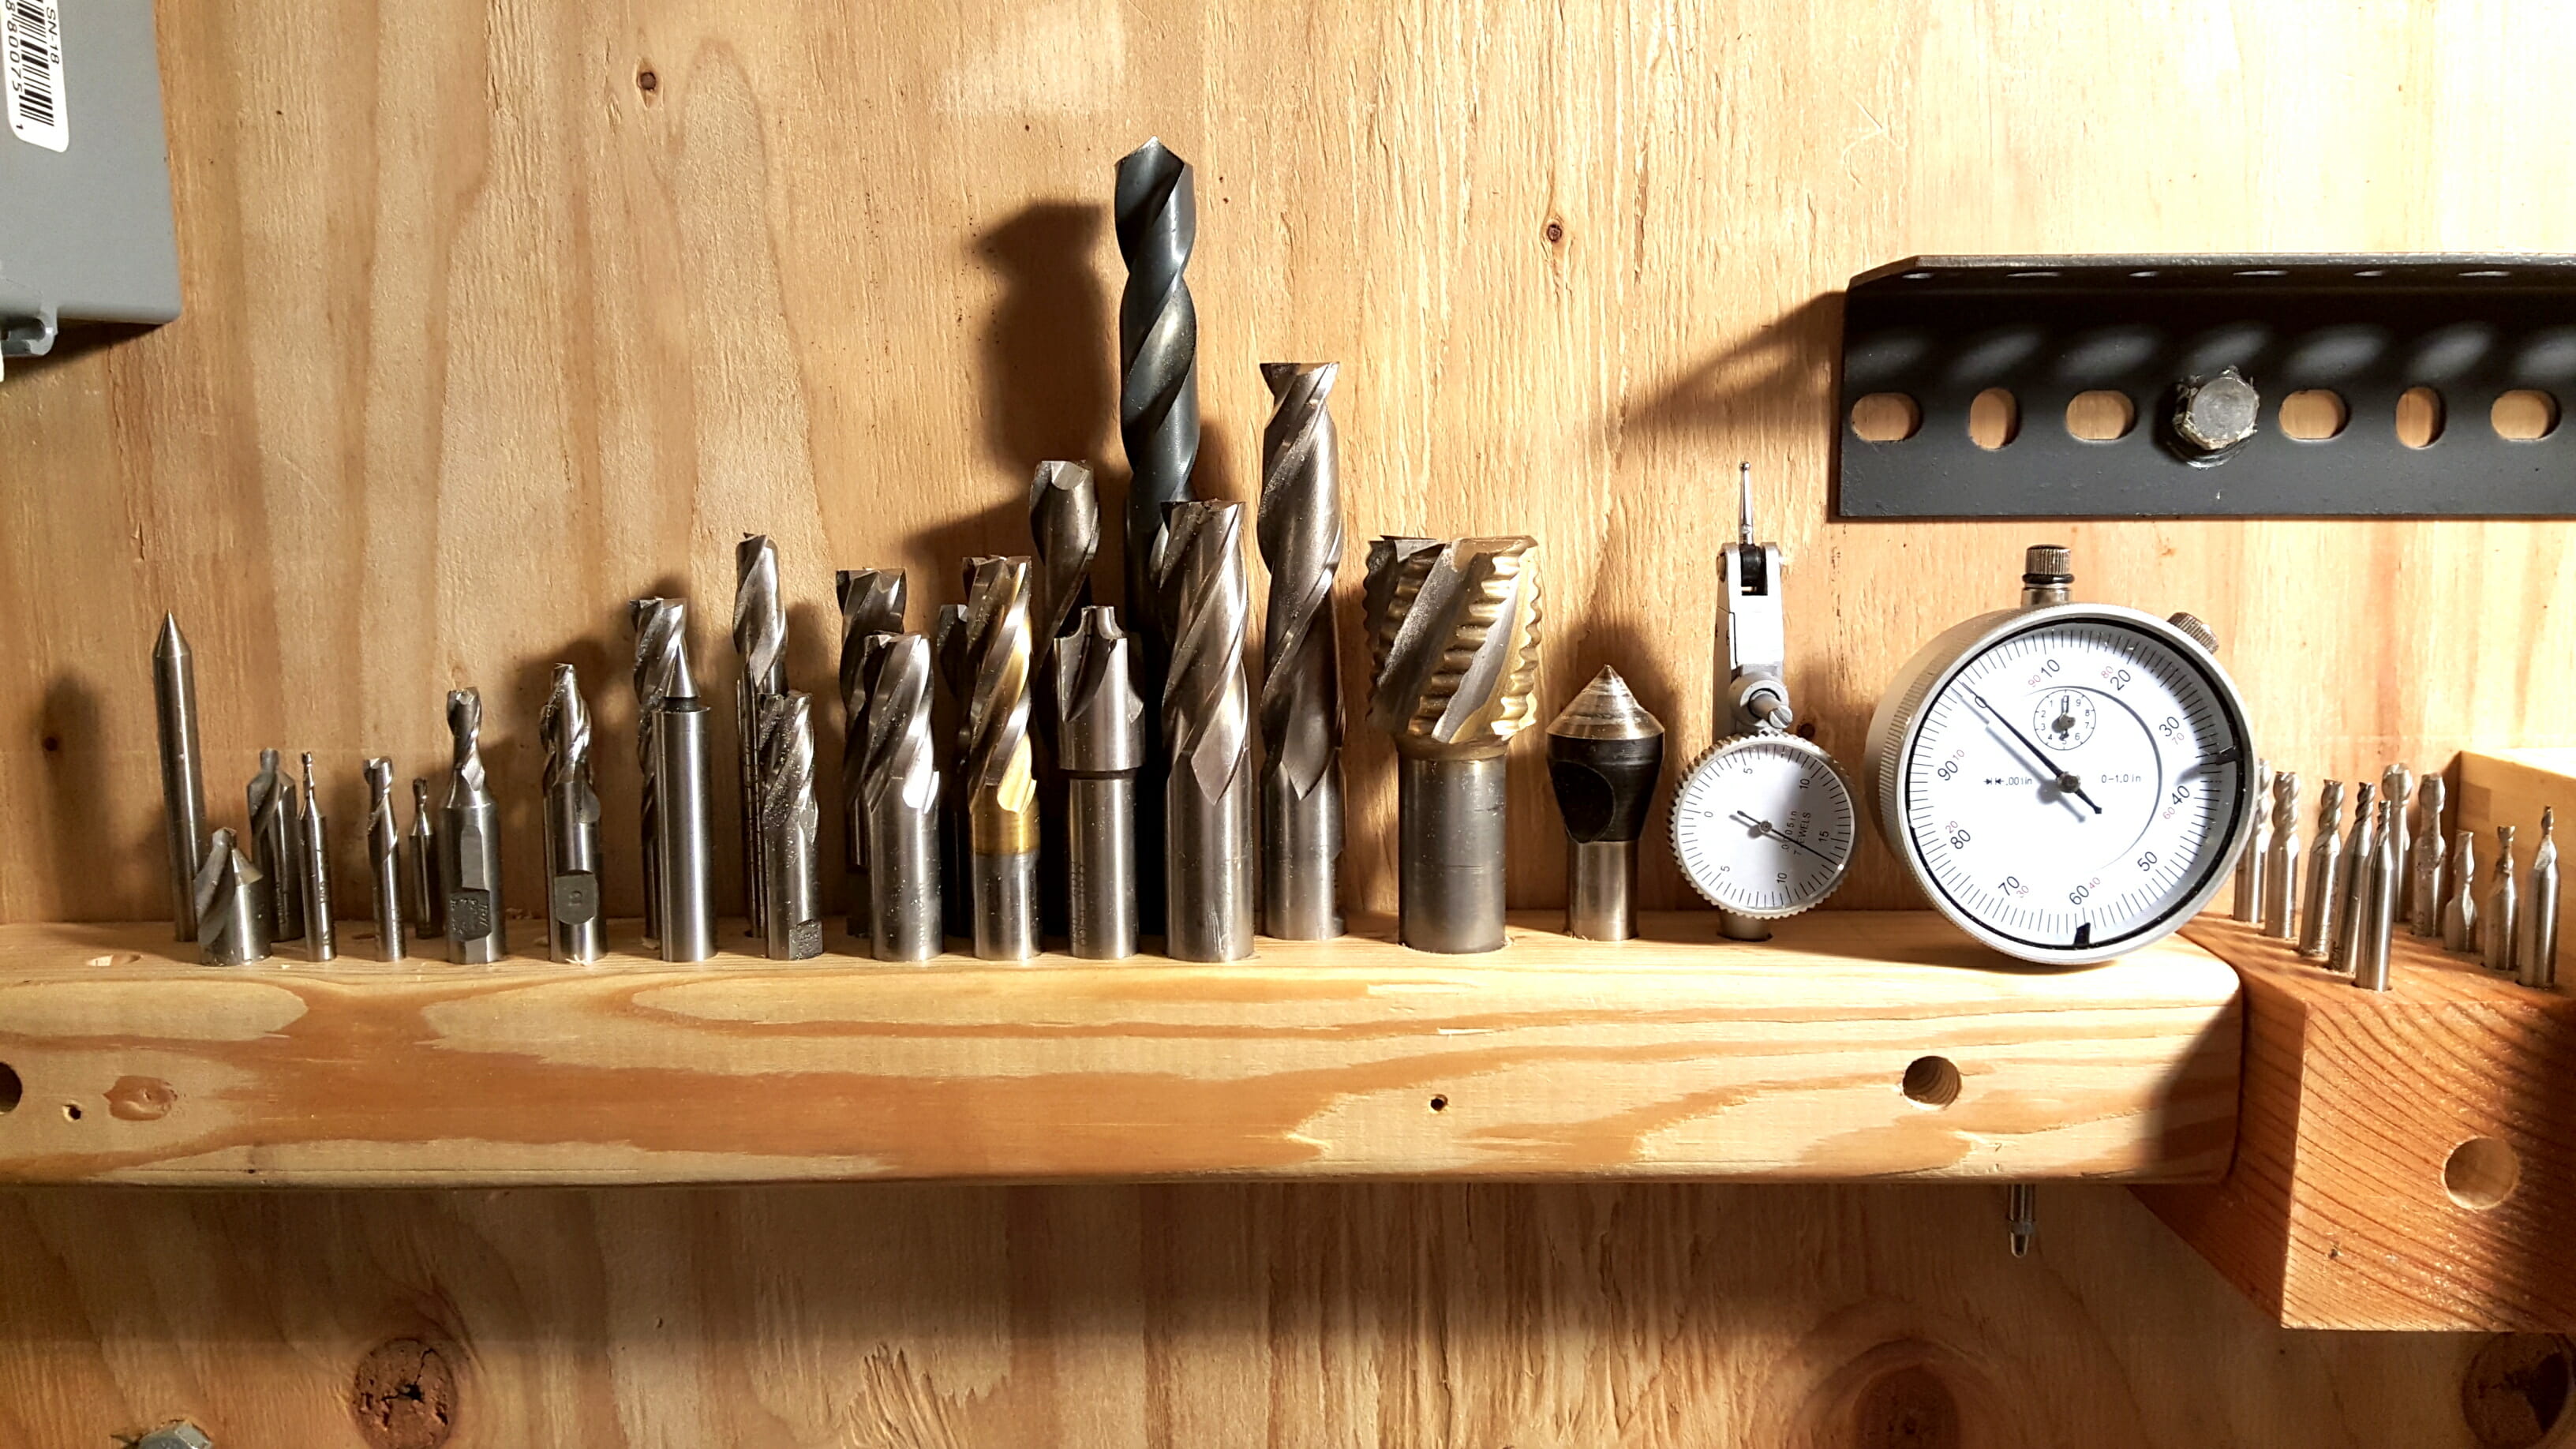
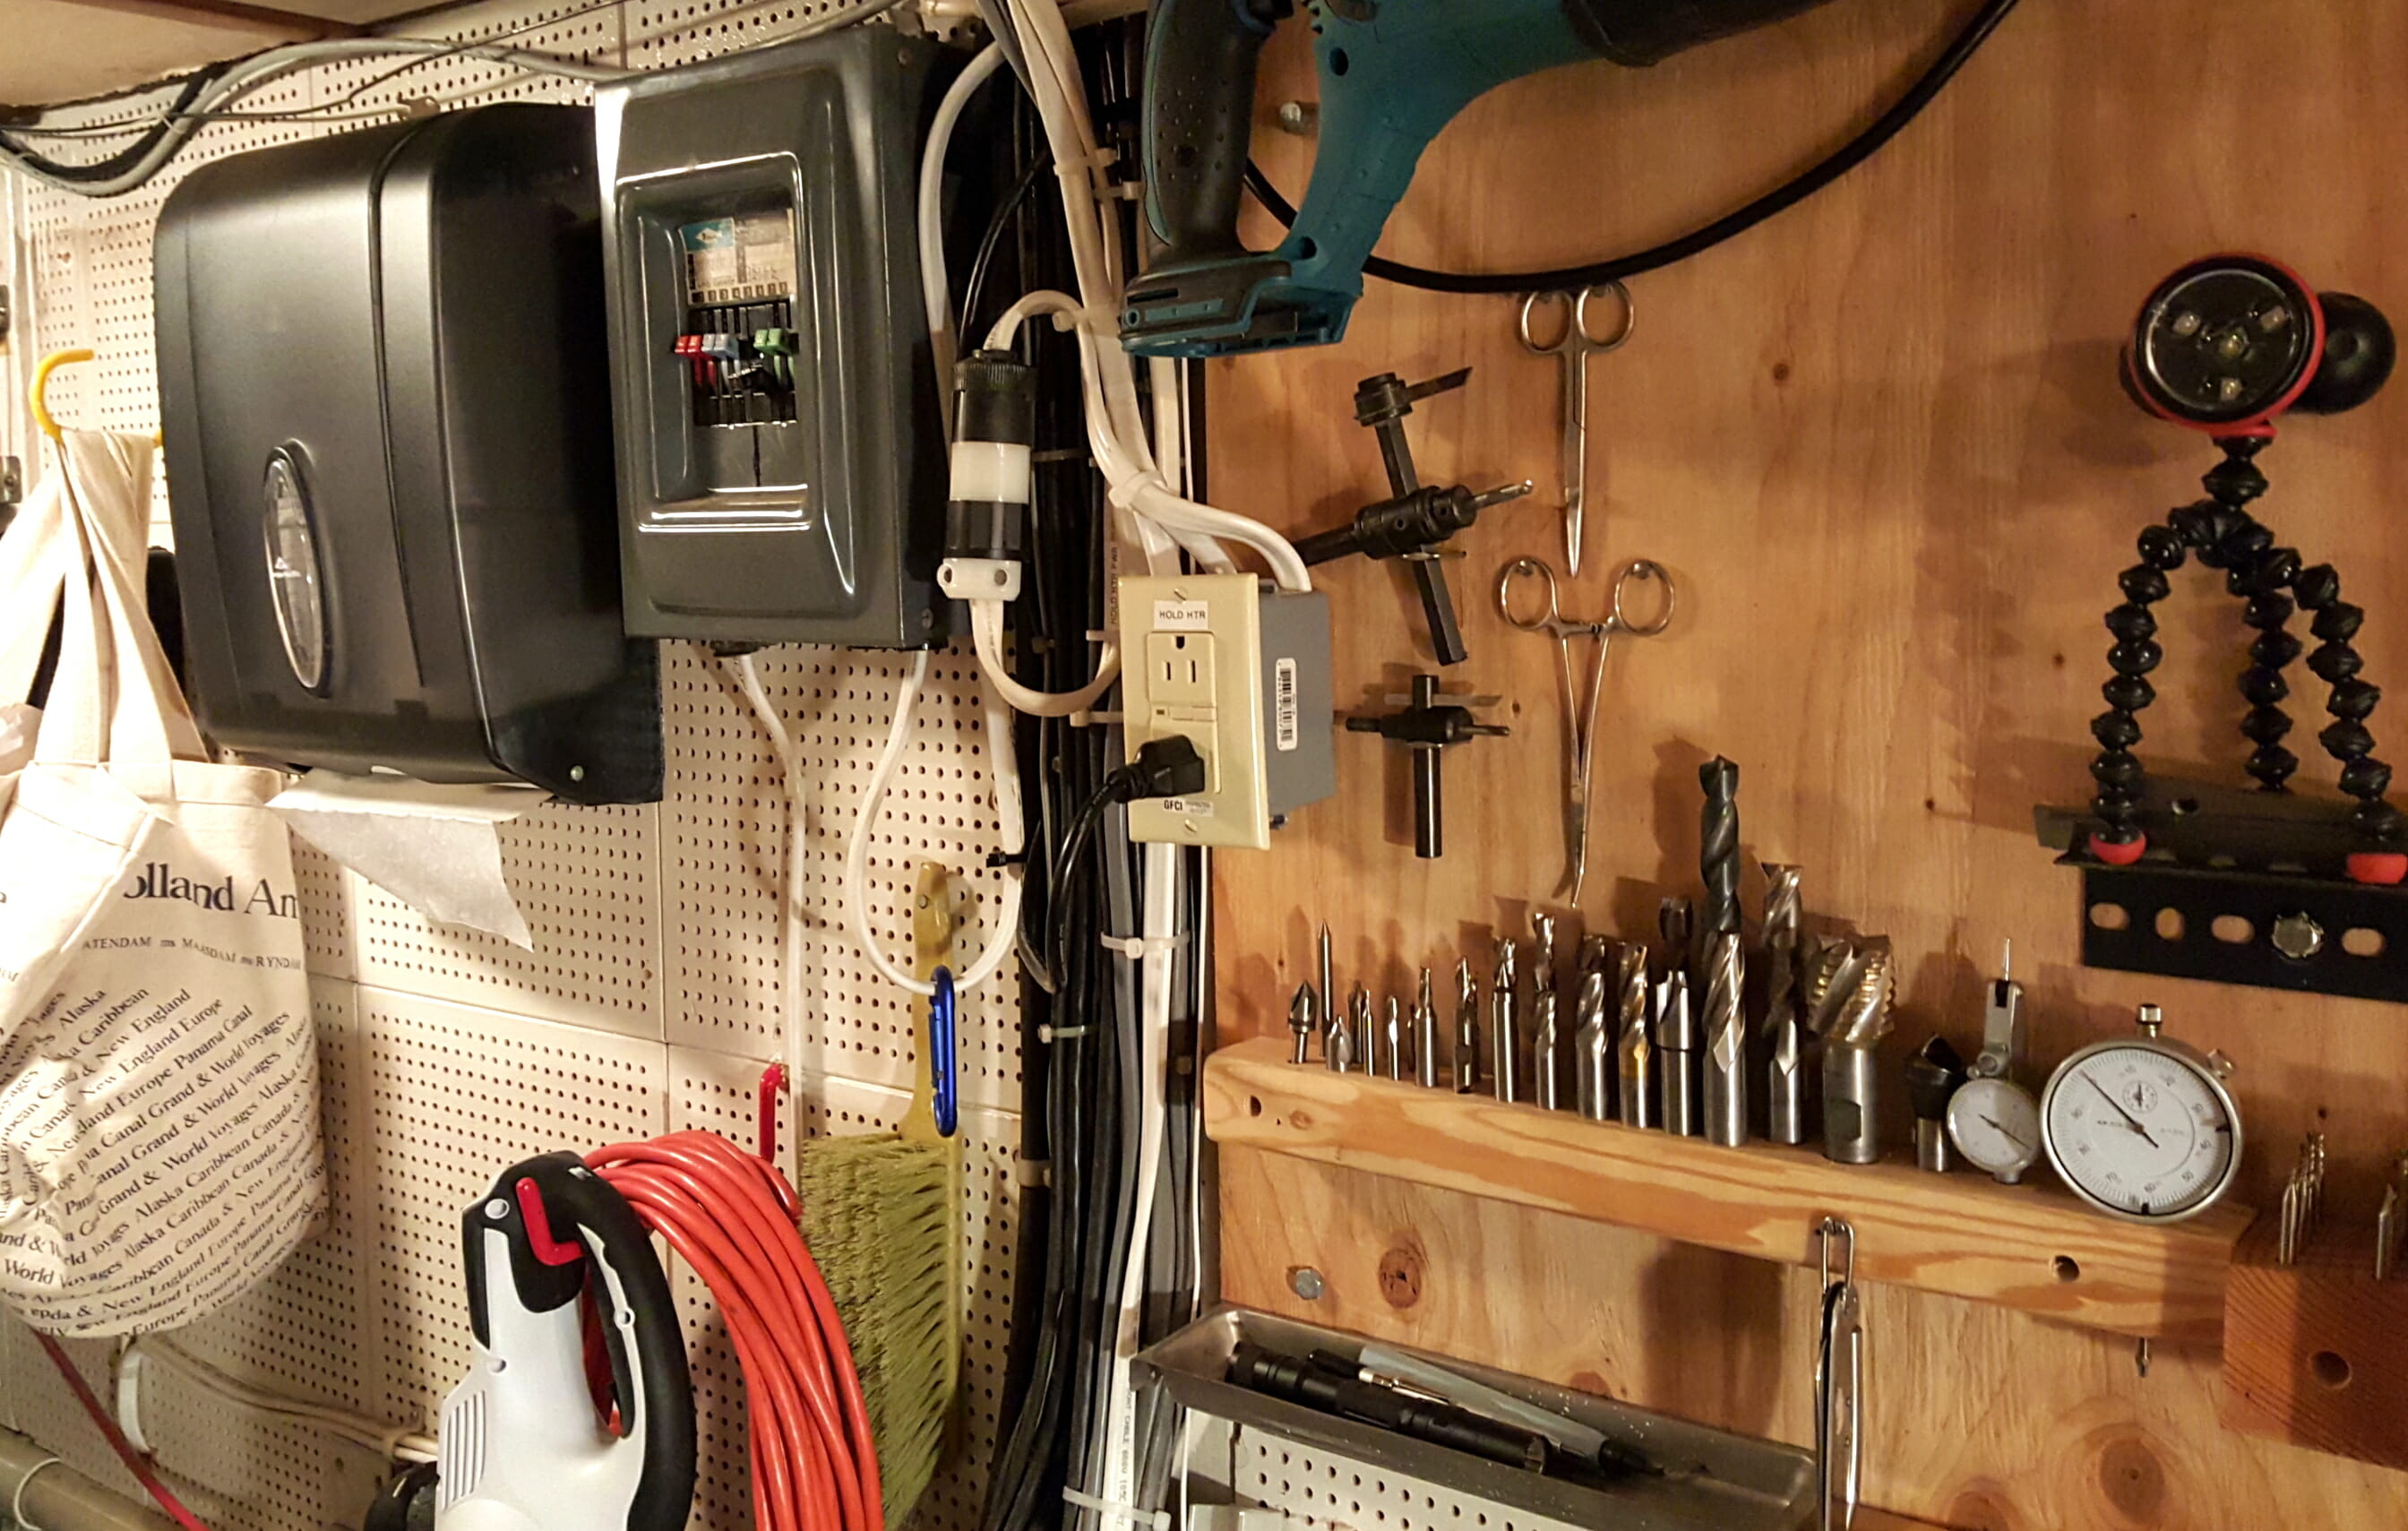
The bowl of random mills needed something a little more custom; I fixed a piece of scrap wood in the vise, sorted them by shank size, and free-handed a holder…

You can see the general tools in that photo – in all cases, they were just hung with whatever simple screws or brackets would do the job, but please note that most of those are not ready to go bounding across heavy seas. I’ll probably add a few screw-eyes for bungees, or at least pile the loose stuff in a drawer before getting off the dock… but that is not an immediate issue.
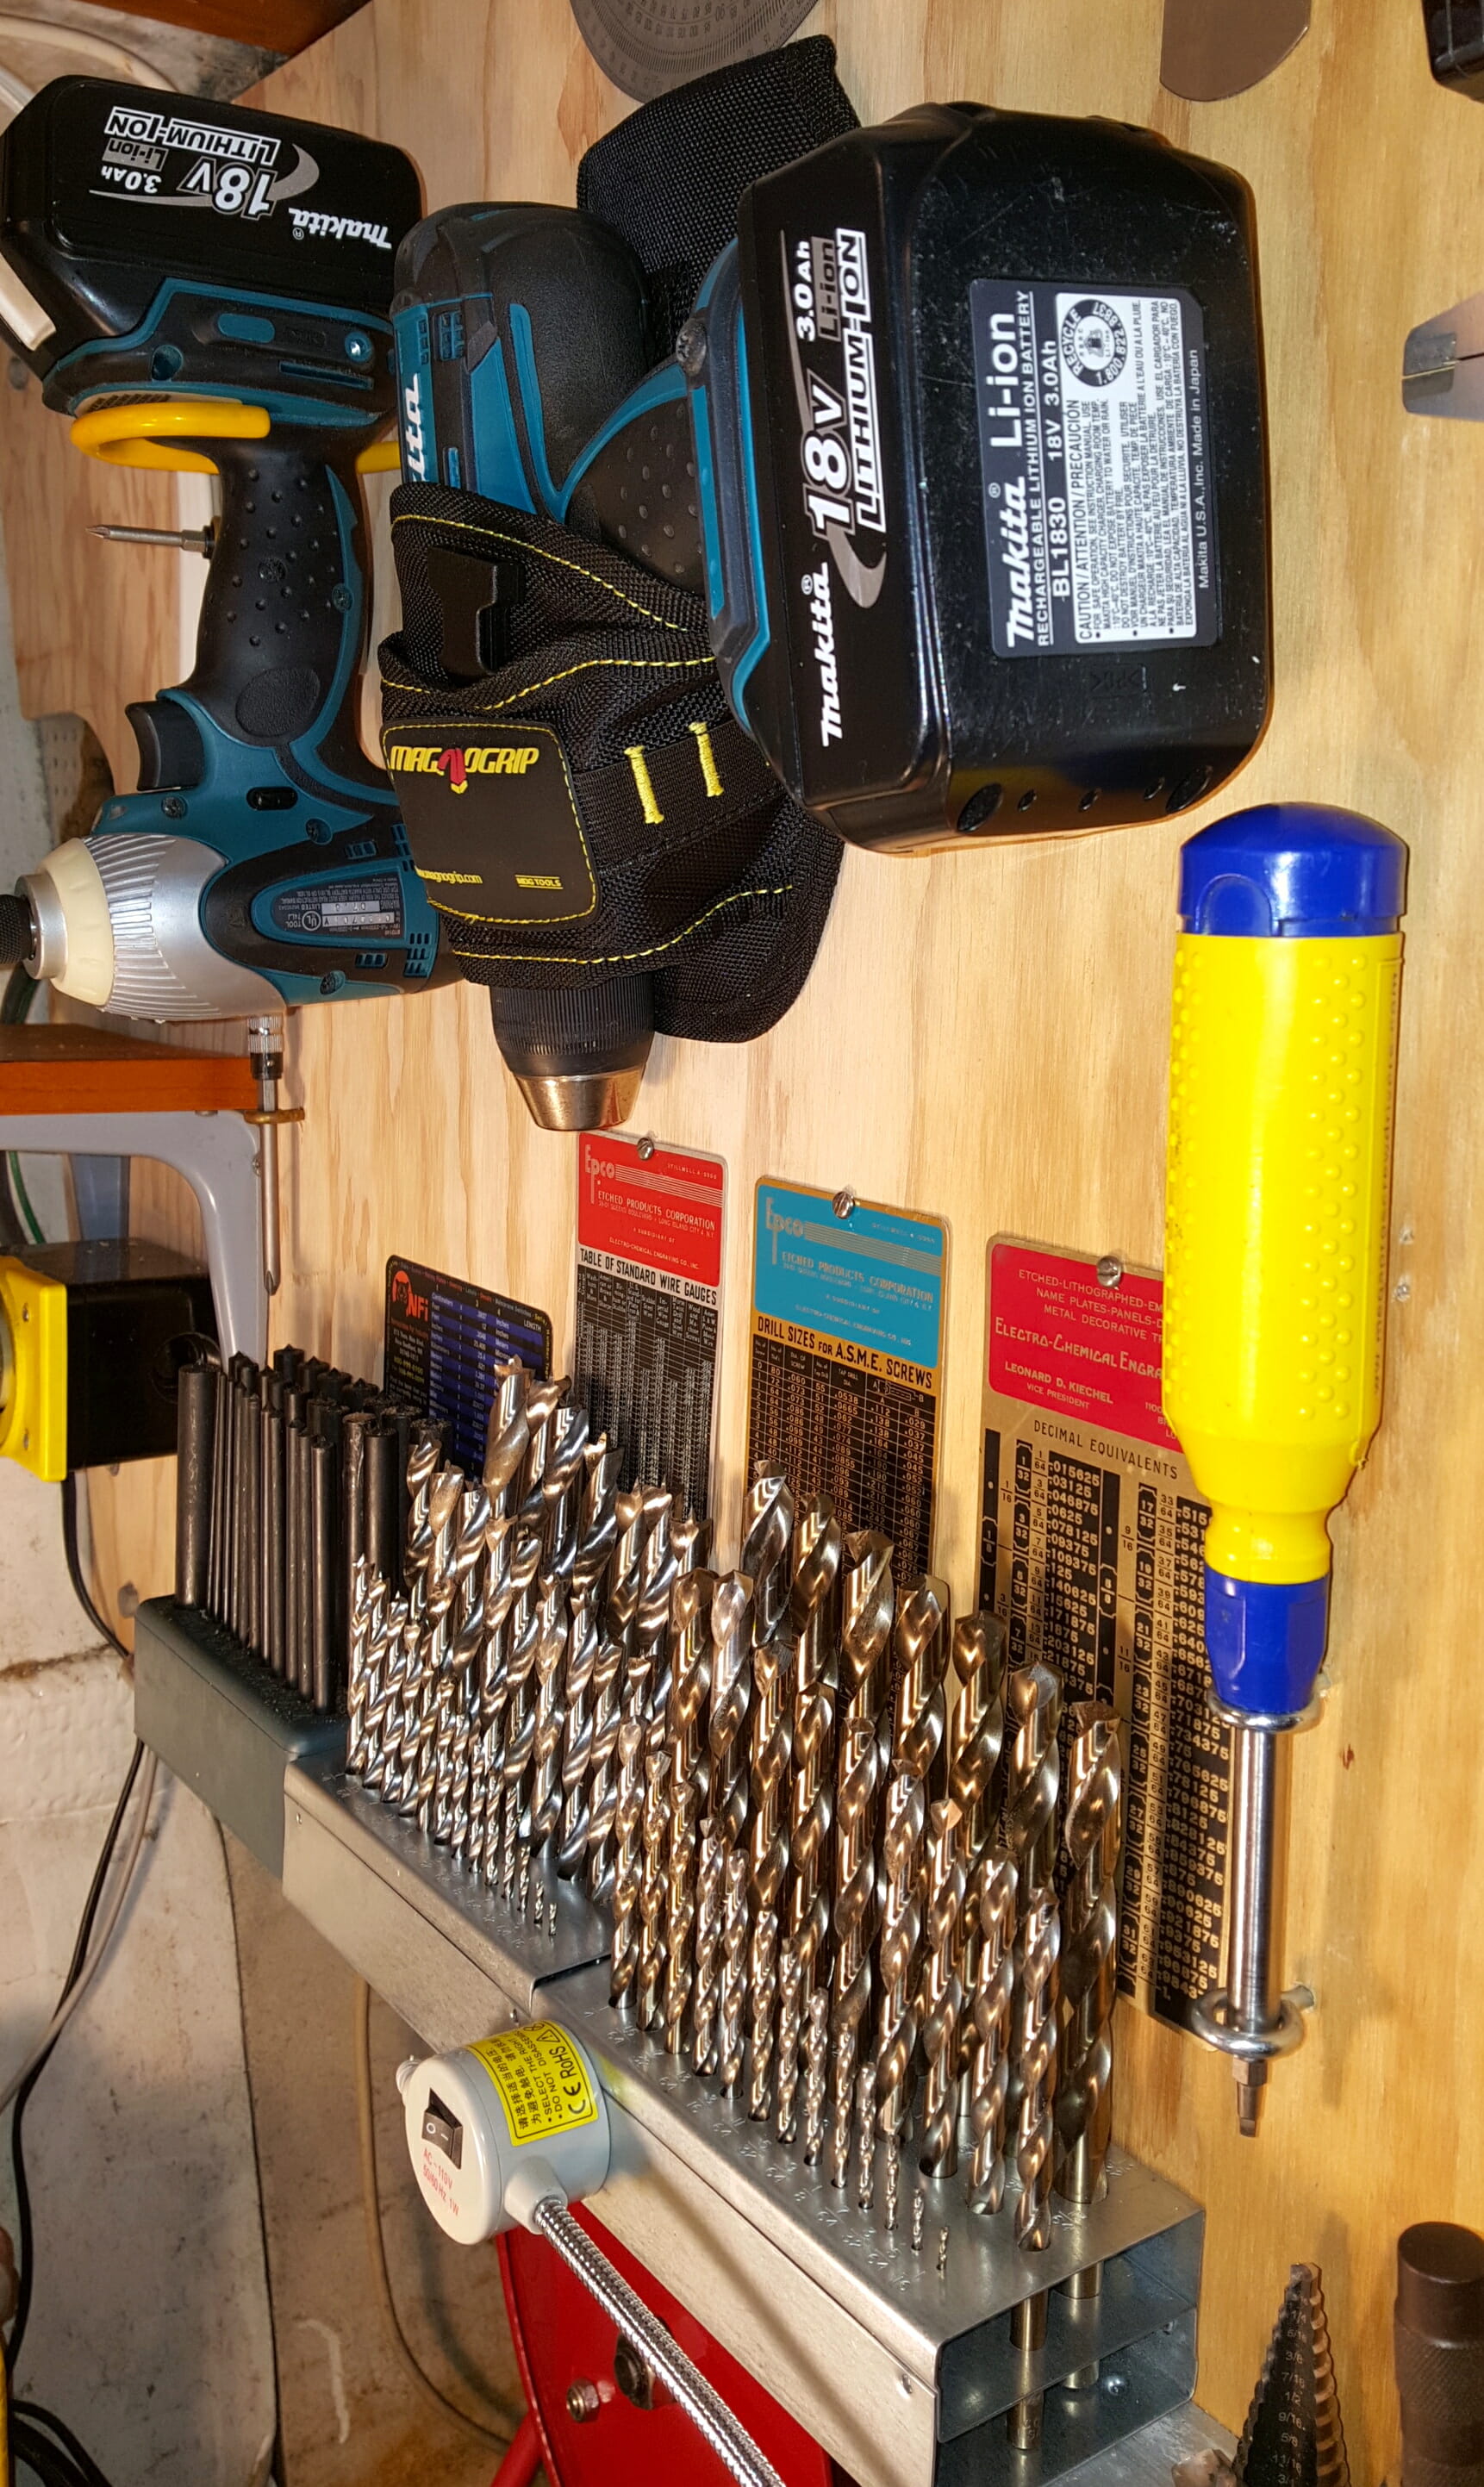
Over on the other side, to the right of the mill, it is pretty much the same story. This region is mostly devoted to drilling, and it didn’t take me long to tire of opening the cobalt and brad point drill index boxes… I ordered stands that are supported on that aluminum angle and screwed to the board. My beloved Makita LXT drill is in a sweet holster that has a magnetic surface for bits, and the somewhat less frequently used impact driver is supported by a hanger bracket… with the charger for both just beyond on a shelf. The transfer punch set plastic box is wimpy; I’ll 3D print one and mount it properly to the wall. And my all-time favorite screwdriver, the Megapro 151SS, is right there at hand (next to the dial caliper, just peeking in from the right edge).
As I mentioned above, I still want to add a better place to wail on heavy things in a proper vise, but that is going to require another layer of cleanup and fabrication. The only added features after completion of the tool boards are a hanger for a somewhat wimpy hand vacuum (not as good as the central vacuum added later) and a wonderful dispenser for folding paper towels, which I have come to prefer over rolls:
Recent milling jobs included a 4U panel to wrap up console zone Epsilon (holding the Tascam PortaStudio, Raspberry Pi 7″ touchscreen, and MOTU AVB switch), along with the 6U and 4U panels for the ham radio console (four rigs along with associated tools like DSP filter, TNC, SWR/power monitor, and so on).
And now, off to cut some more metal! Here’s a gorgeous piece done for me in .25-inch stainless about 25 years ago at a friend’s shop in Chicago… using Wire EDM:

For another take on mobile workspace design, please see my post about the Polaris mobile lab… built into a 24-foot cargo trailer.
September 2018 Update
Over nearly two years of using this space, I’ve generally been happy with it except for one annoying issue: my tools were split into two regions. The original theory was that anything related to messy metalwork would be down there on the boards, and those associated with more “refined” activities would be in a cabinet up in the lab. But that is of course ridiculous; there is way too much overlap. What really happened was constant running up and down to fetch things, as well as less of a tendency to properly put them away when done… which translates into a constant mess.
The fix was to install a tool cabinet in the machine shop (in the process removing or relocating some of the board-mounted stuff). I have had this Kobalt cabinet for years, acquired originally for the mobile lab mentioned above, and it is perfect for the application with locking drawers and solid construction:
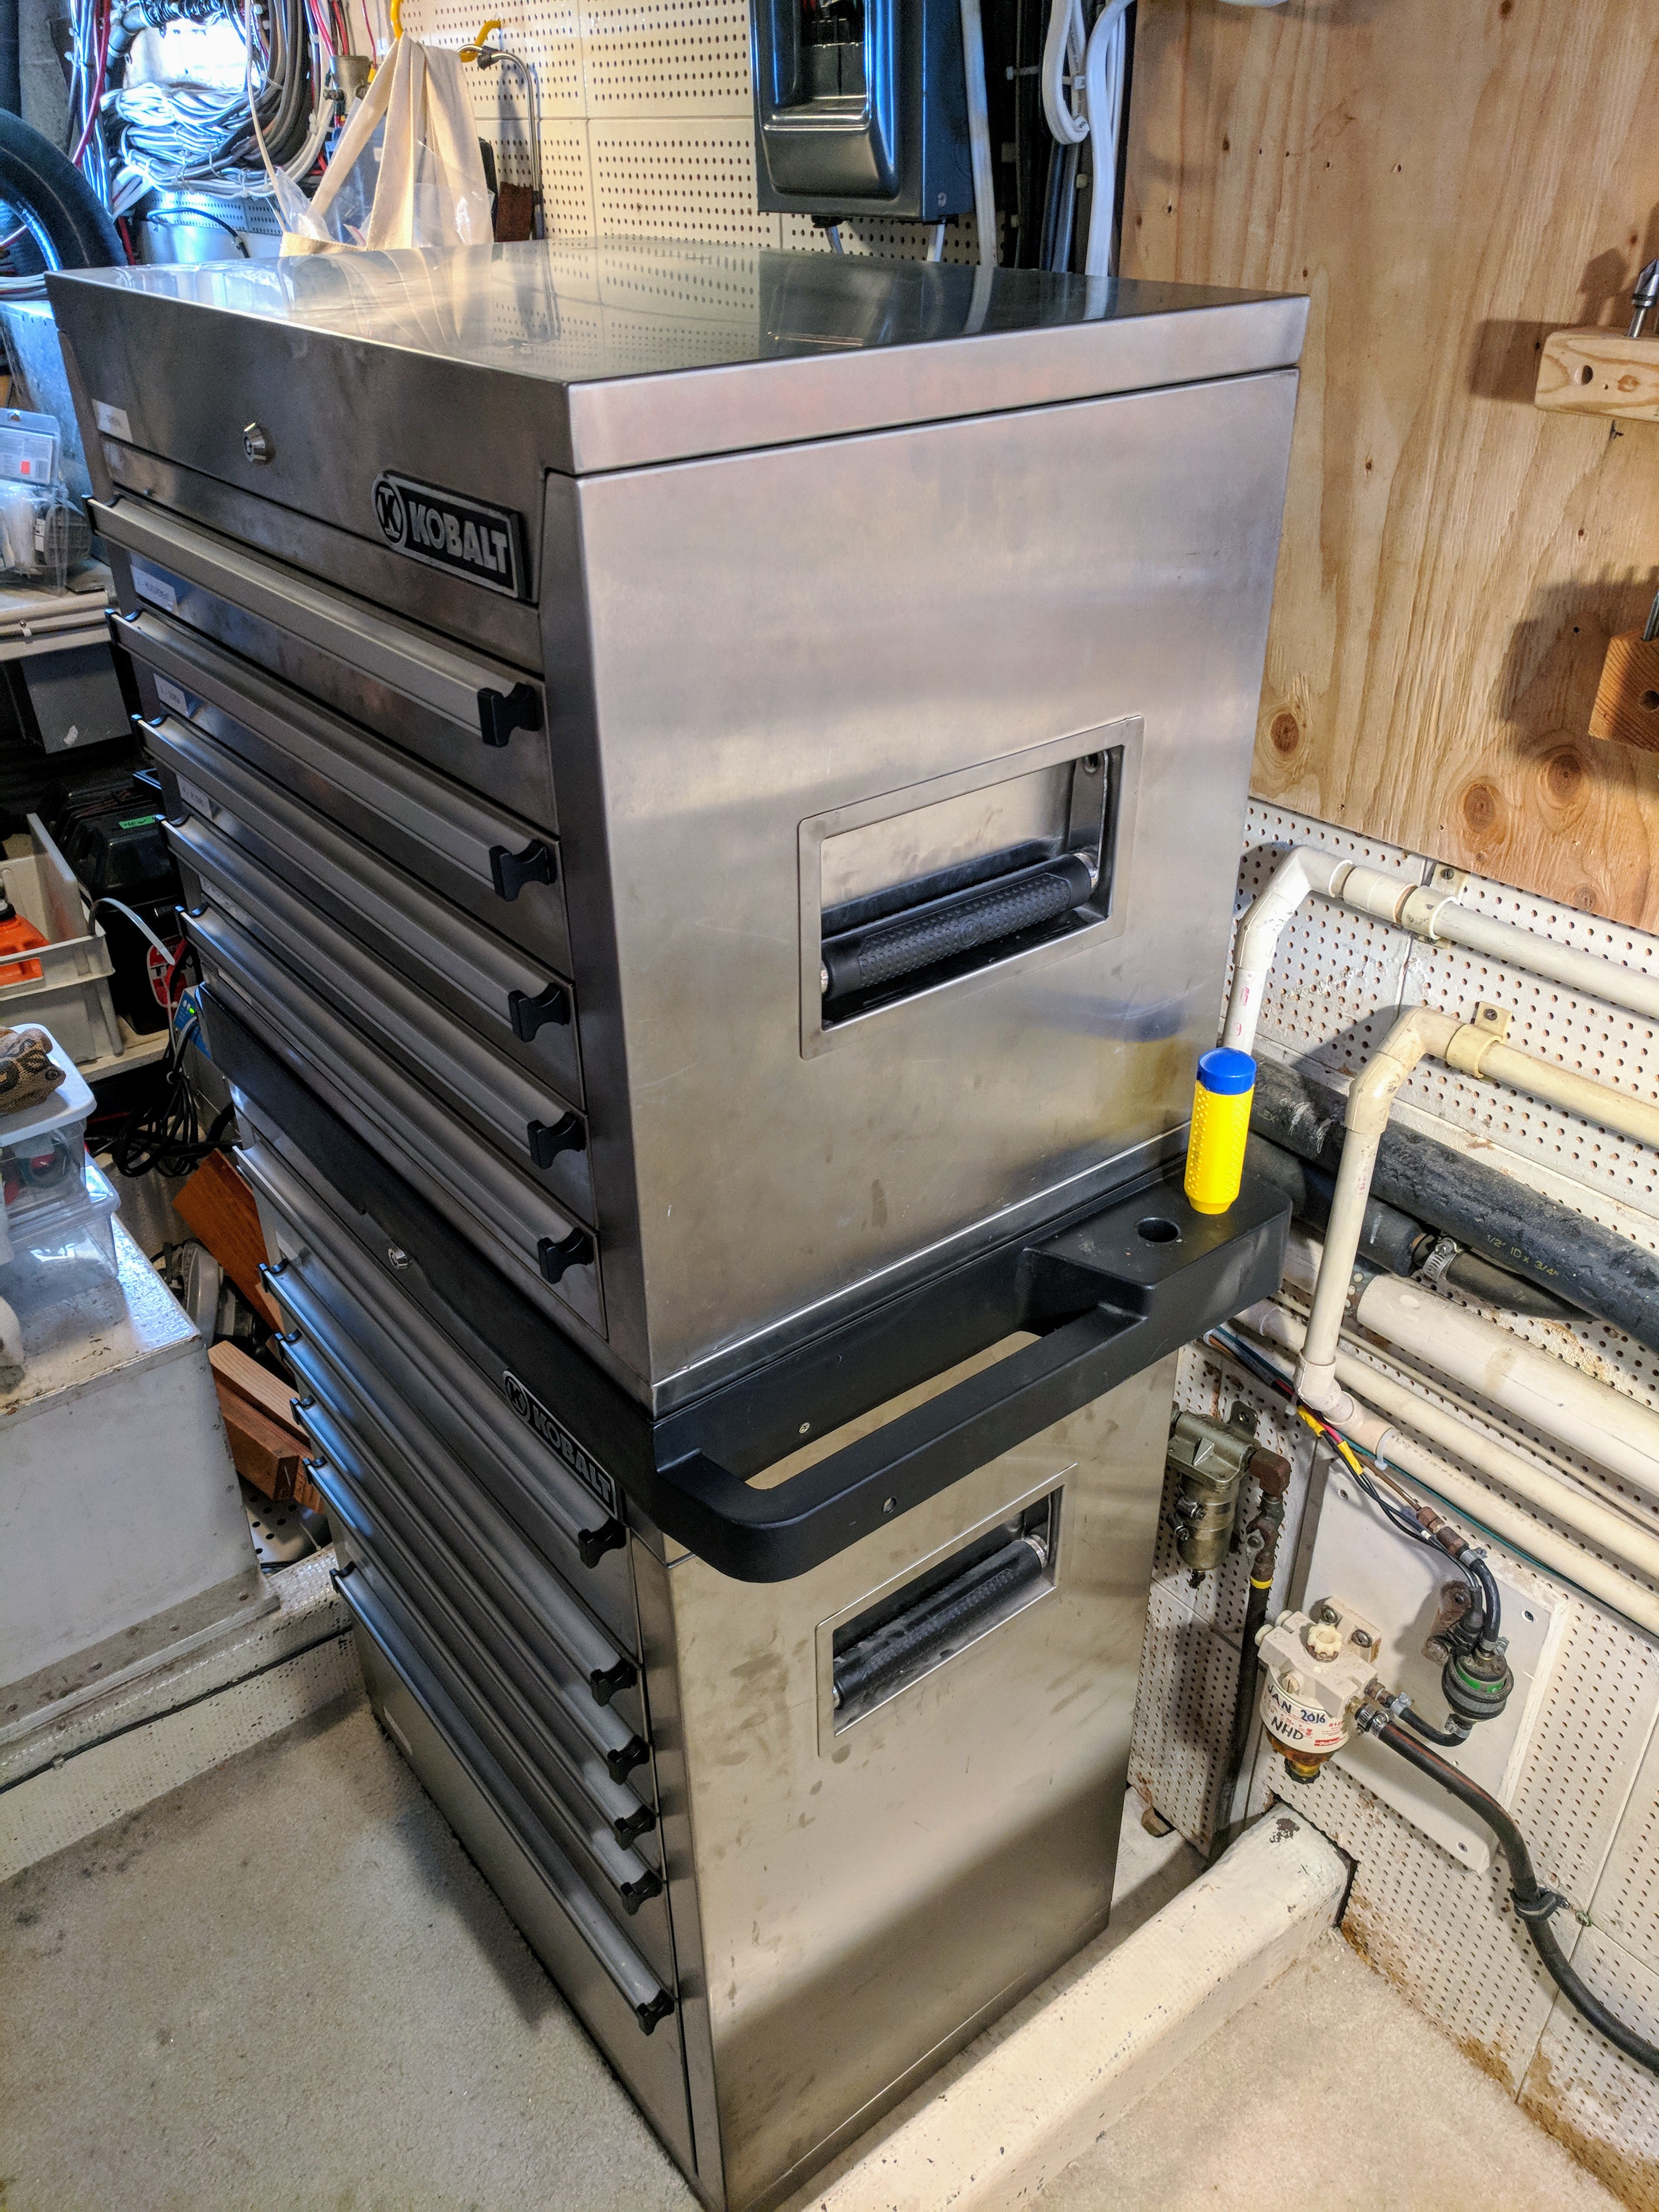
This just barely squeaked down the steps after first removing the drawers, and the landing spot is strong wood flooring between the stringers just forward of an access panel to the bilge. I relocated the Webasto fuel filter for serviceability, and brought the cabinet out far enough to allow cabling runs. The only part not yet done is blocking it solidly to the wall, something that is on the “must do” fixturing list before getting off the dock! We don’t want that beast flying around in the same room with battery banks, and while at it, there are a few things on the tool boards that still need to be more solidly attached.
Otherwise, this workspace has been hugely useful despite its cramped size. Still on the list, if space permits after I replace the ancient 32-volt battery system: a wall of storage bins over on the port side, a place to mount my bigger vise, and a small bench sander/grinder with active dust control.