
Make it Anywhere with a Mobile Lab
©2016 by Steven K. Roberts
Nomadic Research Labs
(Trailer project was completed in 2011, and earlier versions of this piece appeared in Make: Online and Nomadness Report #5.) Minor revisions to this article in July 2021, and a new version of the lab is under construction in 2025.
There are lots of reasons why a fully portable lab might be worth considering: a lack of workspace in your house, maintaining continuity through a move, hauling your toolset to a client site, conjuring a nomadic hackerspace community that can coalesce around projects, “bugging out” without losing effectiveness, creating a shop without construction legalities… or just because it’s efficient, cool, and away from distractions.
In my case, I had an absurd logistical dilemma. I was trying to complete an intensively geeky sailboat project, but my house and shop were on an island with no moorage. A four-hour round trip between home and boat proved to be an insurmountable challenge: I would arrive at the marina, all set for a few days of hacking away at the to-do list, then immediately run into a missing part or fabrication job that required tools back home. OK, back-burner that job, move on to the next, encounter a similar problem. Repeat until exhausted. Hang around visiting other sailors for a day, then drive back to the lab with an even longer to-do list and a sense of frustration.
After over a year of getting too little done, I realized that the solution should have been obvious up front: build a mobile lab, get rid of the real estate, and move all operations to wheel estate!

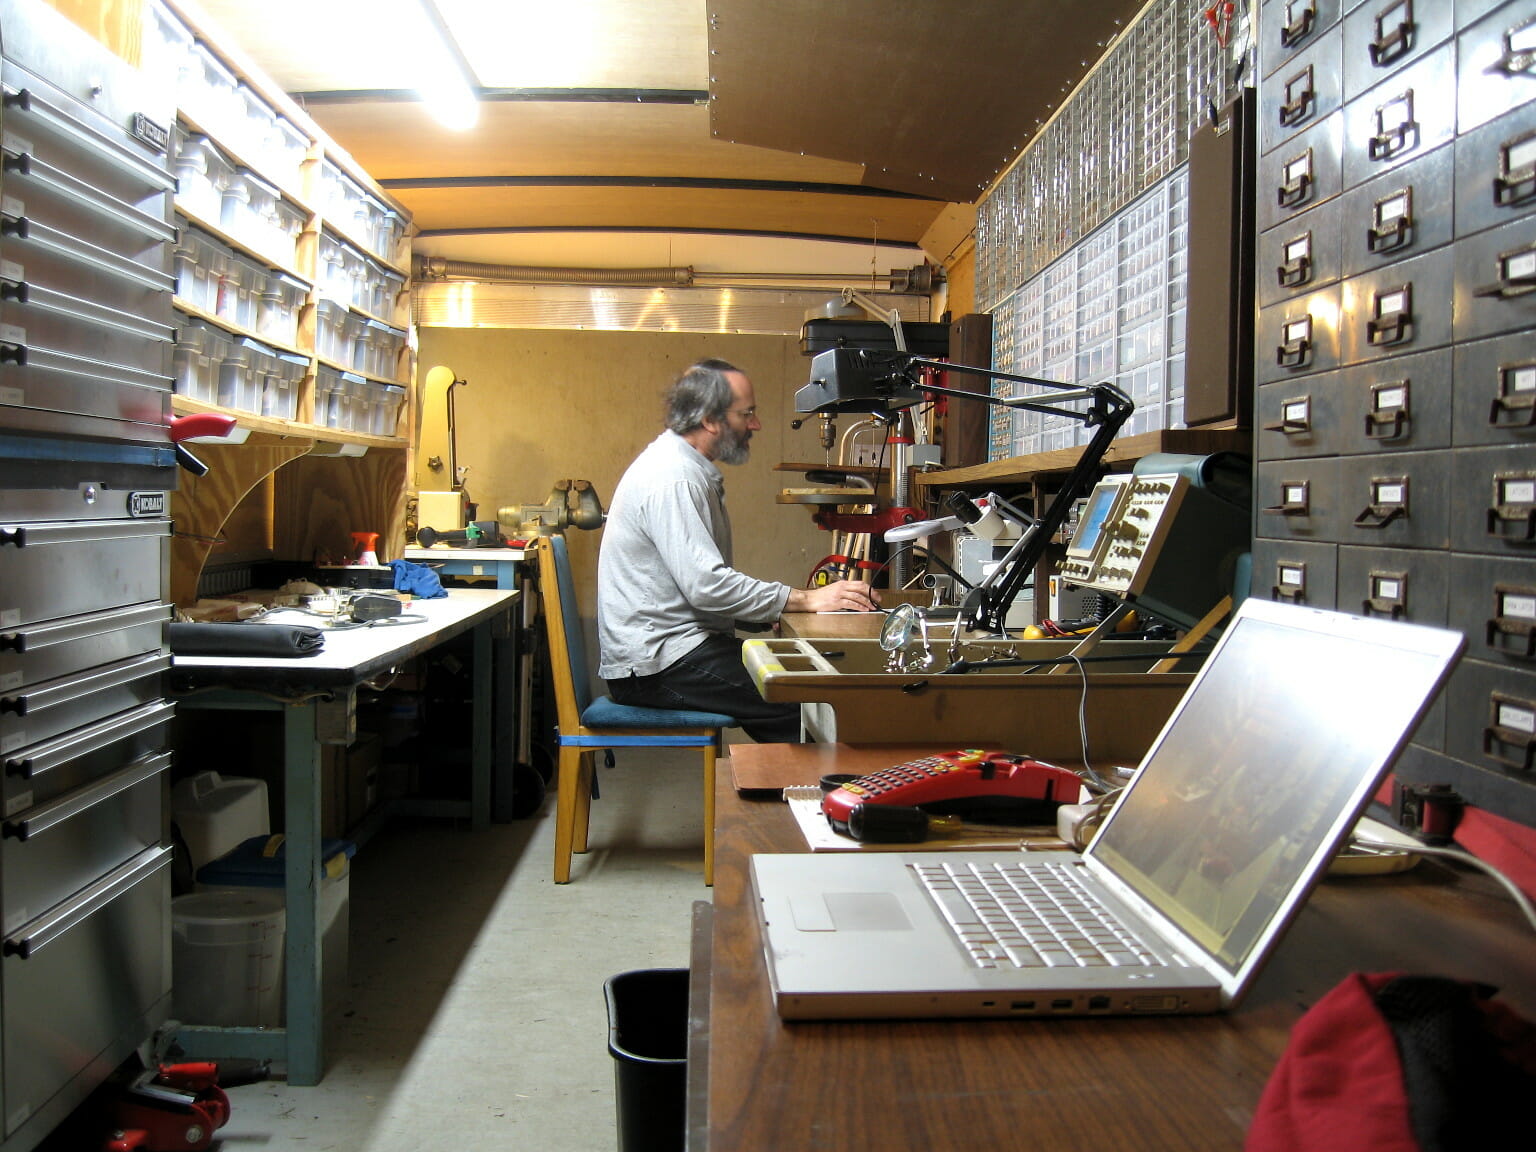
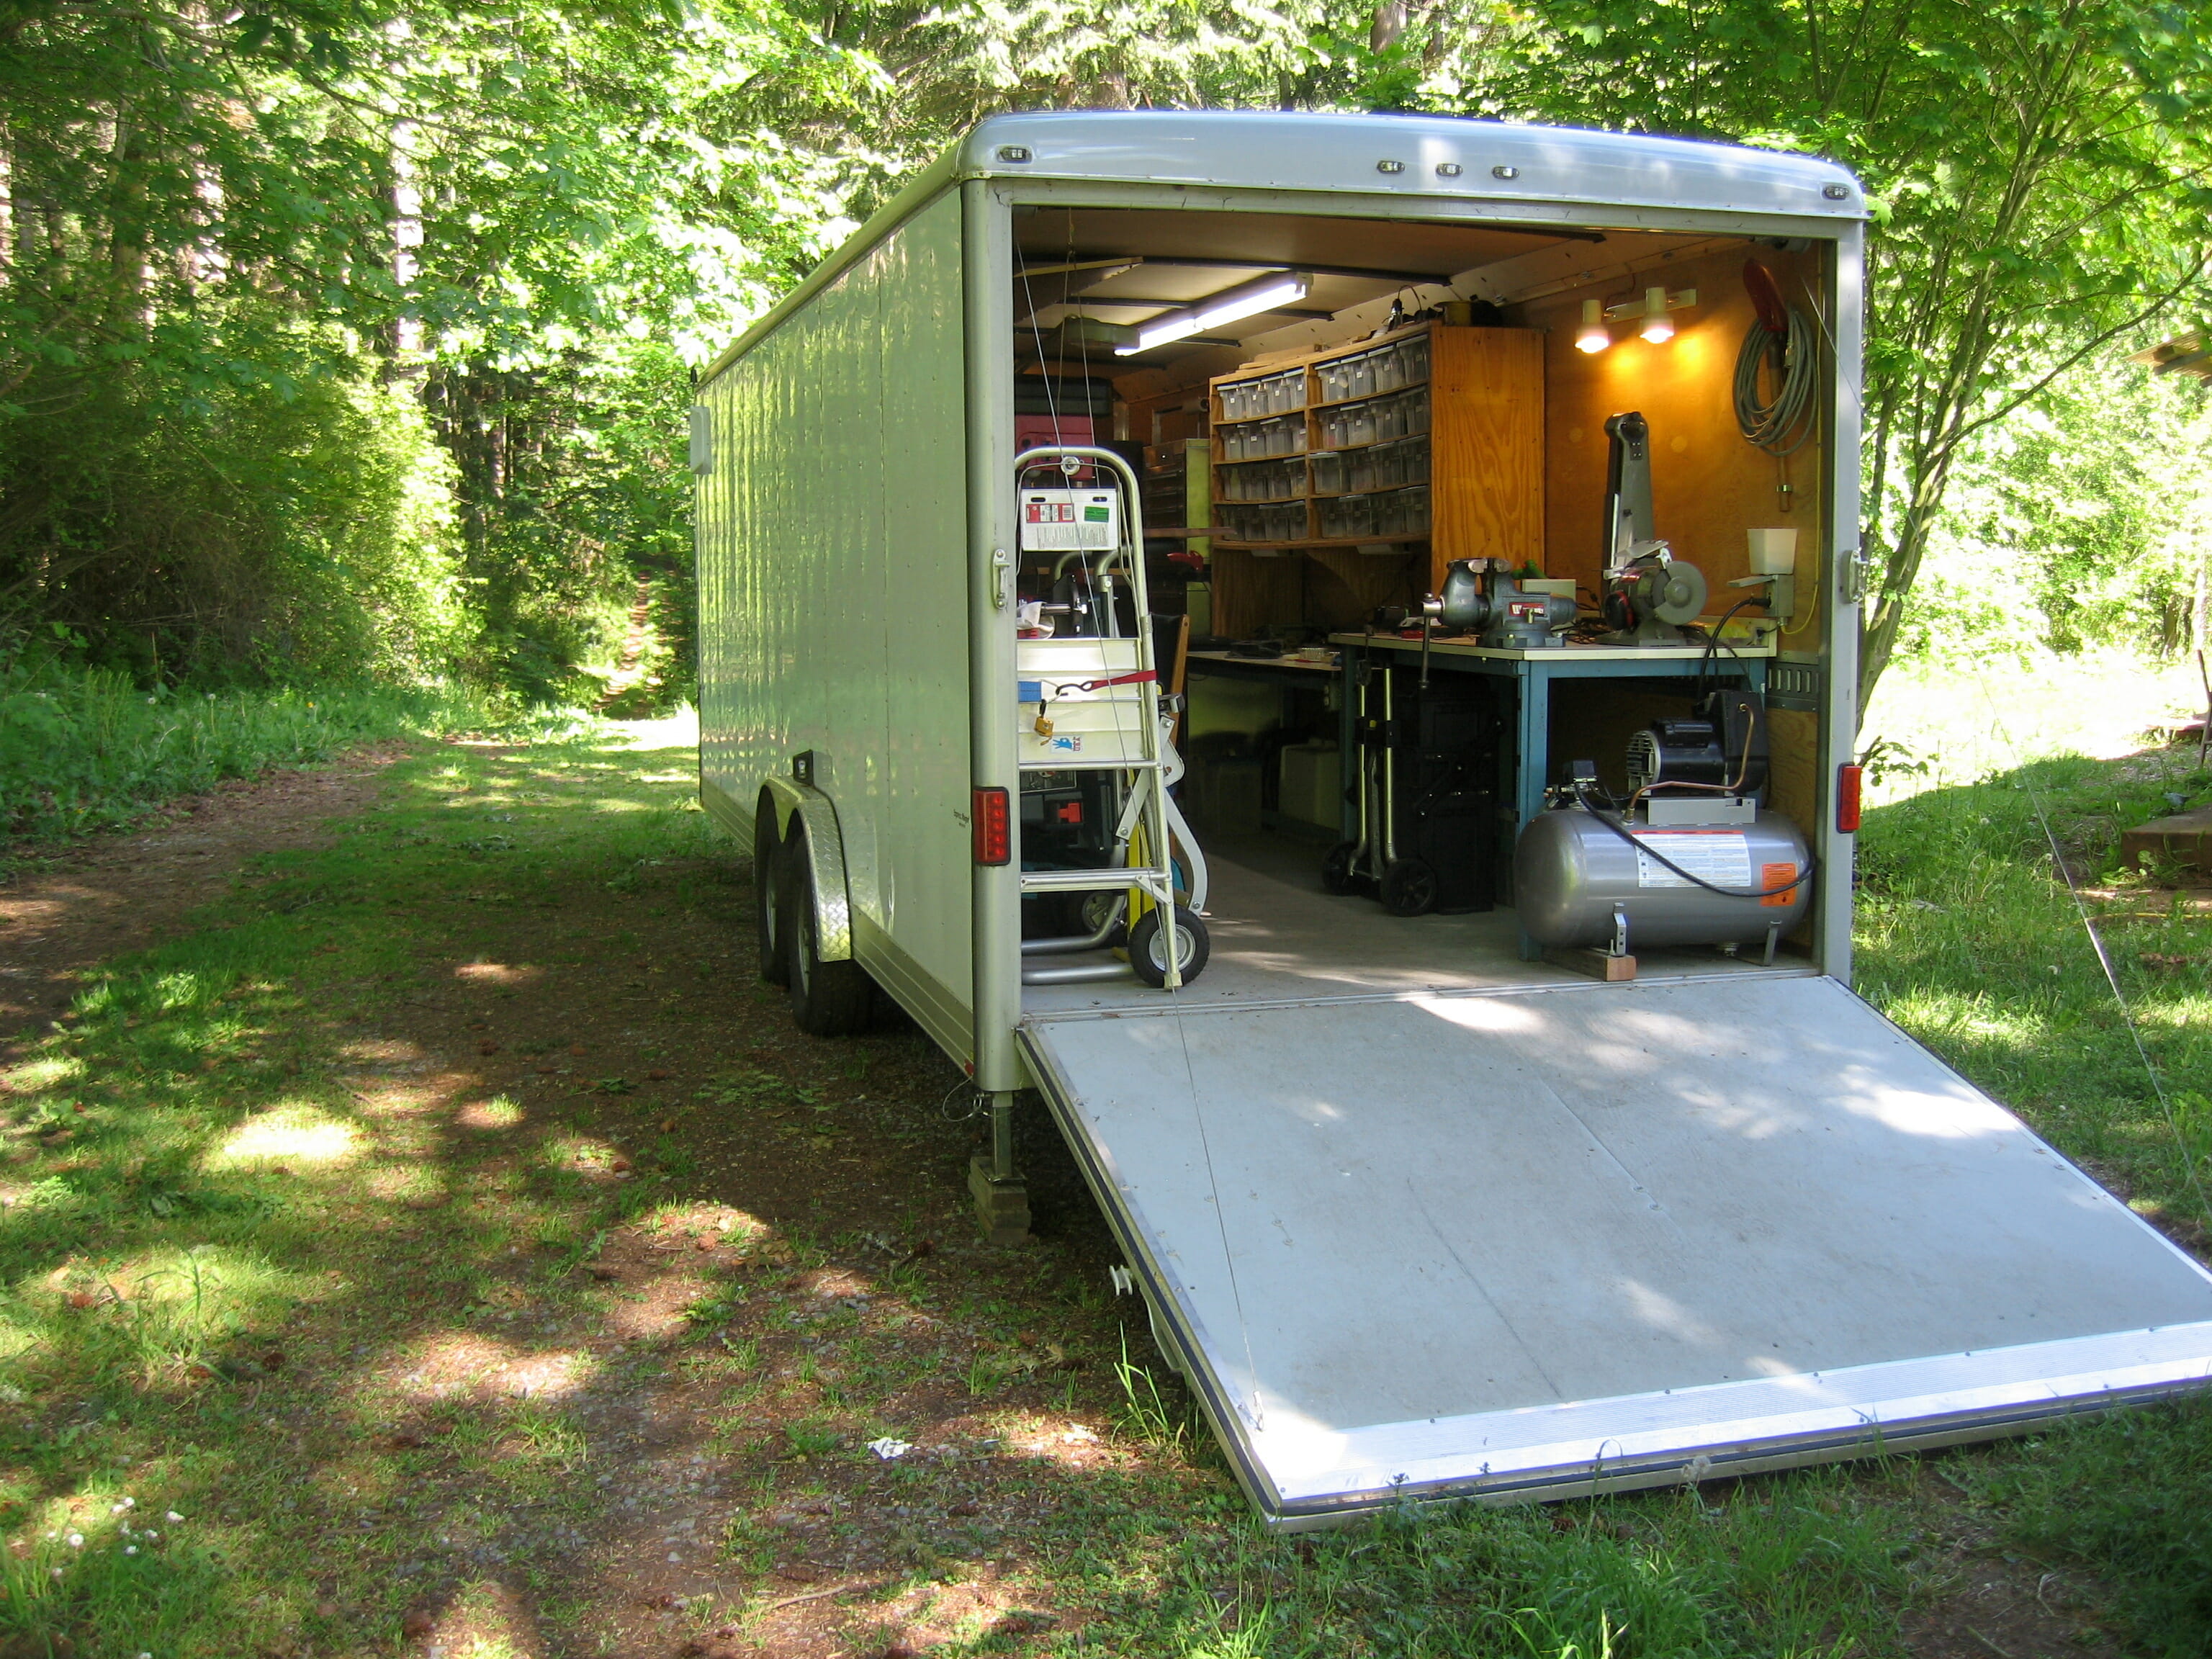
Thus began the Polaris project, a tight and efficient electronics lab and workshop built into a 24-foot utility trailer — a distillation of my sprawling 3000-square-foot building (originally the Microship lab). Ancient dusty inventory parked on shelves was abandoned en masse, and countless tooling redundancies were eliminated as I applied years of experience to building a workspace focused on current activities instead of the “might need it someday” mentality that had spawned a shop overflowing with dormant tonnage.
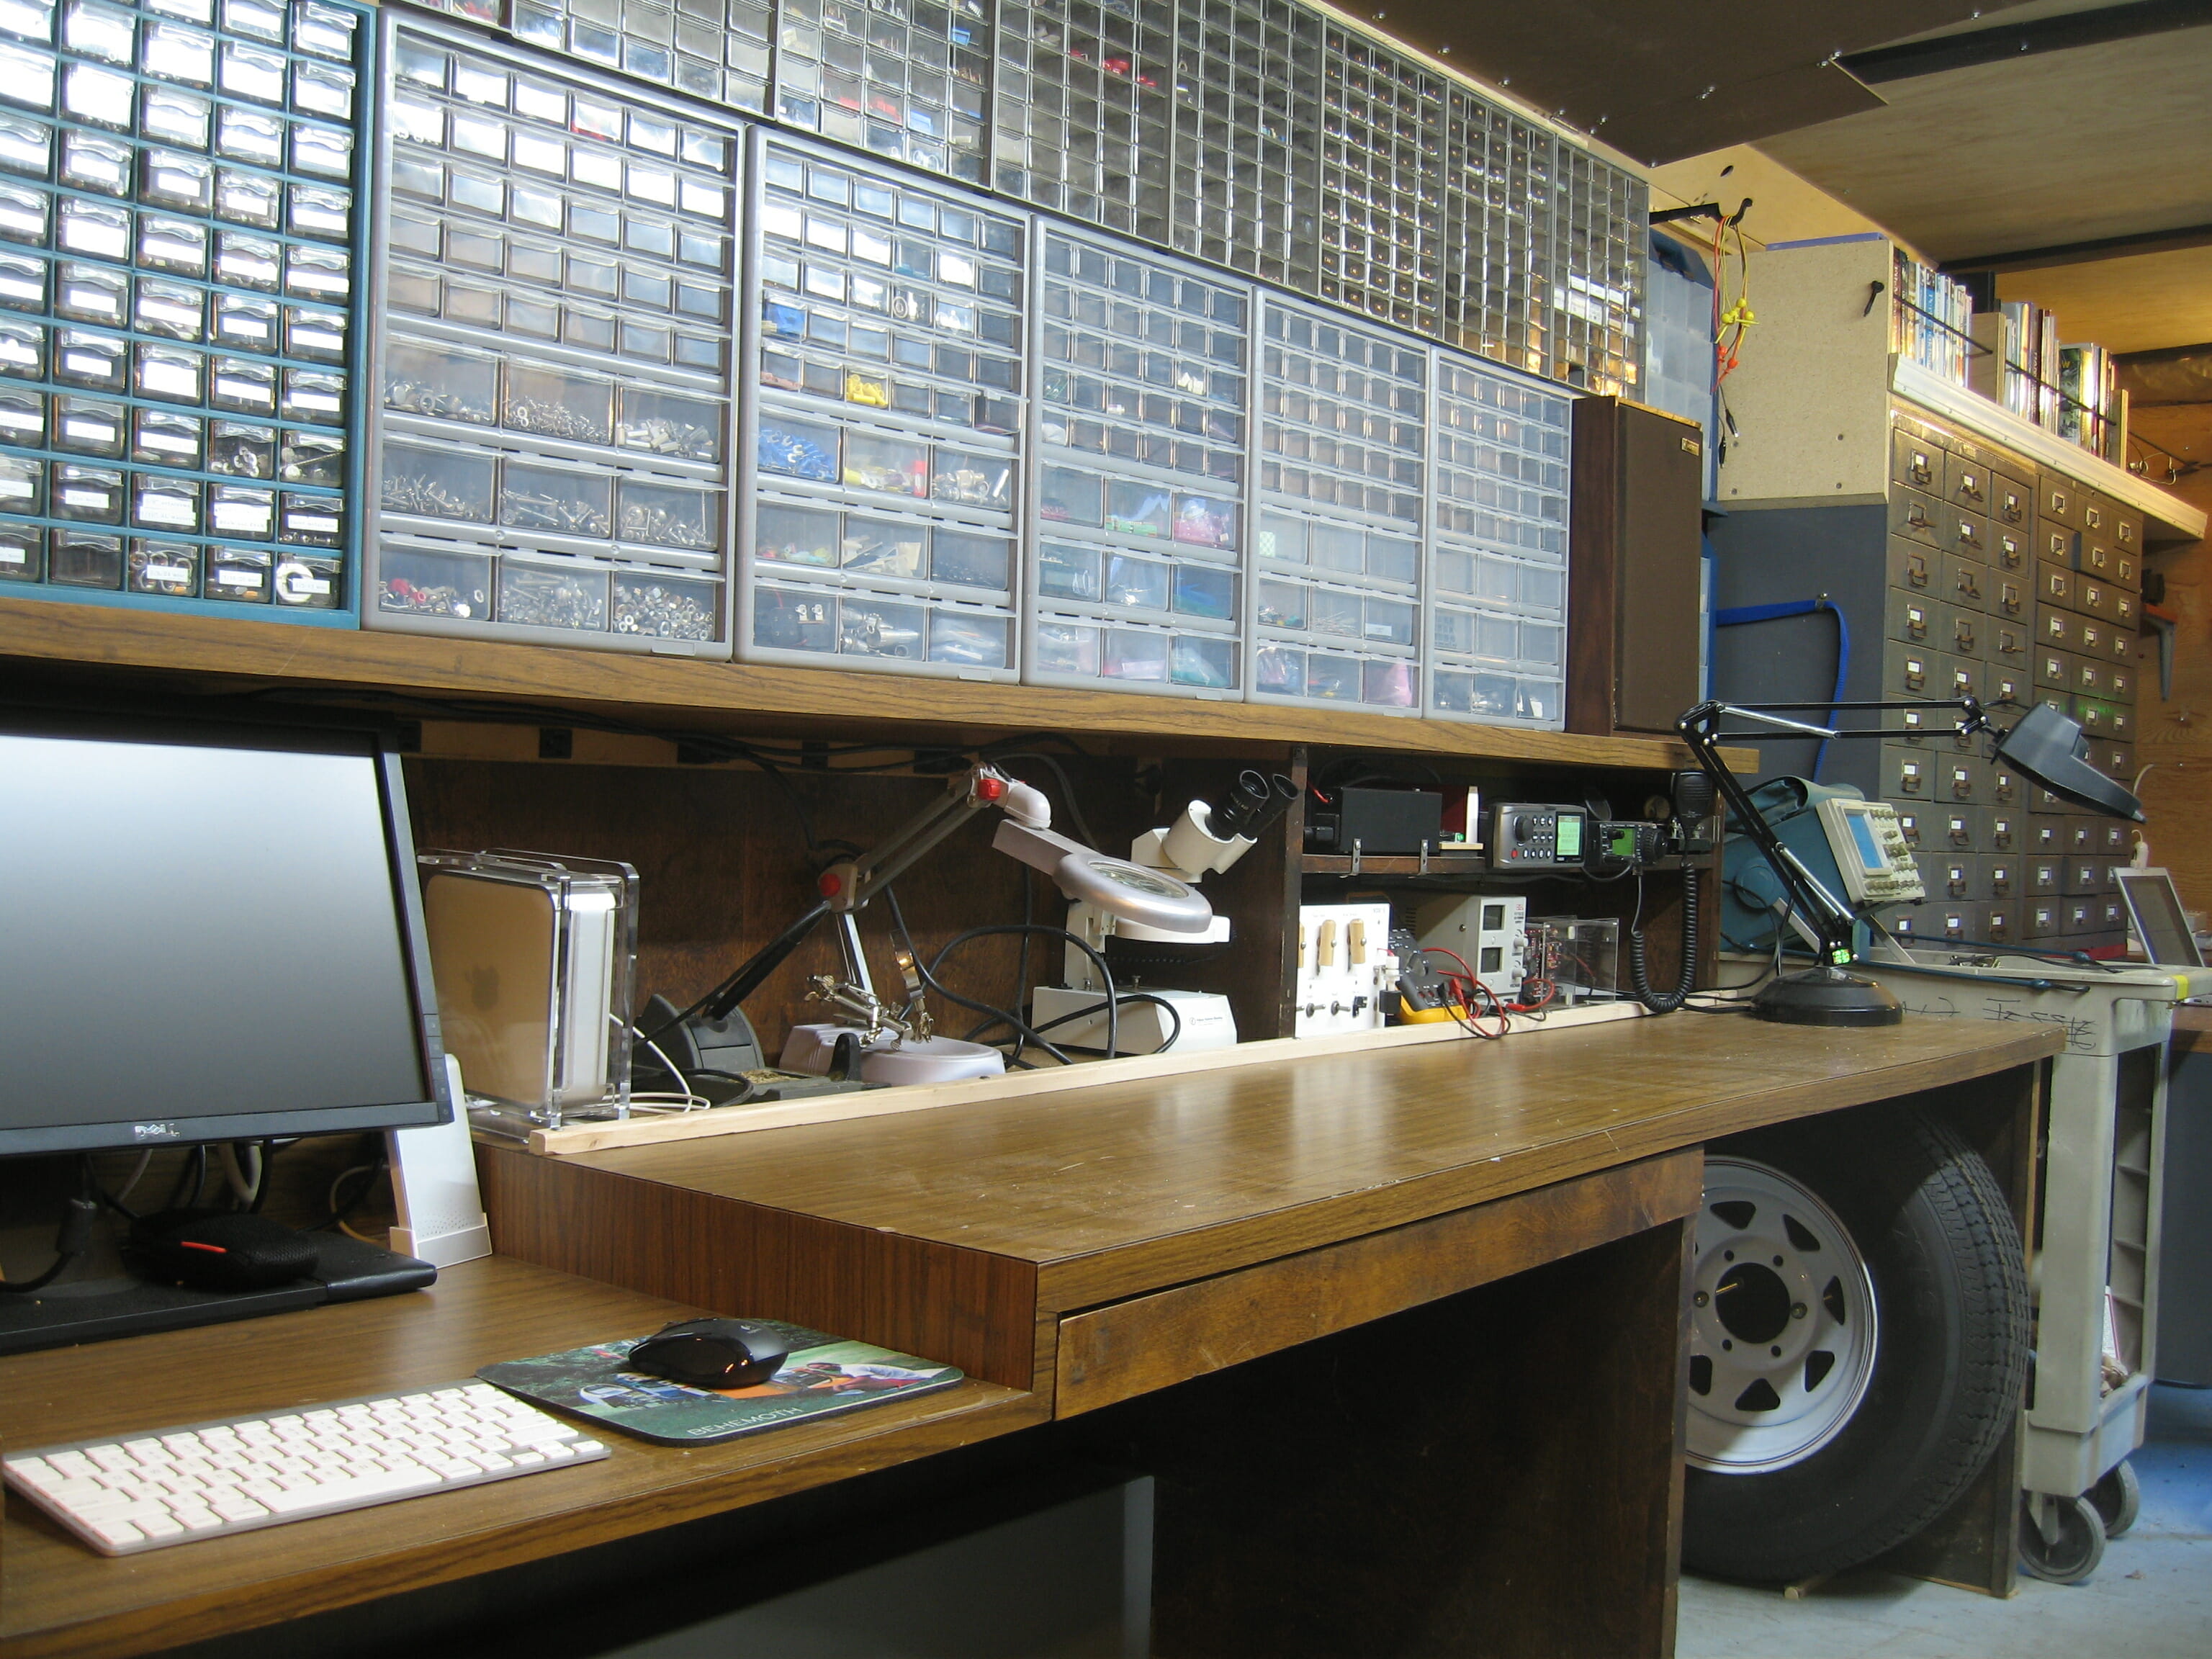
Almost immediately I found that I preferred working in the mobile lab, and it became much more than just a miniature of the old one. It contains an Icom 706 ham radio station with deployable antennas, robust security and networking tools, marine-grade stereo with embedded iPod and Sirius satellite, excellent lighting, and all the parts for my various boat projects. Resources include a cabinet of hand and small power tools, drill press, folding table saw, sander/grinder, compressor with a few air tools, bench vise, gas welder, Sailrite sewing machine, Lulzbot Mini 3D printer, and other goodies. The main lab bench offers a 4-channel Tektronix scope, Metcal soldering station, stereo microscope, power supplies, a stock of Arduino and Raspberry Pi goodies, and the usual suite of small test instruments. And the inventory, at last count, fills 869 drawers — including a wall of small-parts cabinets that are secured by a folding 8-foot whiteboard when underway.
Naturally, everything must be able to accommodate the dynamics of being on the road, so all the furniture (mostly well-built old steel stuff) is bolted down. Every drawer or cabinet has a locking method, and a pre-flight checklist by the door helps make sure I don’t do something stupid that would result in a parts gumbo on the floor after a few bumpy miles.
Let’s take a look at the details.
The Platform
Should you find yourself needing to conjure portable workspace, the first issue is the substrate itself. The harshness of life on the road requires attention to issues that don’t arise in traditional structures except perhaps briefly, during earthquakes; vibration and lateral acceleration can destroy cheap furniture and scramble your inventory.

The first decision involves sorting through trade-offs in robustness, hackability, and cost to choose the substrate itself: van, RV, trailer, container, bus, truck, or other vehicle. I’m not impressed by the construction quality of most RVs, for example, but they’re common enough to have a pretty good cost/performance ratio, and can often be found at a tempting price. The trouble with them is that most interior space is devoted to human comfort, and you’ll thus end up with either a small lab tucked into remaining corners, or a major operation to gut your rig; neither very appealing.
Buses, however, can be spectacular substrates… the MCI or Prevost machines made for Greyhound have a design life of 2-3 million miles… compared to the 100K or so of a typical RV. If I were living and traveling full-time in my mobile lab instead of just parking it, this would be my first choice.
Shipping containers are rugged and secure (from intrusion as well as the elements). They are available cheaply in US port cities, piling up due to global trade imbalance, and 40-footers can be had for as little as $1-2K if you shop around. They’re not very mobile, however, unless you own a large truck; moving them is a turnkey process, but you’ll pay. The good part of this is that you can ship one pretty much anywhere in the world and assume that it will arrive in one piece. Containers are also dimensionally standardized, and can be combined in a variety of ways to build a whole compound at a fraction of traditional construction costs. If you need to conjure a cheap shop building and don’t plan to move it very often, this is an excellent option.
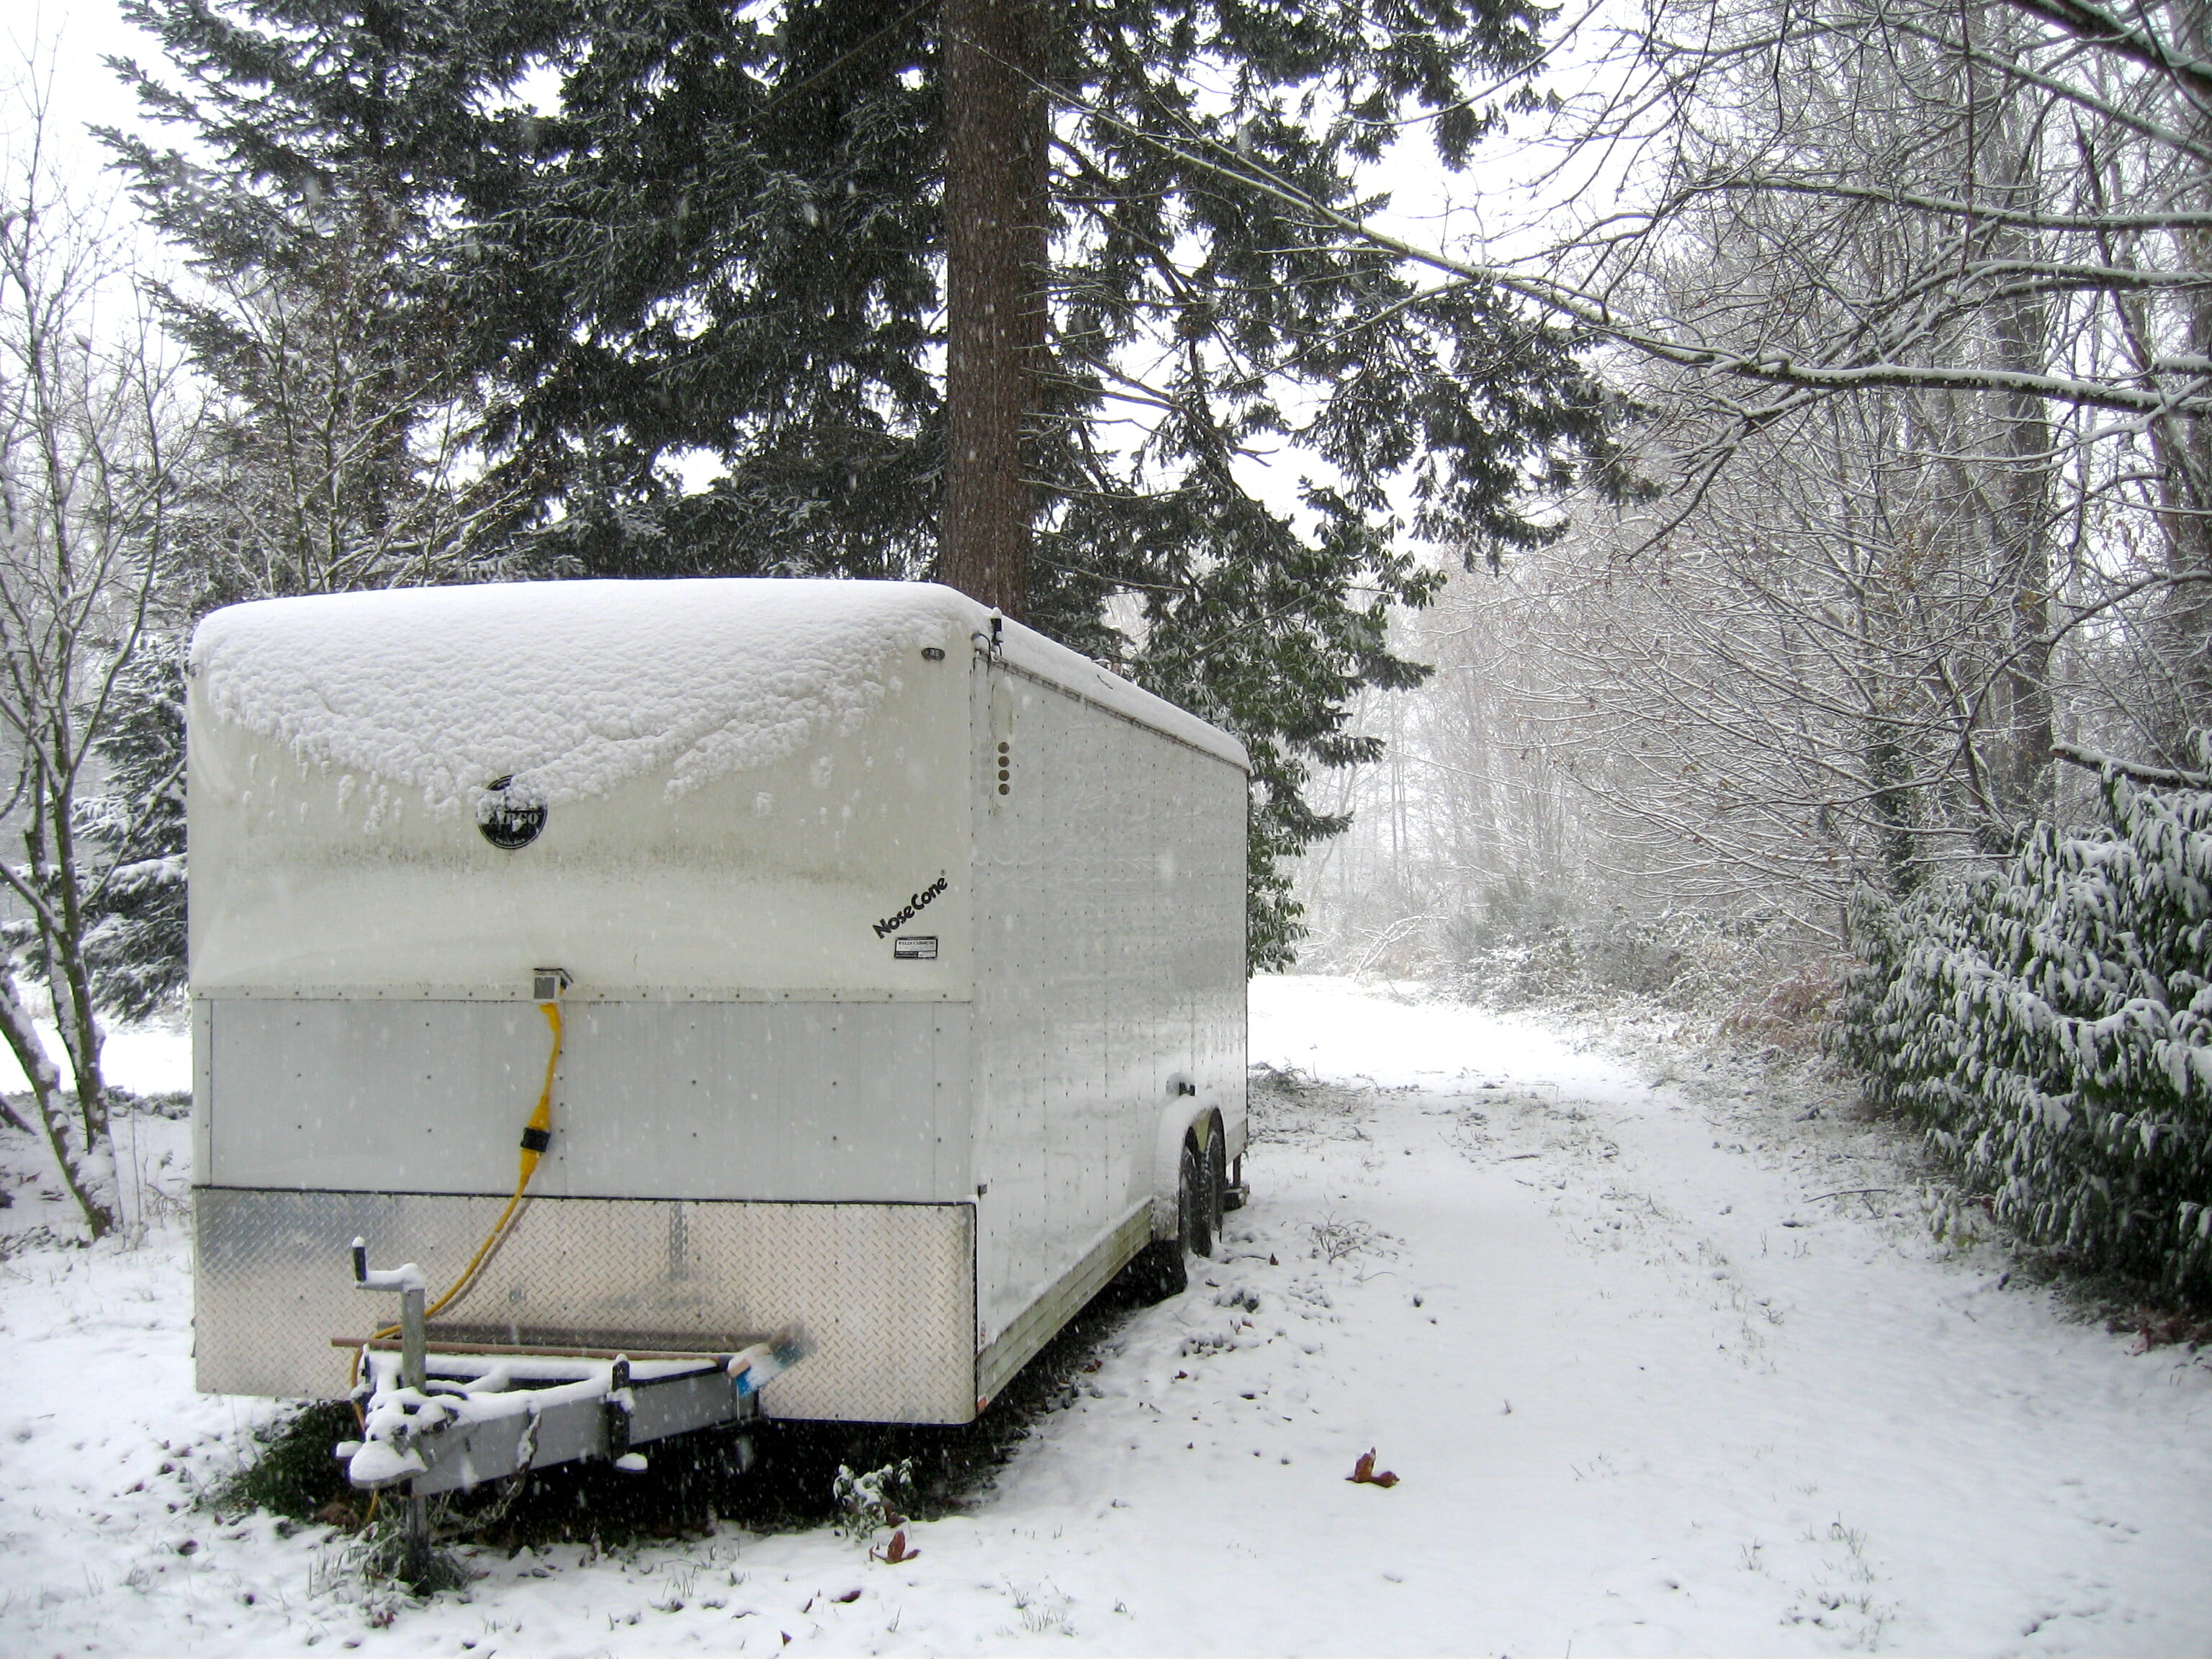
Still, I prefer more convenient mobility (and more space than a van), so for my application, I chose a utility trailer. These are made by about a dozen vendors with various levels of quality and a wide range of costs. My choice was the 24-foot EW-2424 from Wells-Cargo (this is my third from them, the others being 20 and 44 feet) but it’s by no means the only game in town. New price on these is in the $10K range, but sometimes they appear on eBay or Craigslist at bargain prices.
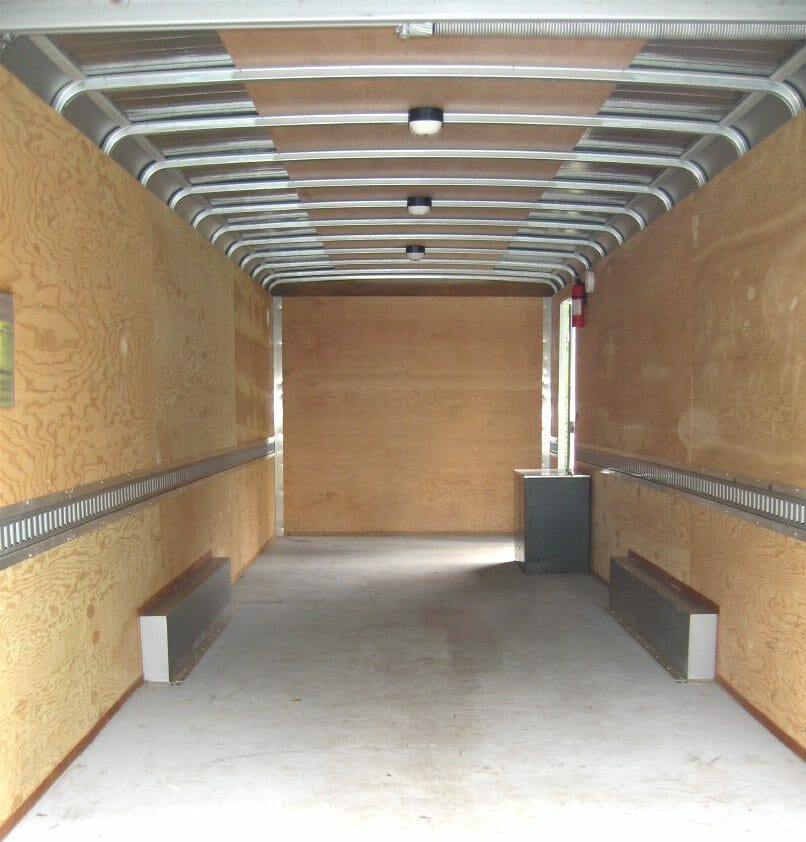
Trailers of this class are basically big mobile boxes with plywood floors and skinned walls, with metal ribs and a lightweight roof structure. They range from 8-48 feet long and 6-8 feet wide. They’re easy to hack, and can be purchased with lots of useful options, including insulation, windows, E-track, and tie-downs for lashing, power, lighting, folding steps, ramp doors, roof vents, air conditioners, and more. Mine was off-the-shelf and fairly basic, so the first job was to take it apart and insulate walls and ceiling… not a fun job.
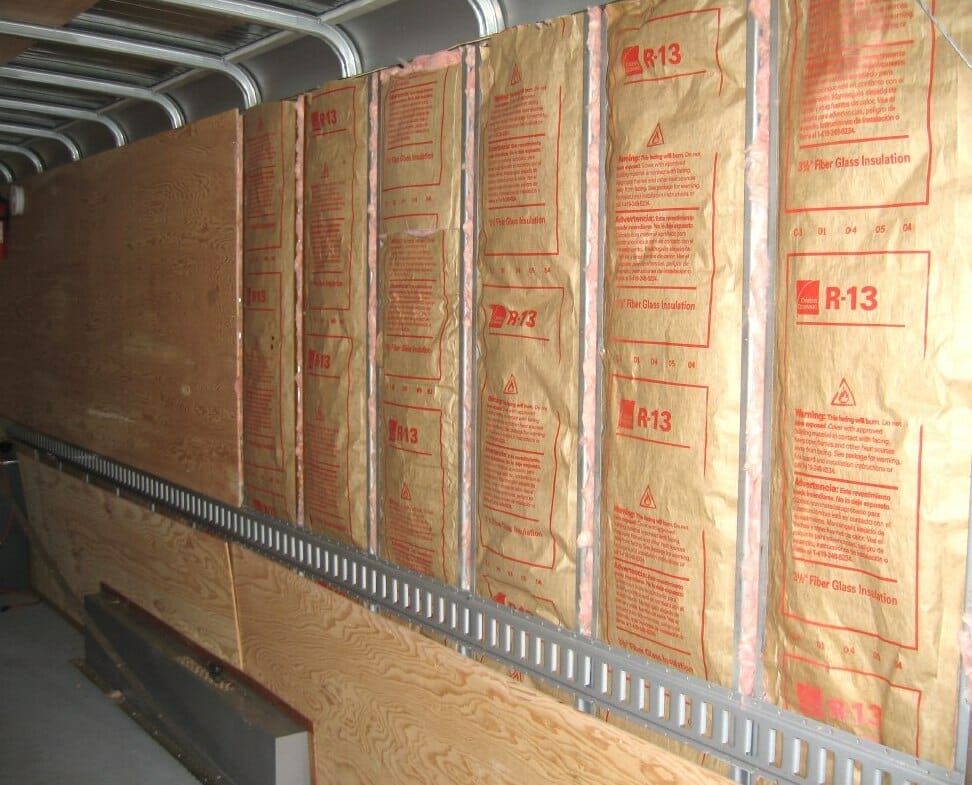
The structure is simple: exterior steel skin supported by “hat section” ribs that also carry the internal plywood sheathing. The space between is so thin that I had to peel away about half of the R-13 insulation batt thickness; the net effect is much better than the original uninsulated space, but I wouldn’t call it cozy. This part of the project was tedious, but I got to know every part of the trailer (finding and fixing a few manufacturing flaws in the process).
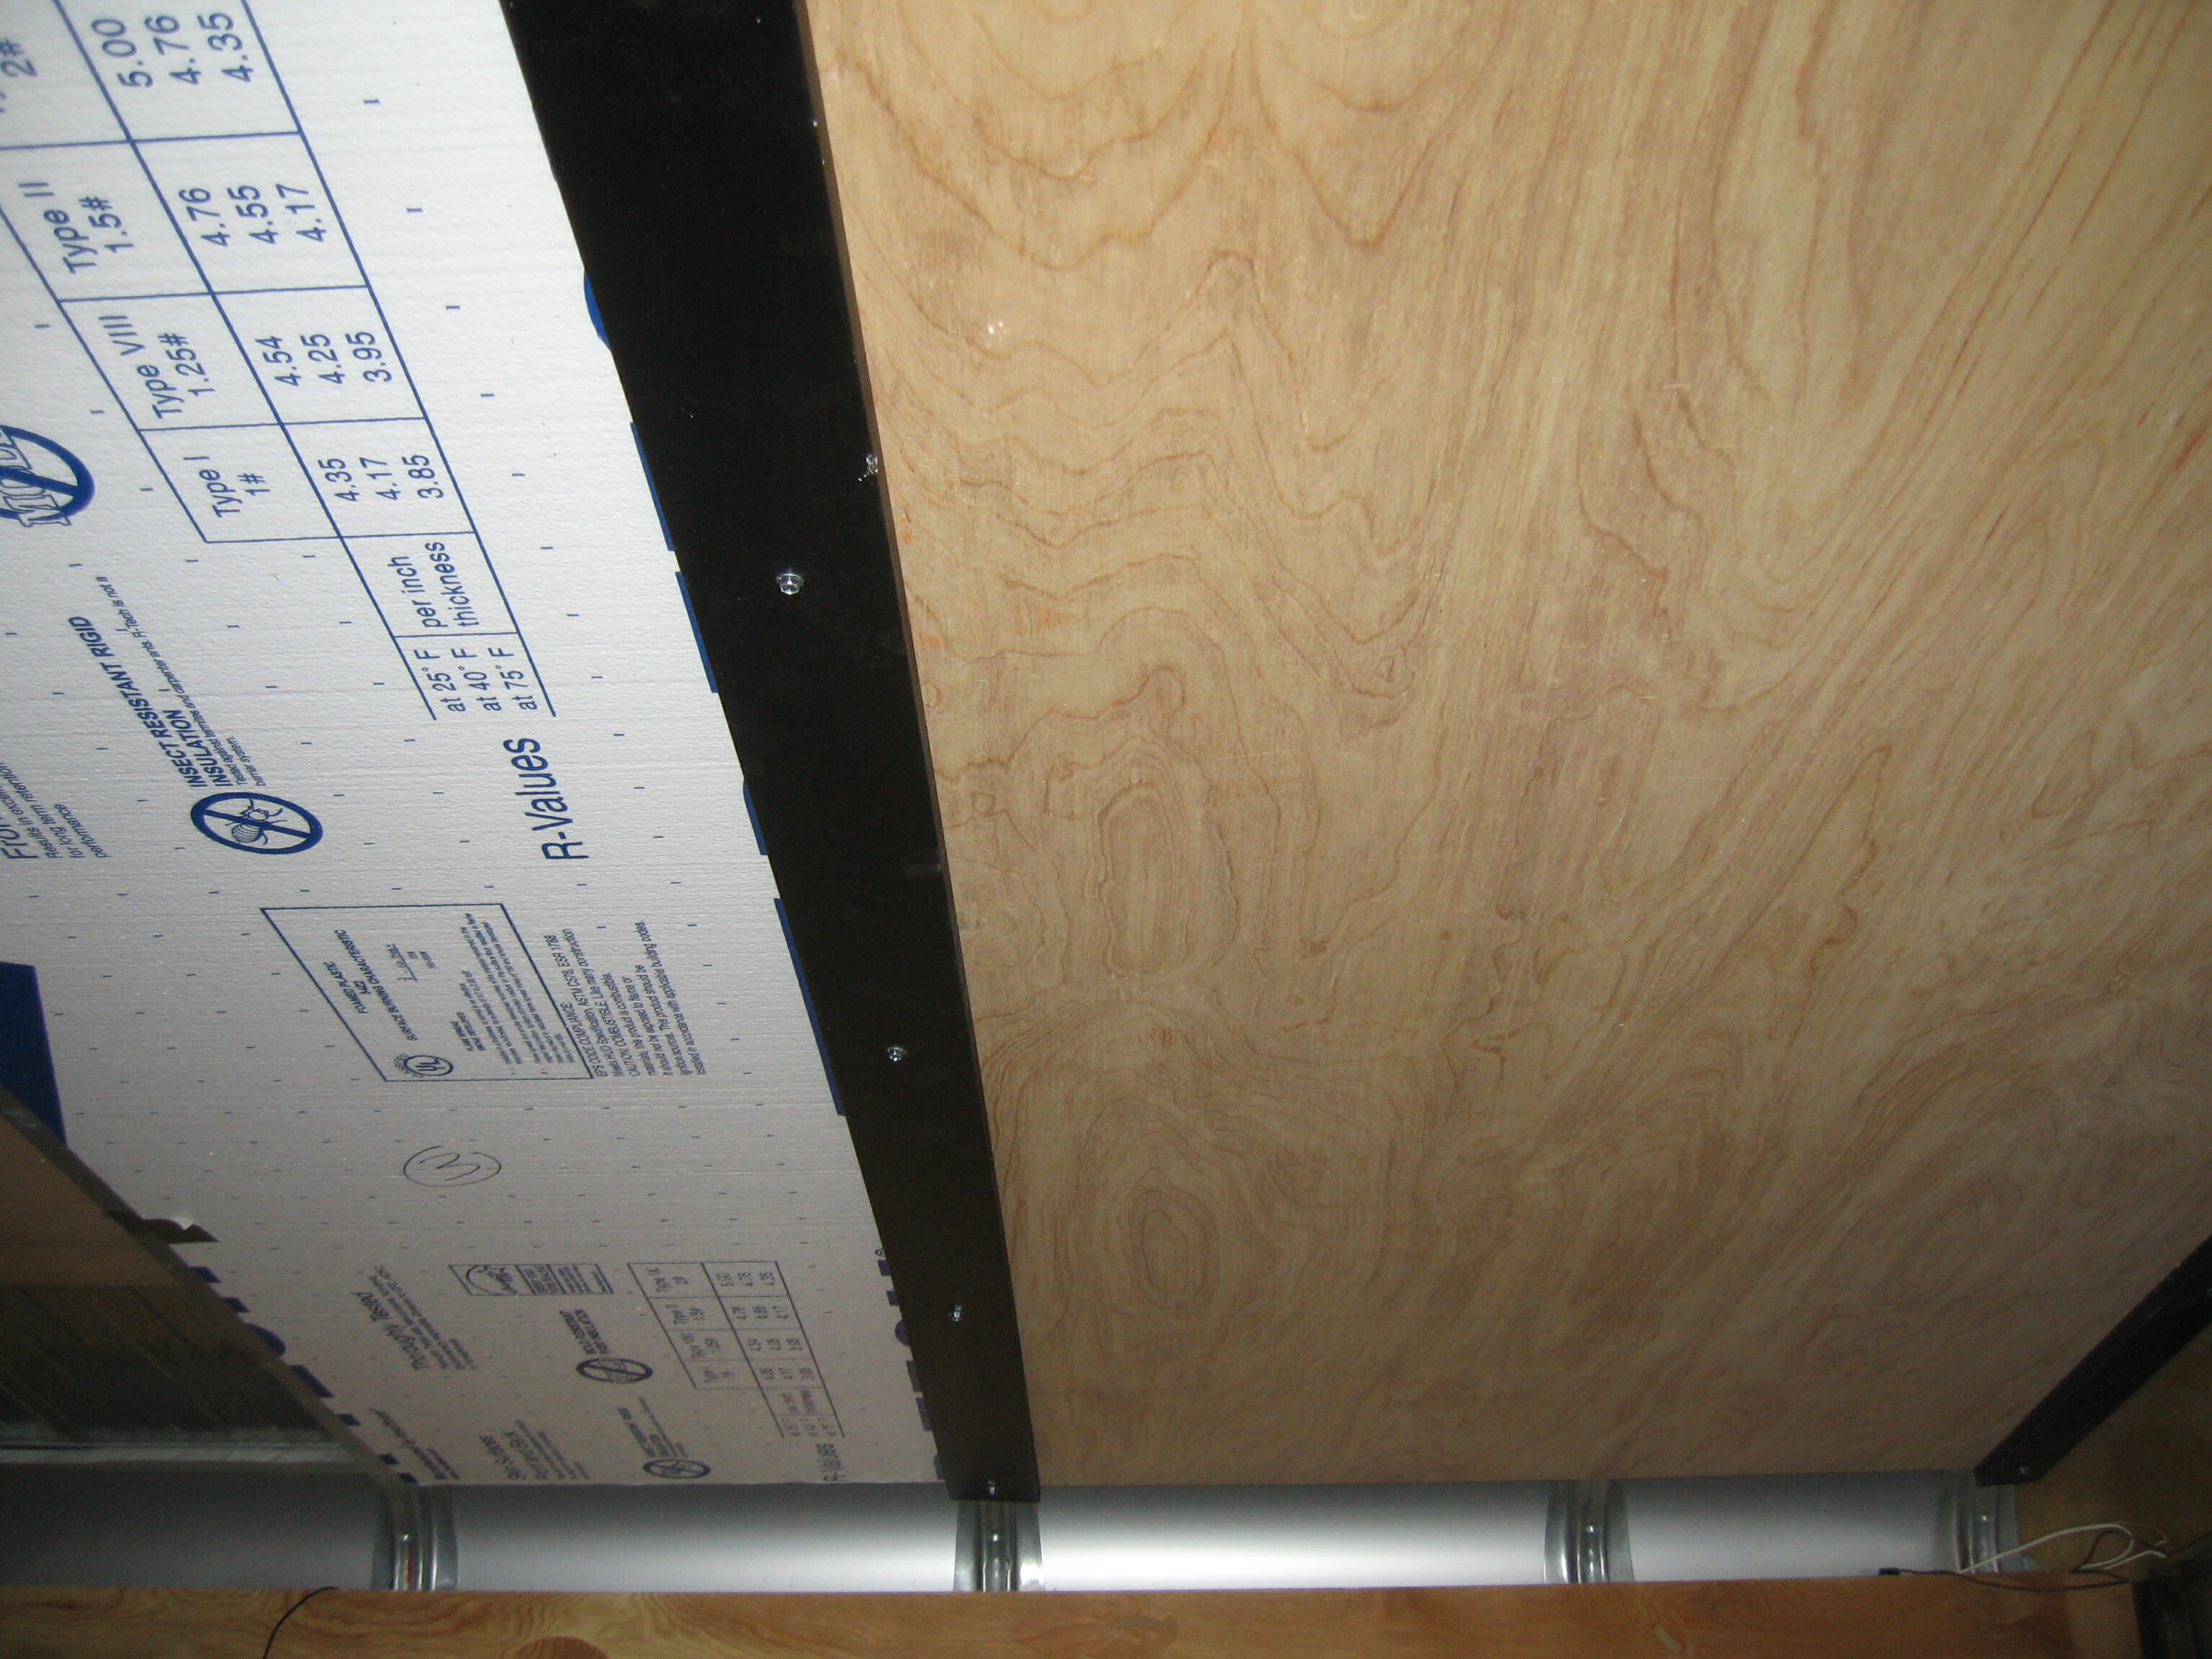
The roof involved a different method — rigid R-Tech skinned foam, an added headliner, and wooden cross-members to clamp it all in place. Your mileage may vary considerably, depending on trailer construction. If you have the opportunity to order a unit to your specs, I highly recommend letting them do this nasty job. In my case, the insulation project dragged on for a few weeks.
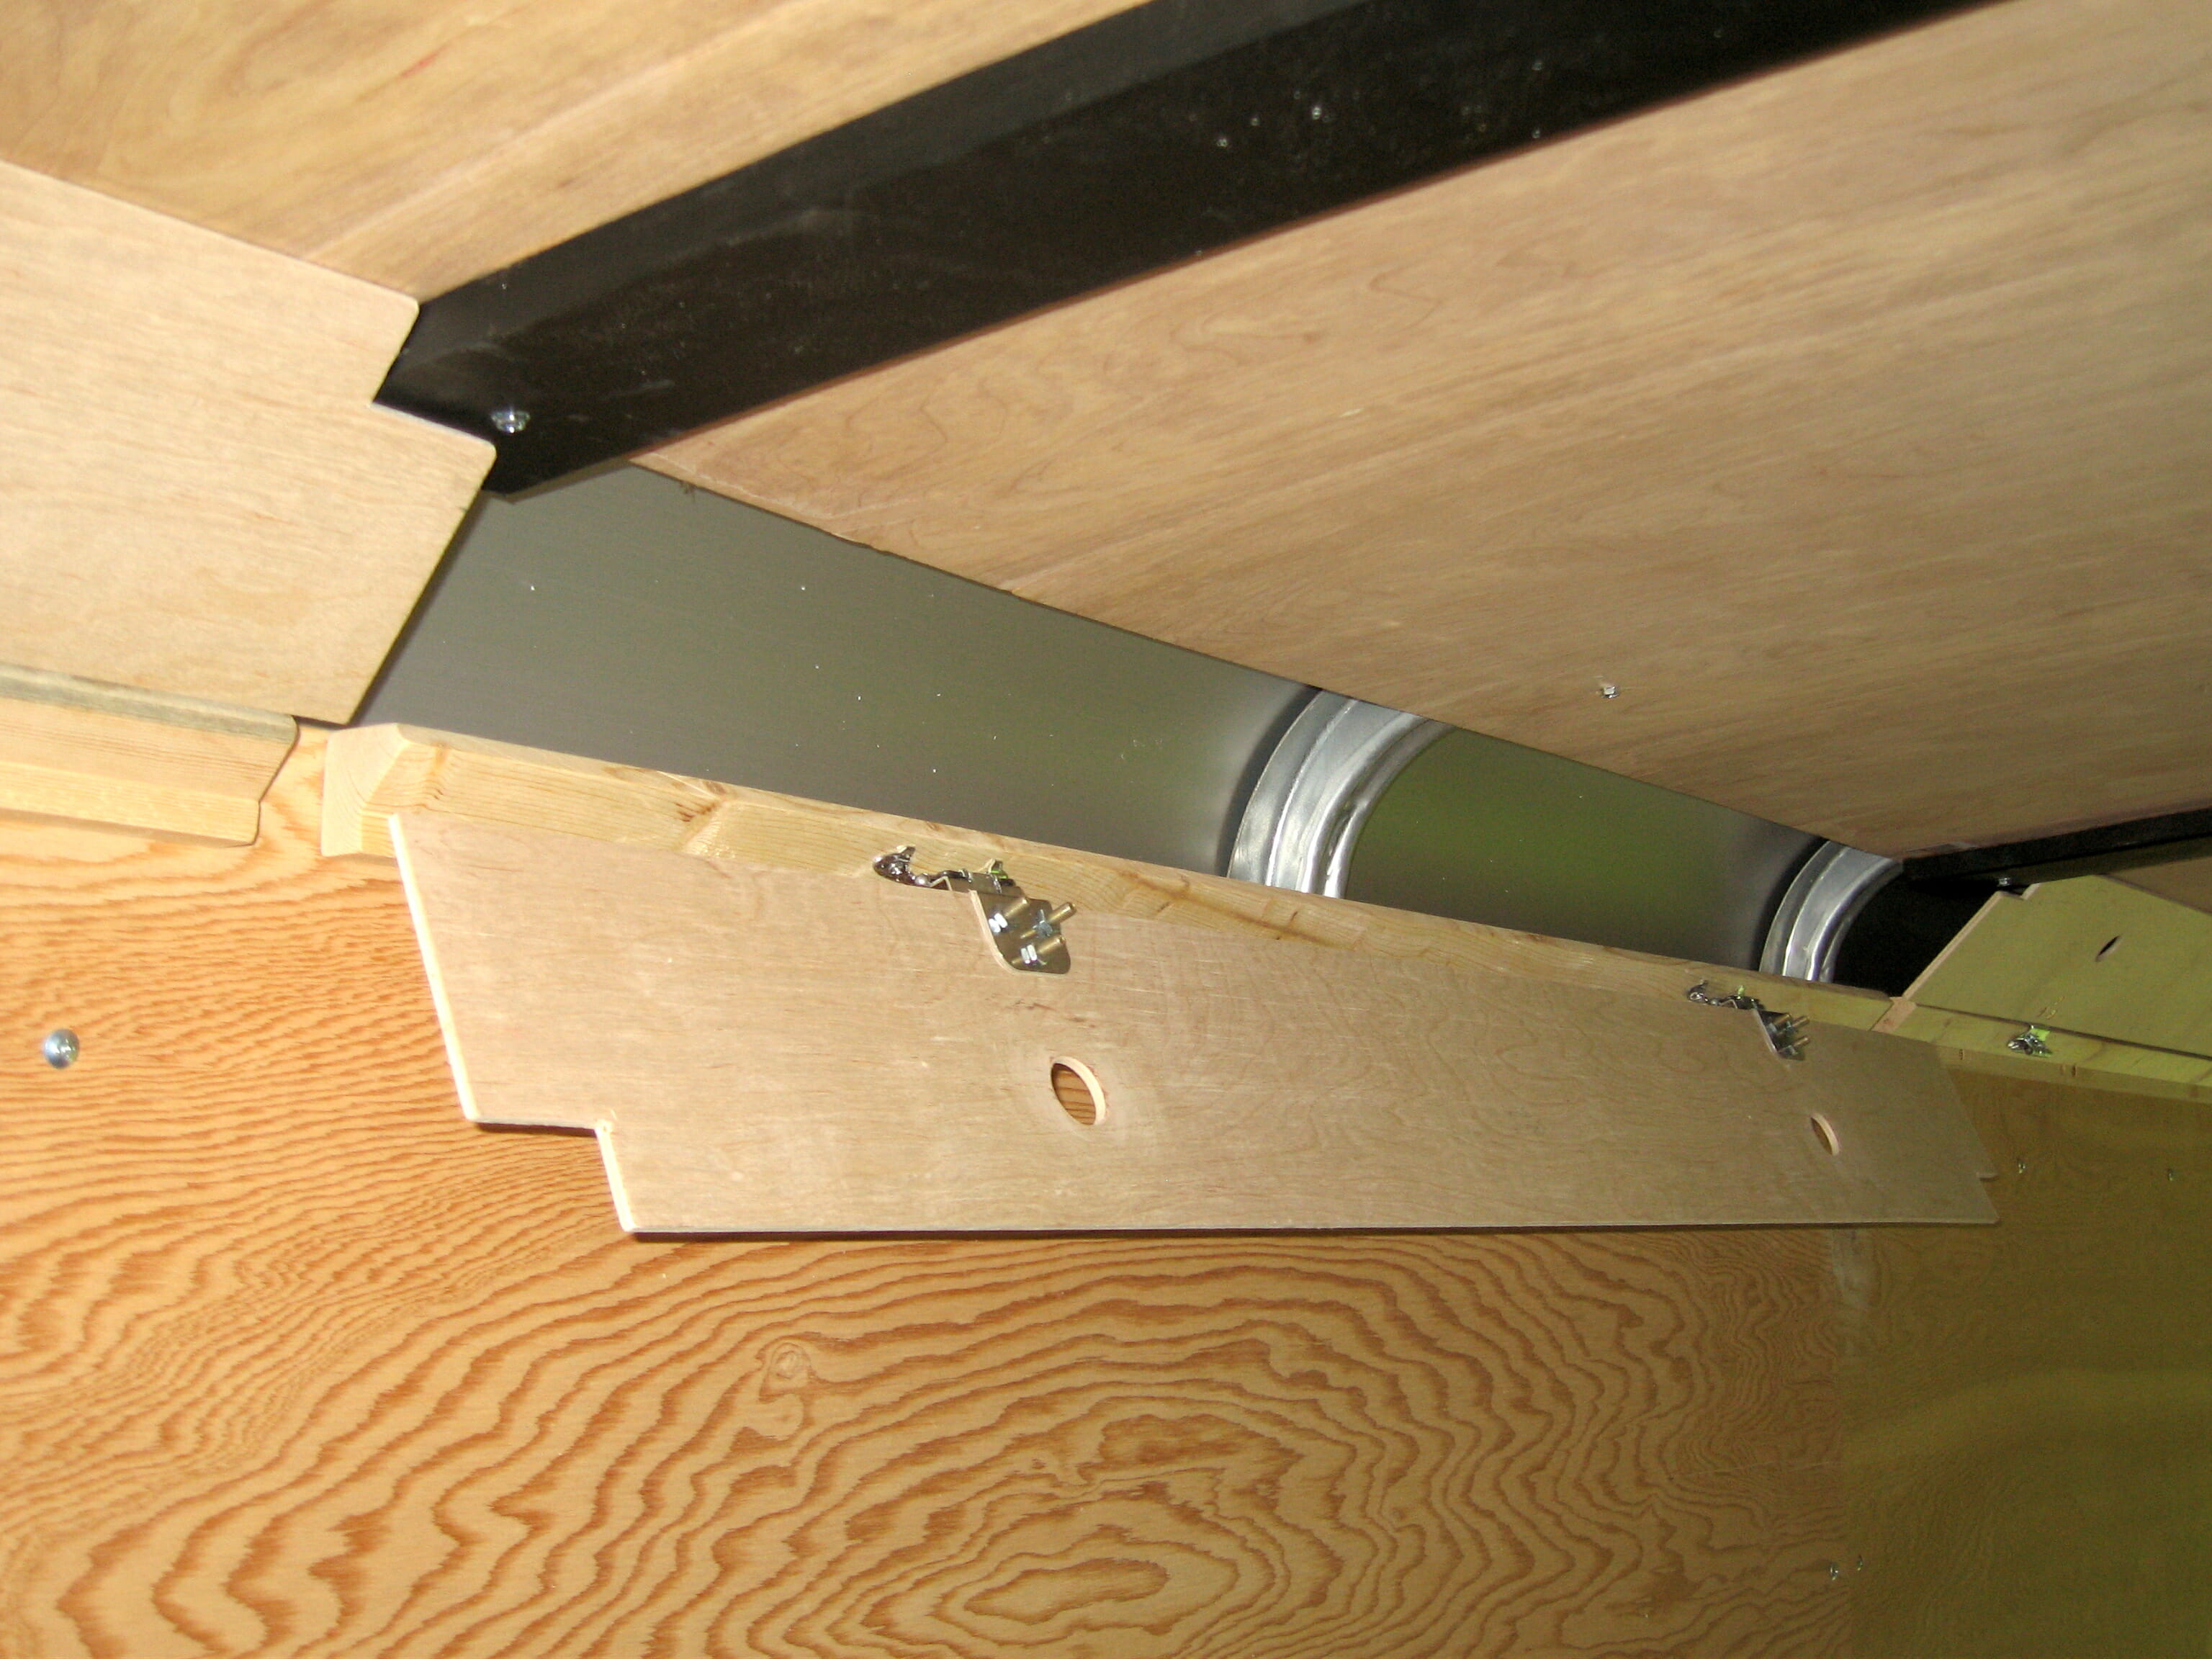
The boundary between wall and ceiling created an interesting challenge — a combination of non-square roof crown, curvy aluminum cap rail, and my own contributed imperfections. I made a dozen fitted doors with cabinet hinges, stuffing insulation behind them, and using the newly created full-length channels (with gaps every four feet) for cabling. I used a table saw to mill the hinge supports.

With the shell of the trailer now insulated and buttoned up, there was still a major issue to address before bolting down furniture. I was clearly going to need a place to install the systems — power management, security, radio communications, and networking tools. The obvious spot was at the bow, where I added a door inside what Wells-Cargo calls the “nose cone.”
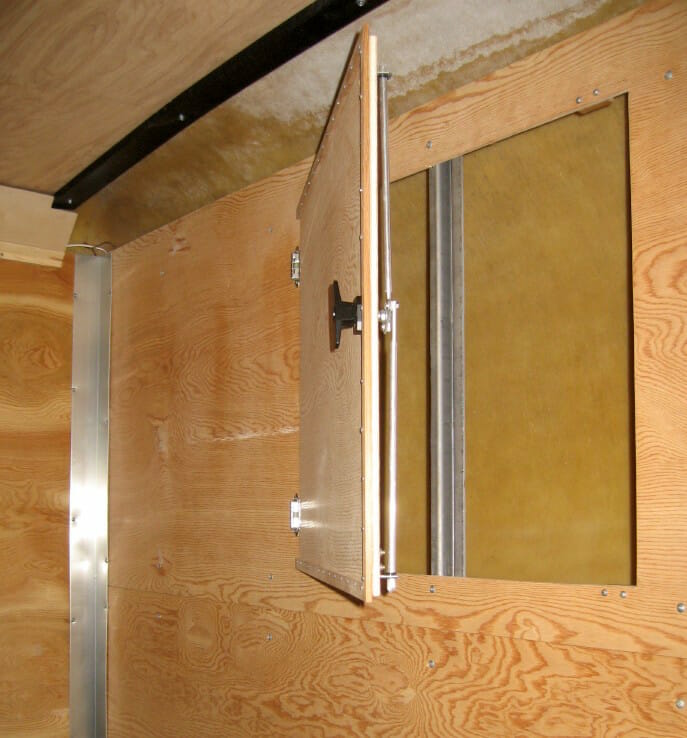
The latch is a Southco multipoint unit that engages receivers at top and bottom, making it easy to open and close the door with a single twist-lock. I insulated the fiberglass nose with a couple of batts, and mounted the 30-amp marine shore power connector near the bottom (just above the trailer tongue shelf where the generator sits). This space is now packed with wiring & control panels, and the door itself became the primary mounting surface. The open corners allowed feeding cable along the row of hinged panels on both sides, with a drop every four feet for power and networking.
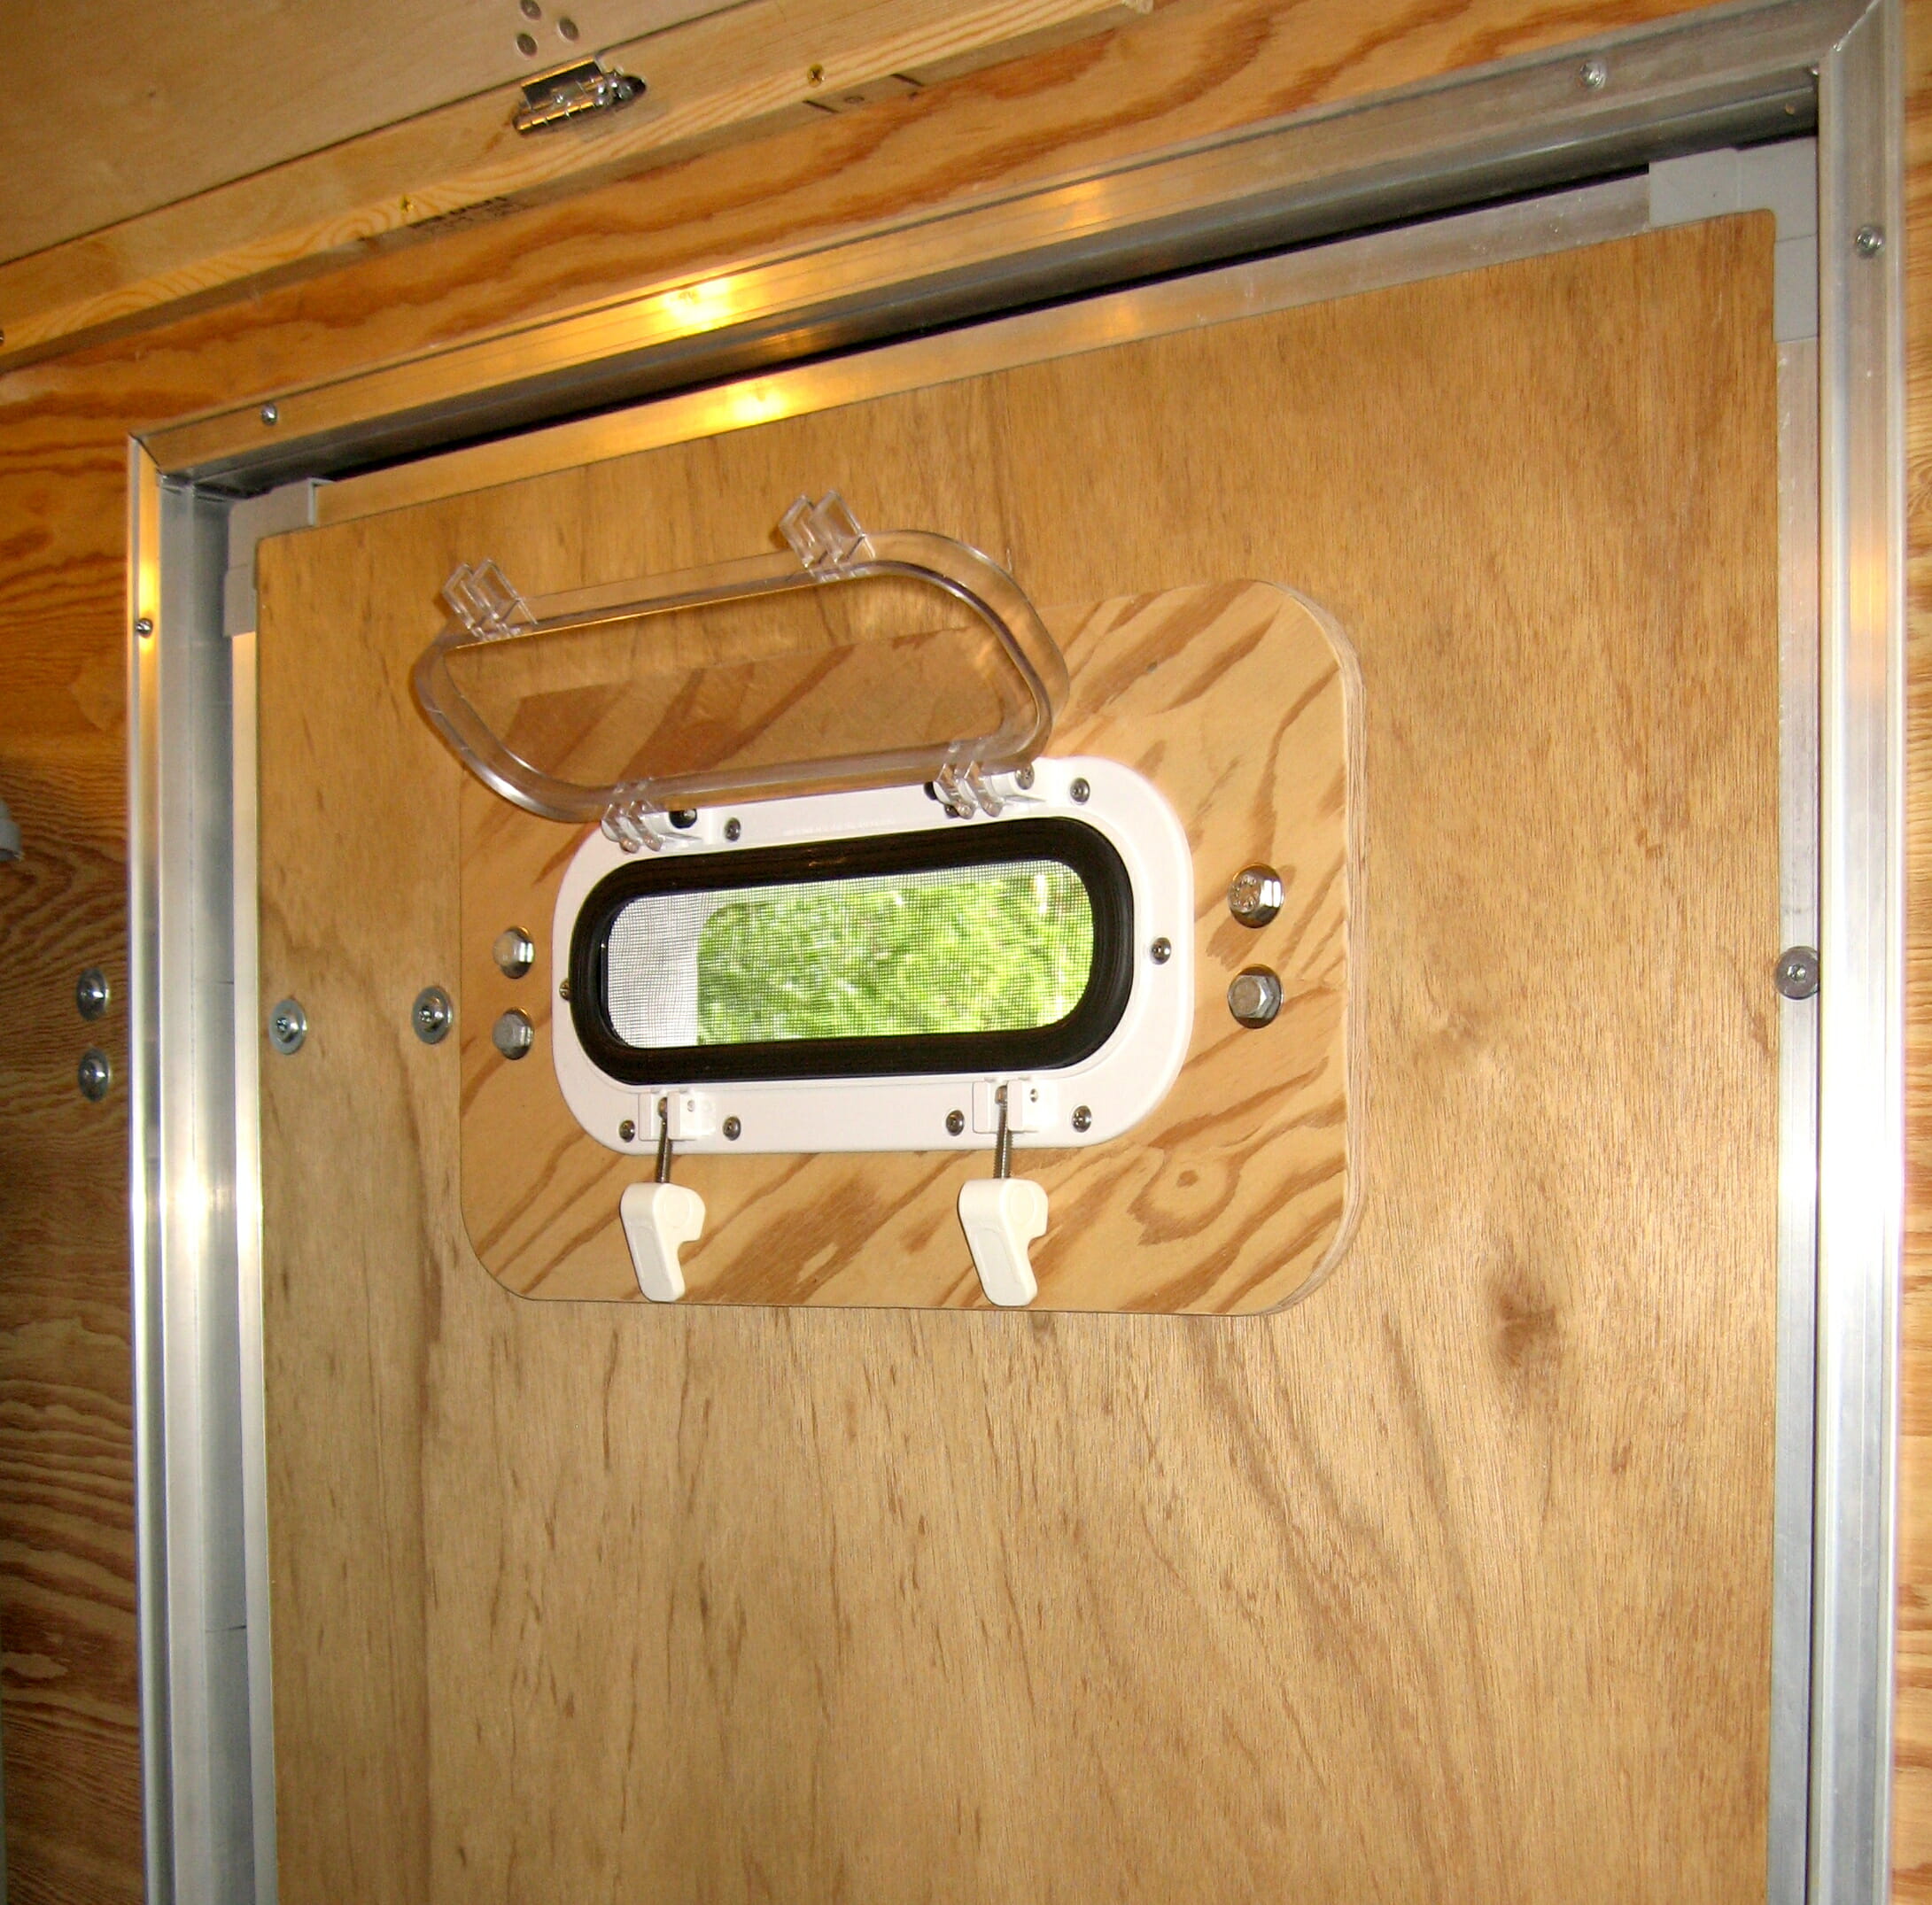
Finally, there was one remaining “substrate” issue that needed attention: with side and rear doors closed, the lab-to-be was pitch black inside. Since the trailer had not come with optional windows (and my planned interior layout gobbled all the wall space anyway), the only airflow was through a couple of tiny flow-through vents designed to prevent mildew. Besides, when sequestered inside the rig, I want a way to peek out and see who’s pounding on the door before releasing the lock!
In the nautical spirit, I prowled eBay and picked up a discontinued Beckson opening port. Given my 6′ 4″ height, I wanted this close to eye level… and that ended up removing a structural beam in the door that connects the upper hinge to the frame. Always something.
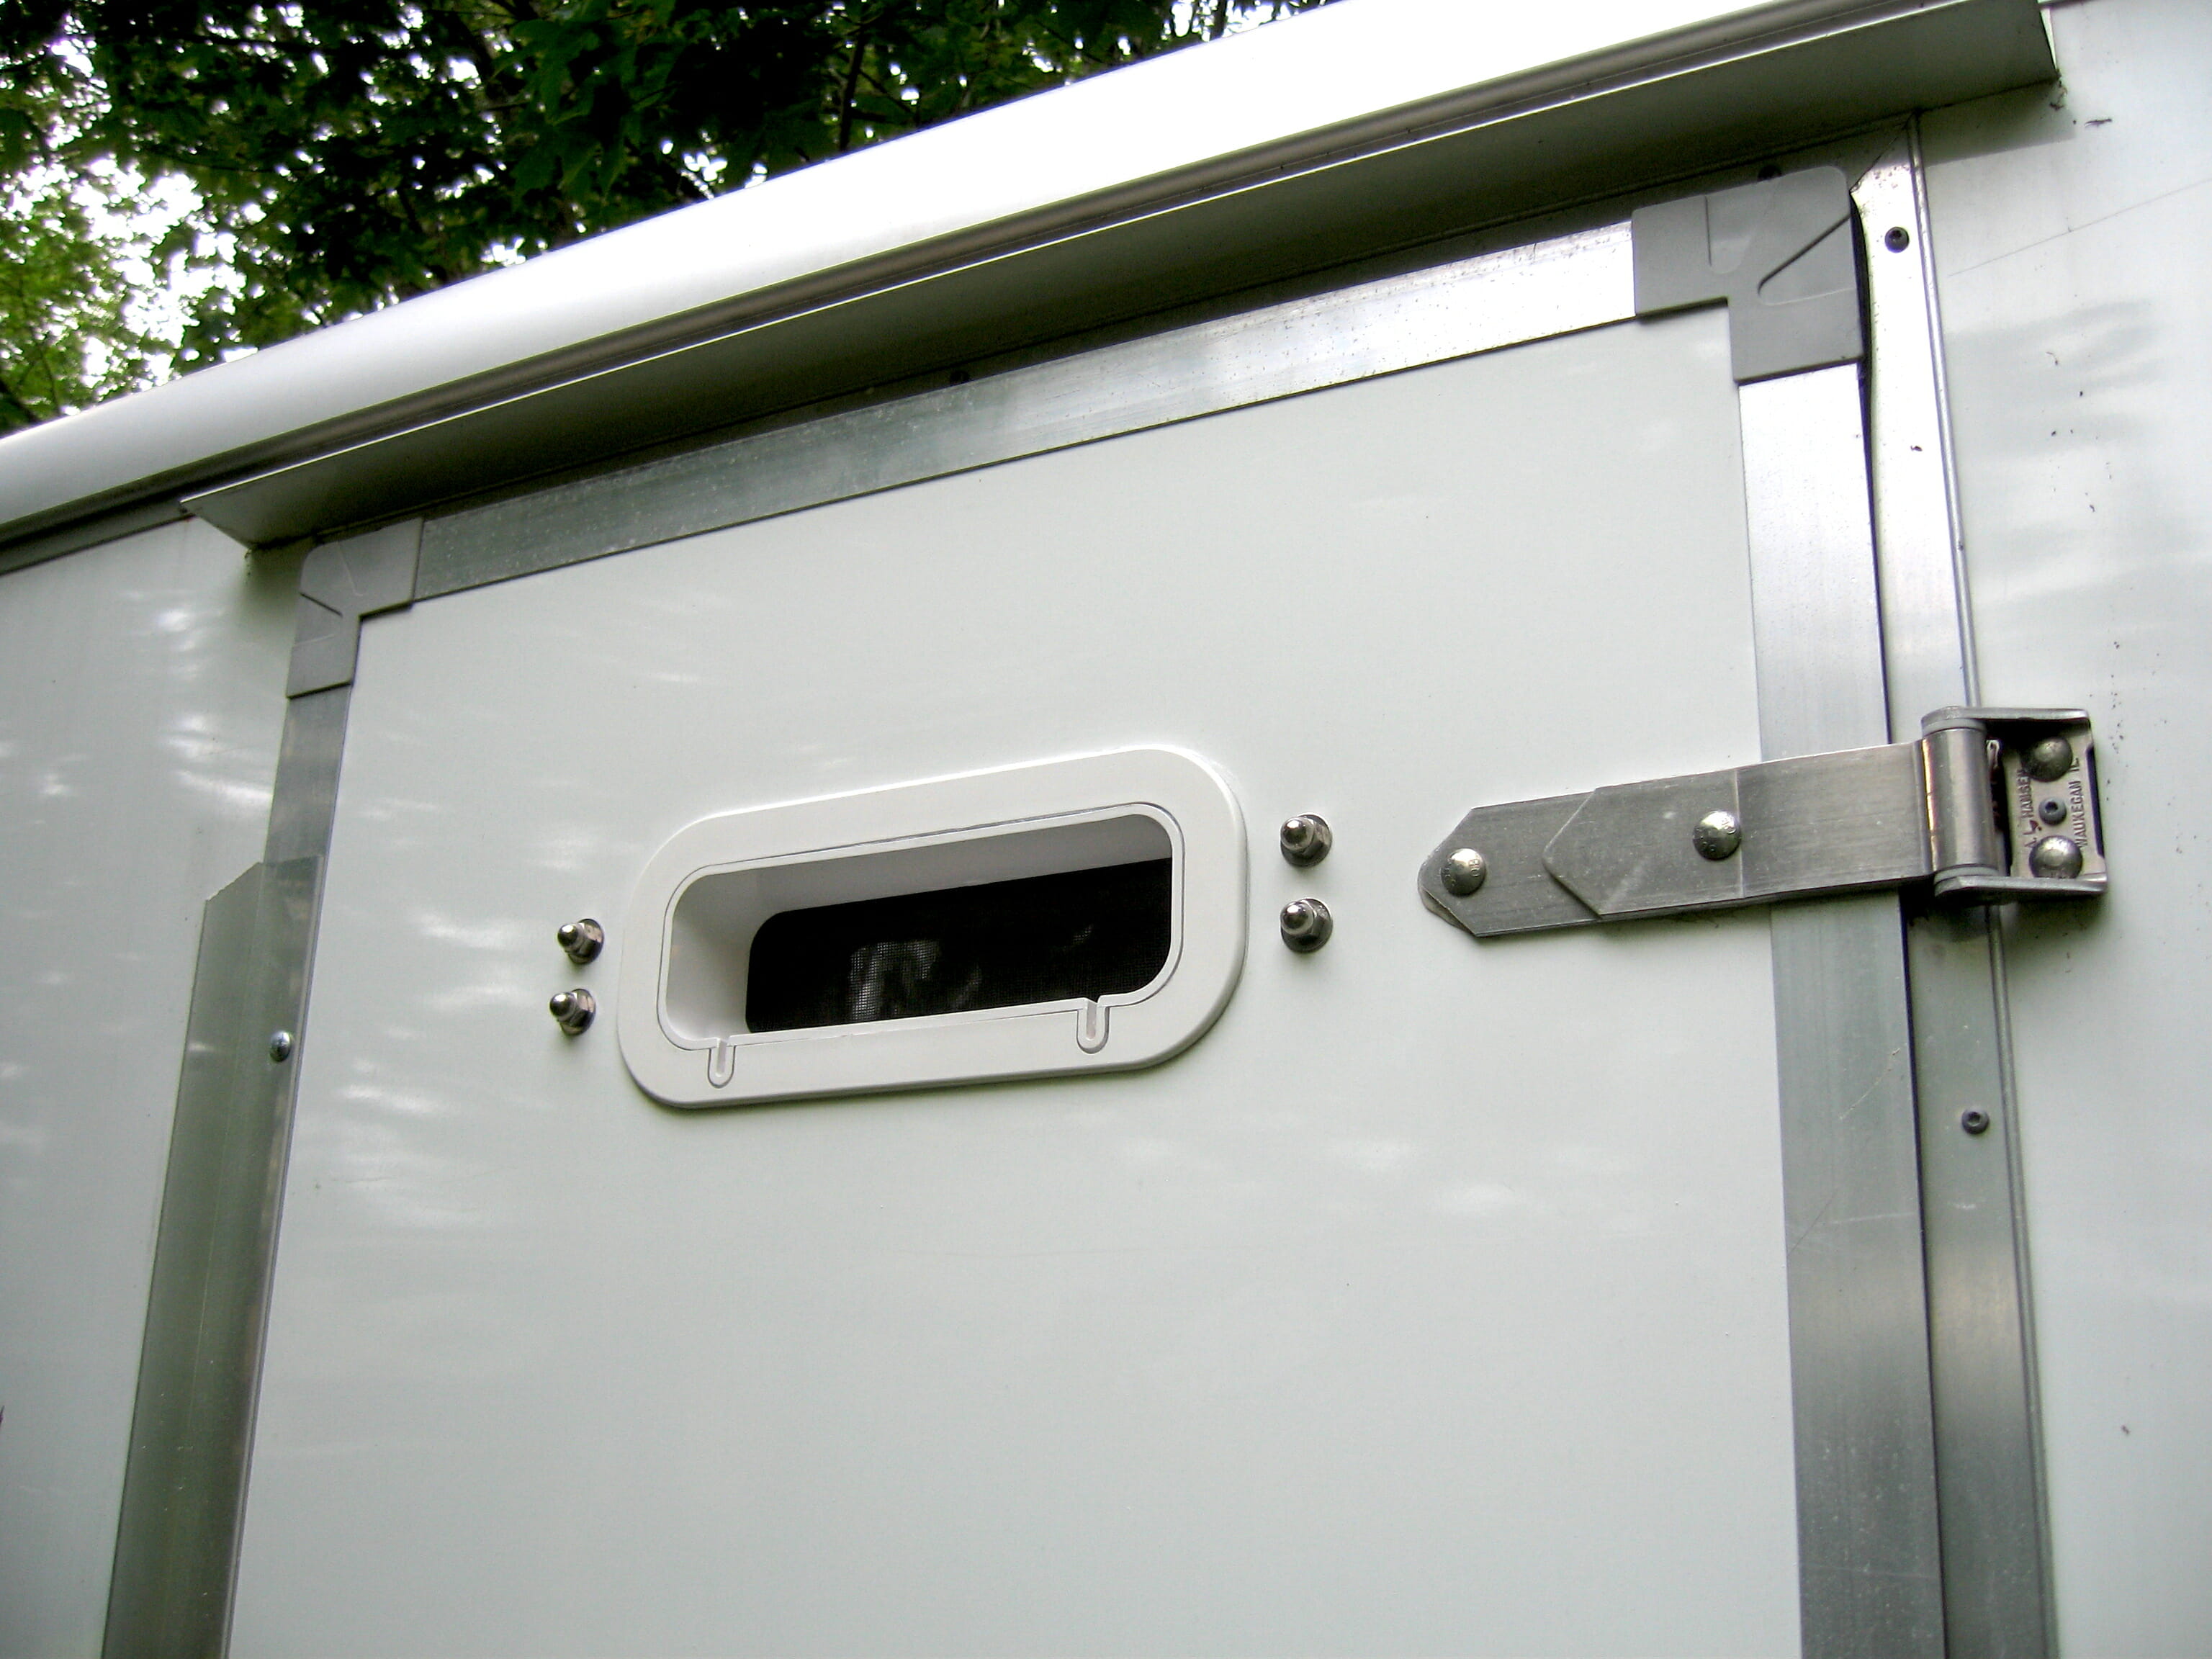
The solution is at least as strong as the original, and gives the rig a somewhat salty air: I carried the door structure around the port hole with a frame of marine plywood, and called it done. If I were doing this again, I would want more natural light and ventilation than this, and would recommend a side window or two if you have the internal wall space (and if security is not an issue). At least I never worry about people peeking in!
Furniture and Fixtures
All that boring structural stuff gets us to the point where the rig is ready to accept fixtures for work surfaces and inventory stowage.
Harsh environments like this are a challenge, although I’ve found it almost relaxing compared to building systems for the marine environment (water corrodes; salt water corrodes absolutely). The problem here is movement: lateral acceleration, high-frequency vibration, cyclic loading over time, and abrupt shock. Cheap office furniture will shake to pieces, inventory drawers need to be held shut, and high-mass items on moment arms will eventually fail.
Every mobile lab project will be shaped by the needs of its owner, so rather than any kind of recipe, I’ll offer a little smörgåsbord of methods that worked for me.
The first challenge is finding suitable furniture. Forget laminate kits from big box and office-supply stores; what you want is good stuff from the days when things were built to last. Pieces from grand old brands of the last century (Steelcase, Steelmaster, Cole Steel, and others) can be picked up at surplus places, auctions, and if you’re lucky, just for the effort of hauling them away from someone’s office renovation project. In Polaris, steel units include an 8-foot steel work table, 5-foot standing workbench, file cabinets and drawer units, a gorgeous old desk… all of which work smoothly. The only large item that diverges from the theme is a hulking 10-foot wooden multilevel table that I got about 20 years ago, almost dumped because it was too hard to move.

The newfangled way to arrange all this, of course, is to model your space in Google SketchUp… but I just cut Post-It notes to scale and played with them and “Mr. Template” on a piece of graph paper until it made sense. However it shapes up, things start to get interesting when you drag the first piece of furniture into your mobile platform and have to figure out how to keep it in one place.
My trailer has a plywood floor with steel joists underneath, so it’s easy to crawl under there with a socket wrench. Many things (like the old workbench) are simple jobs, as long as they have legs or surfaces that can be mounted either directly or with angle brackets.
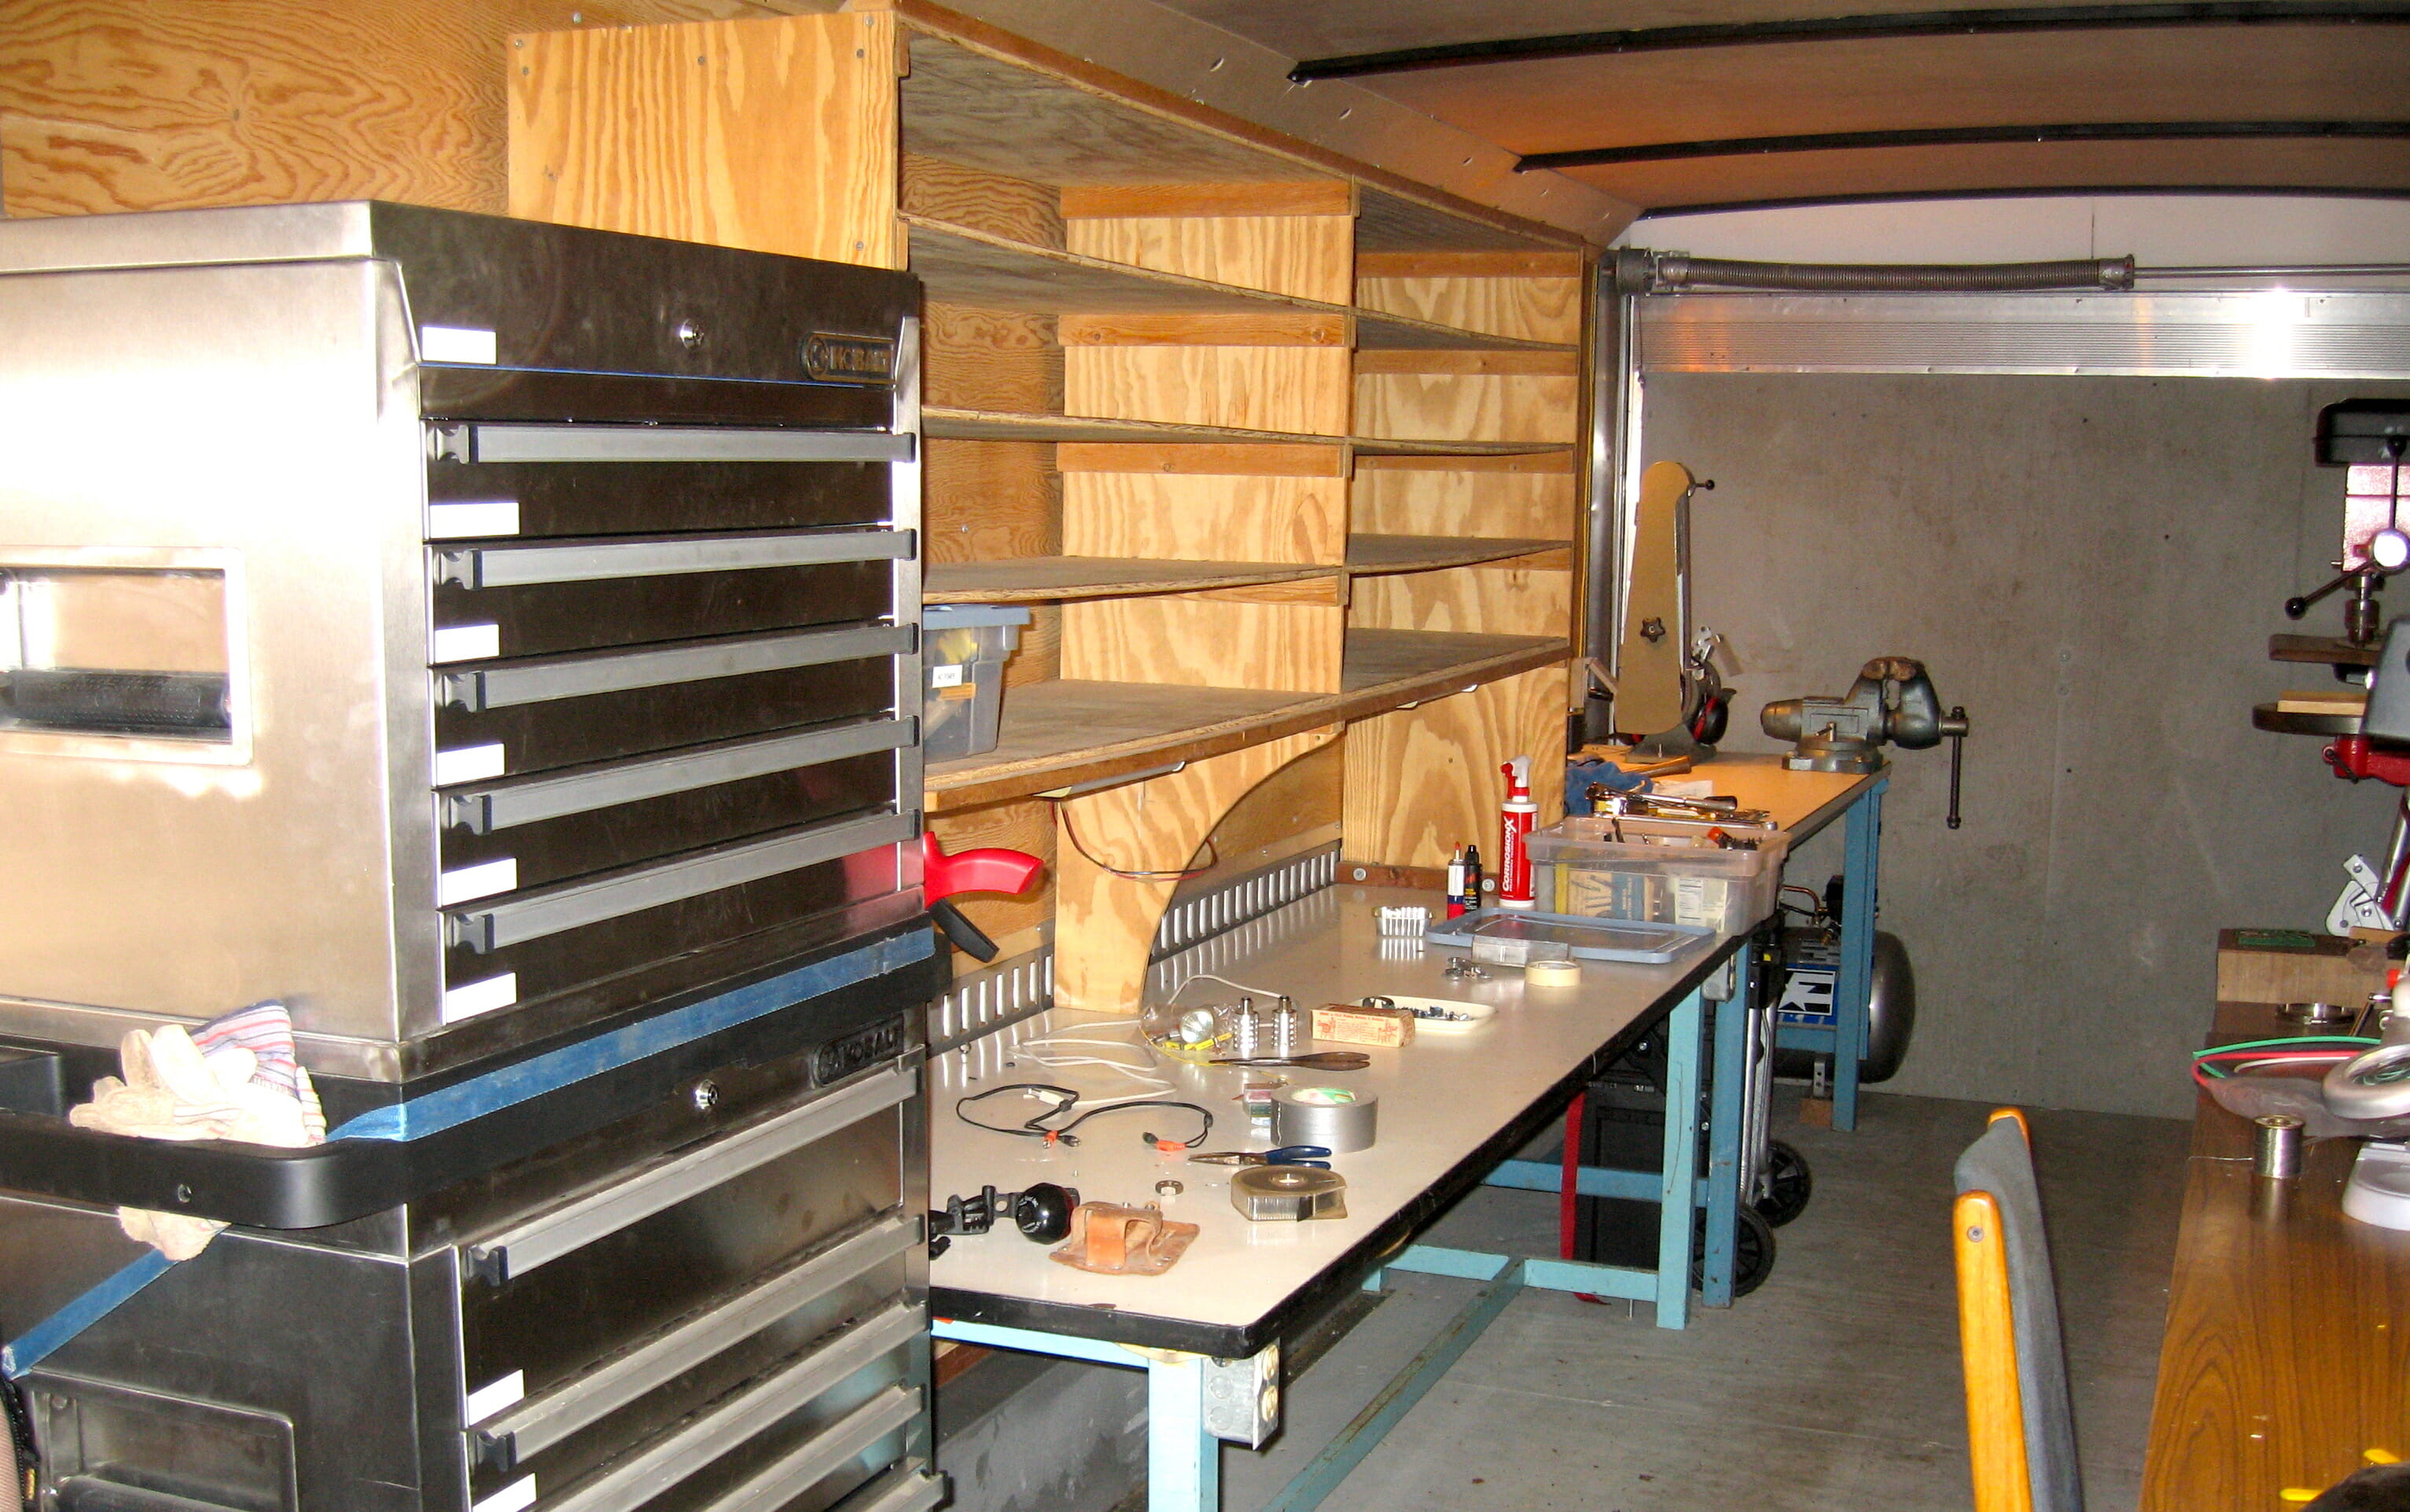
I similarly bolted down the air compressor you can see back in the corner (removing wheels and handle, then adding a block to level it), floor-mount drill press (3/8″ stainless bolts with acorn nuts on top), most of the steel furniture, the massive wood table, and a few minor items.
But attaching things to the walls gets a little trickier, with only thin plywood sheathing and steel ribs that you can hit with self-drilling sheet metal screws. I don’t trust this with significant loads, and suspect there may be some flexion in rough conditions.
If you have a chance to specify E-Track when buying a trailer, by all means you should do so — it’s a standard with lots of readily available fixtures. An “industrial” rig like a container or big truck doesn’t need this, since you can tack-weld brackets where needed… but on a lightweight machine like mine, the additional wall structure simplified mounting throughout.

There are four instances of E-Track in the photo above. The little ring hanging by itself at the left is used by a short webbing strap when underway, angled down across the drawer faces of the low cabinet to an eye bolt in the floor. The Honda generator (which moves outside to a shelf on the tongue when needed) is snugged against a foam pad on the wall by a strap that wraps around the unit and through the handle. The tall stainless tool cabinet is kept under control by a ratchet strap, and yet another provides a backup to floor bolting by wrapping around the 8-foot long bench barely visible to the right.

Easy solutions are the best, and redundancy is cheap insurance. I also use simple strapping to keep the folding Bosch table saw from wandering around, and while underway the drill press is stabilized to the wall to keep it from wrenching itself loose. That photo also shows some clunky wall brackets for shop utility items, and a little fold-down work table supported by a wire bridle to fixtures in the ceiling.
Dealing with Inventory
Keeping furniture and other big stuff under control is mostly straightforward. But preventing little stuff from flying around is much trickier.
Where possible, I took advantage of existing locking schemes (steel desk, file cabinet, and the tall tool box). The wood desk has a drawer that’s easy to lock with a pair of screw eyes and a pin. But there are three major “inventory regions” that involved special challenges.
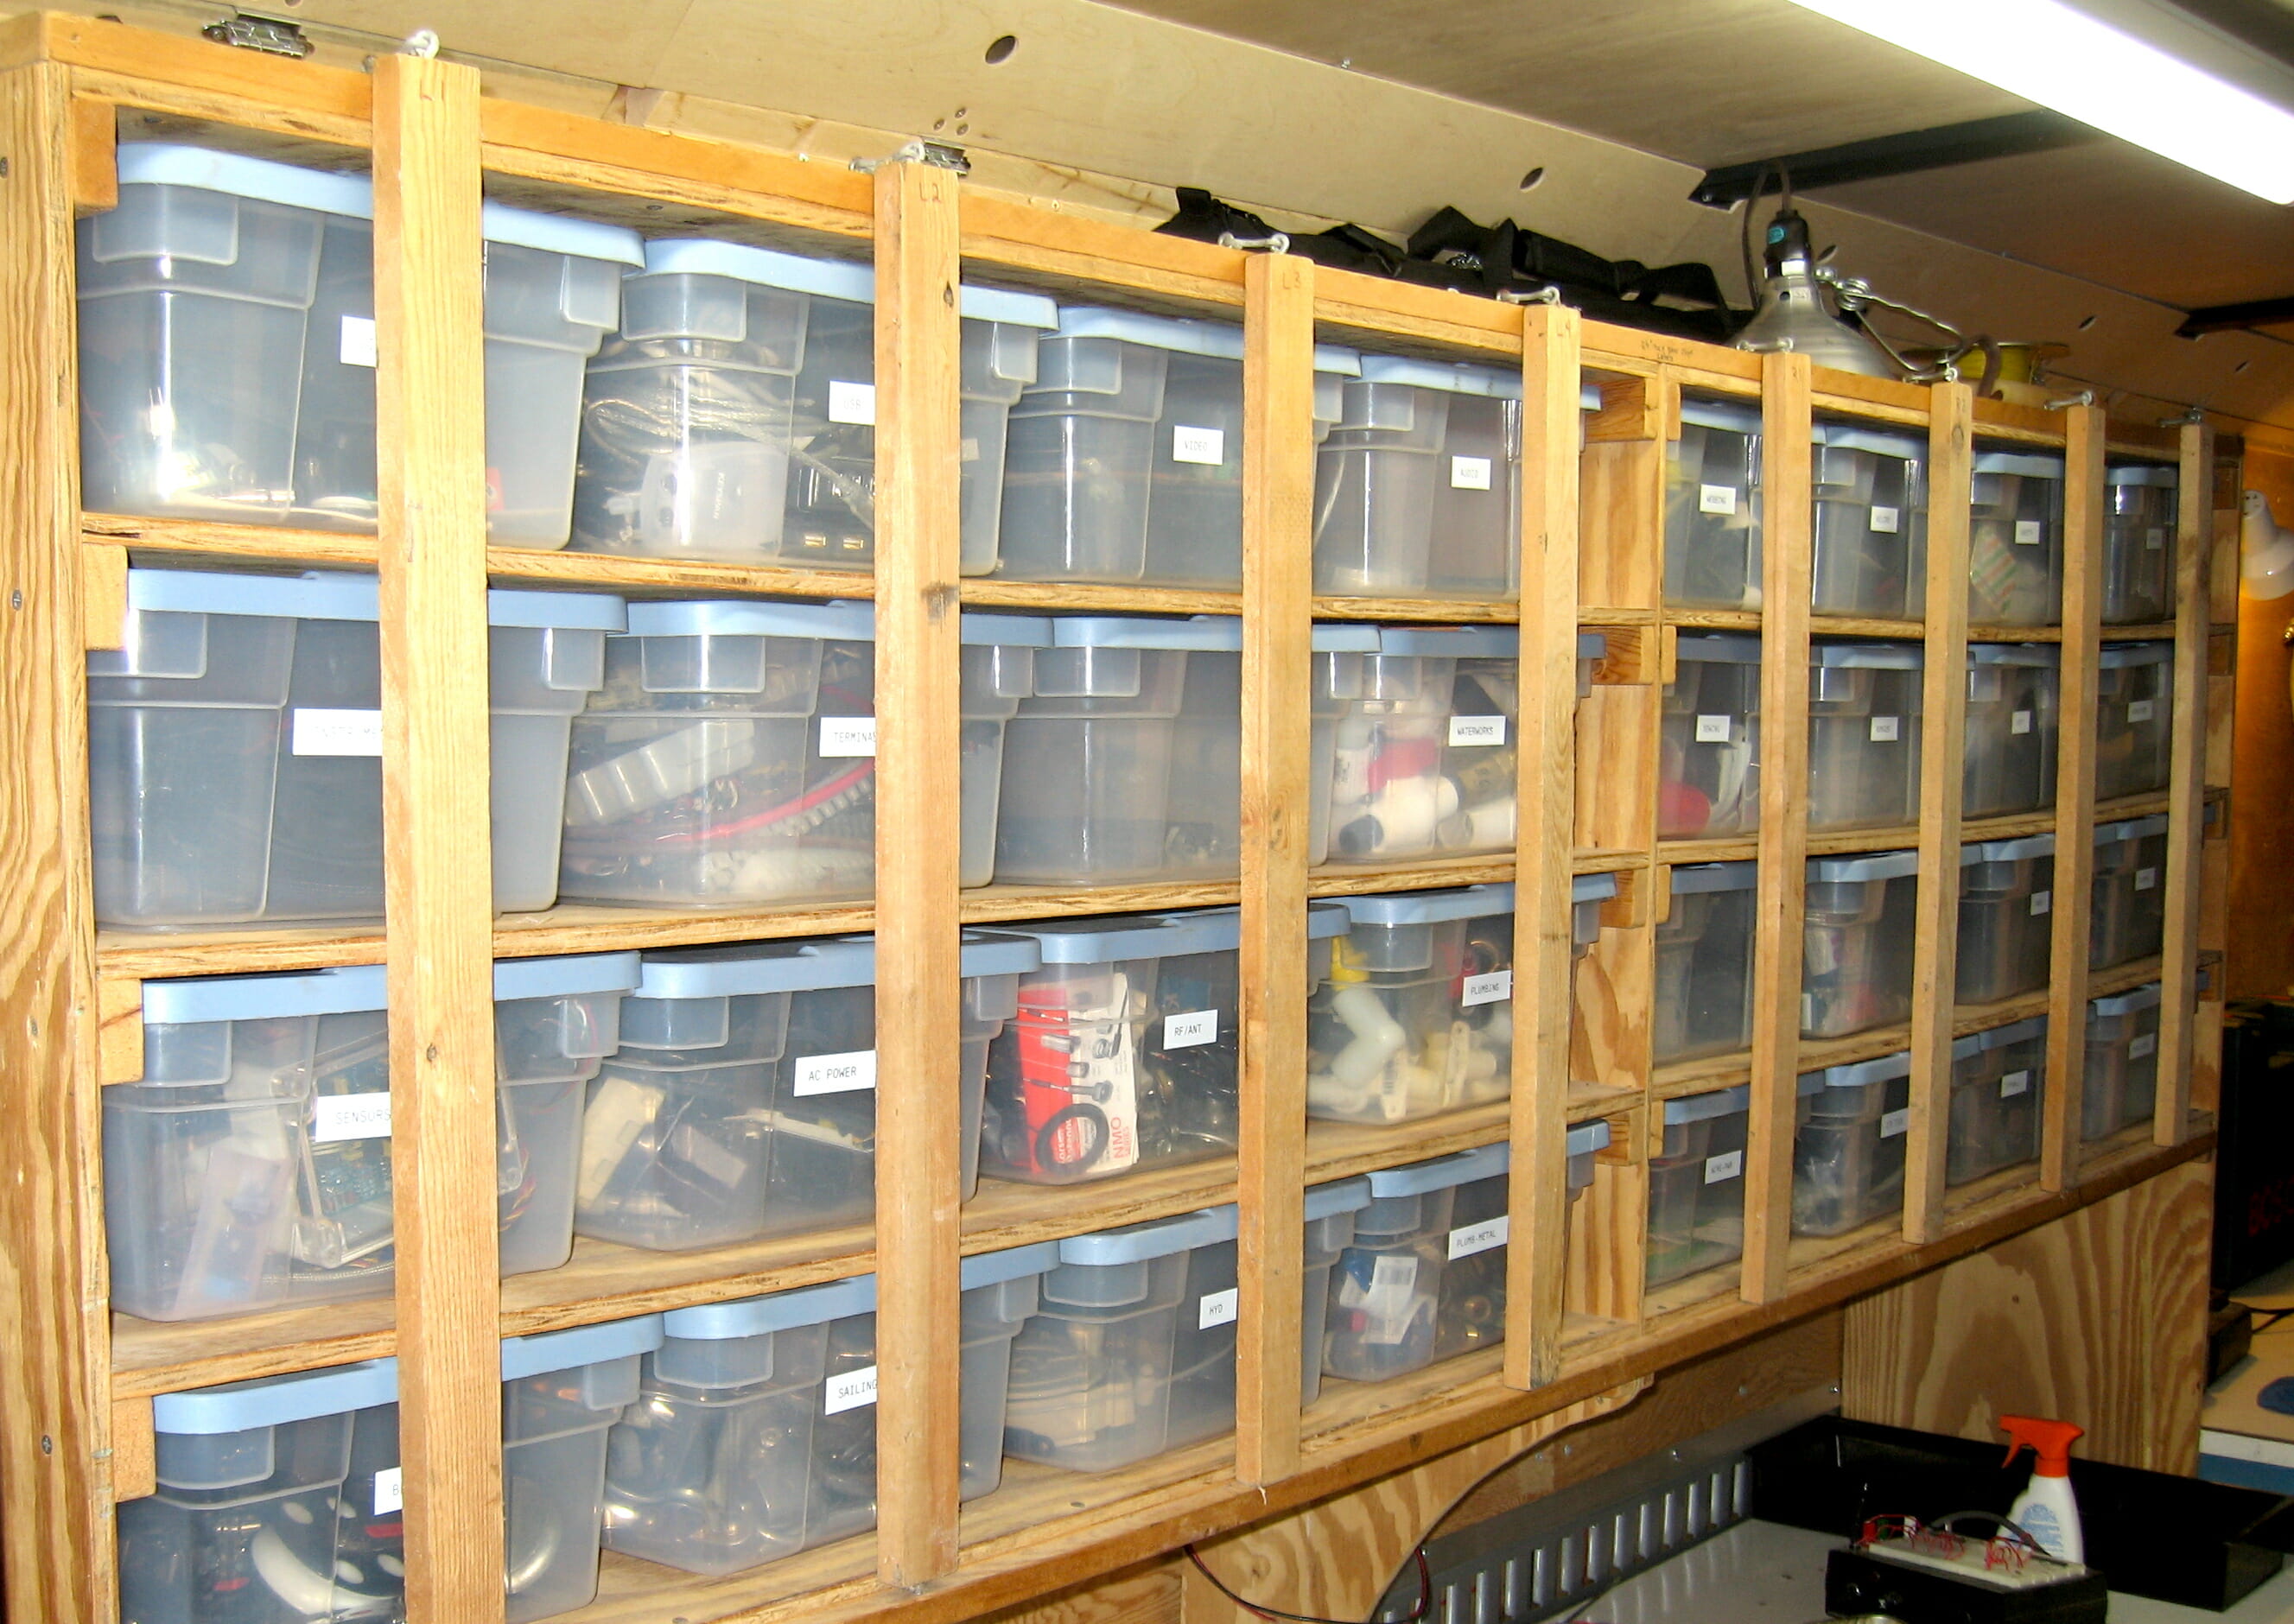
Large parts and some tooling clusters live in an array of 32 Rubbermaid bins that slide into homebrew shelving atop the 8-foot steel bench. To keep these in place on a hard right turn, there are eight wooden bars that lock in place with a protruding screw in the bottom (engaging a hole) and a hook and eye at the top. Simple, but solid.
Smaller but still bulky parts reside in a pair of steel cabinets with a total of 63 drawers mounted to my desk (and held to the wall by an E-Track strap at the bottom and bookshelf brackets at the top). This one was kind of annoying, and my preferred method involved serpentine line, pulleys, and cam cleats. But somewhere between gathering parts and drilling holes, I discovered that it would have to come off the desk for surgery… and being fundamentally lazy, I dropped back to the simple-but-ugly solution shown here.
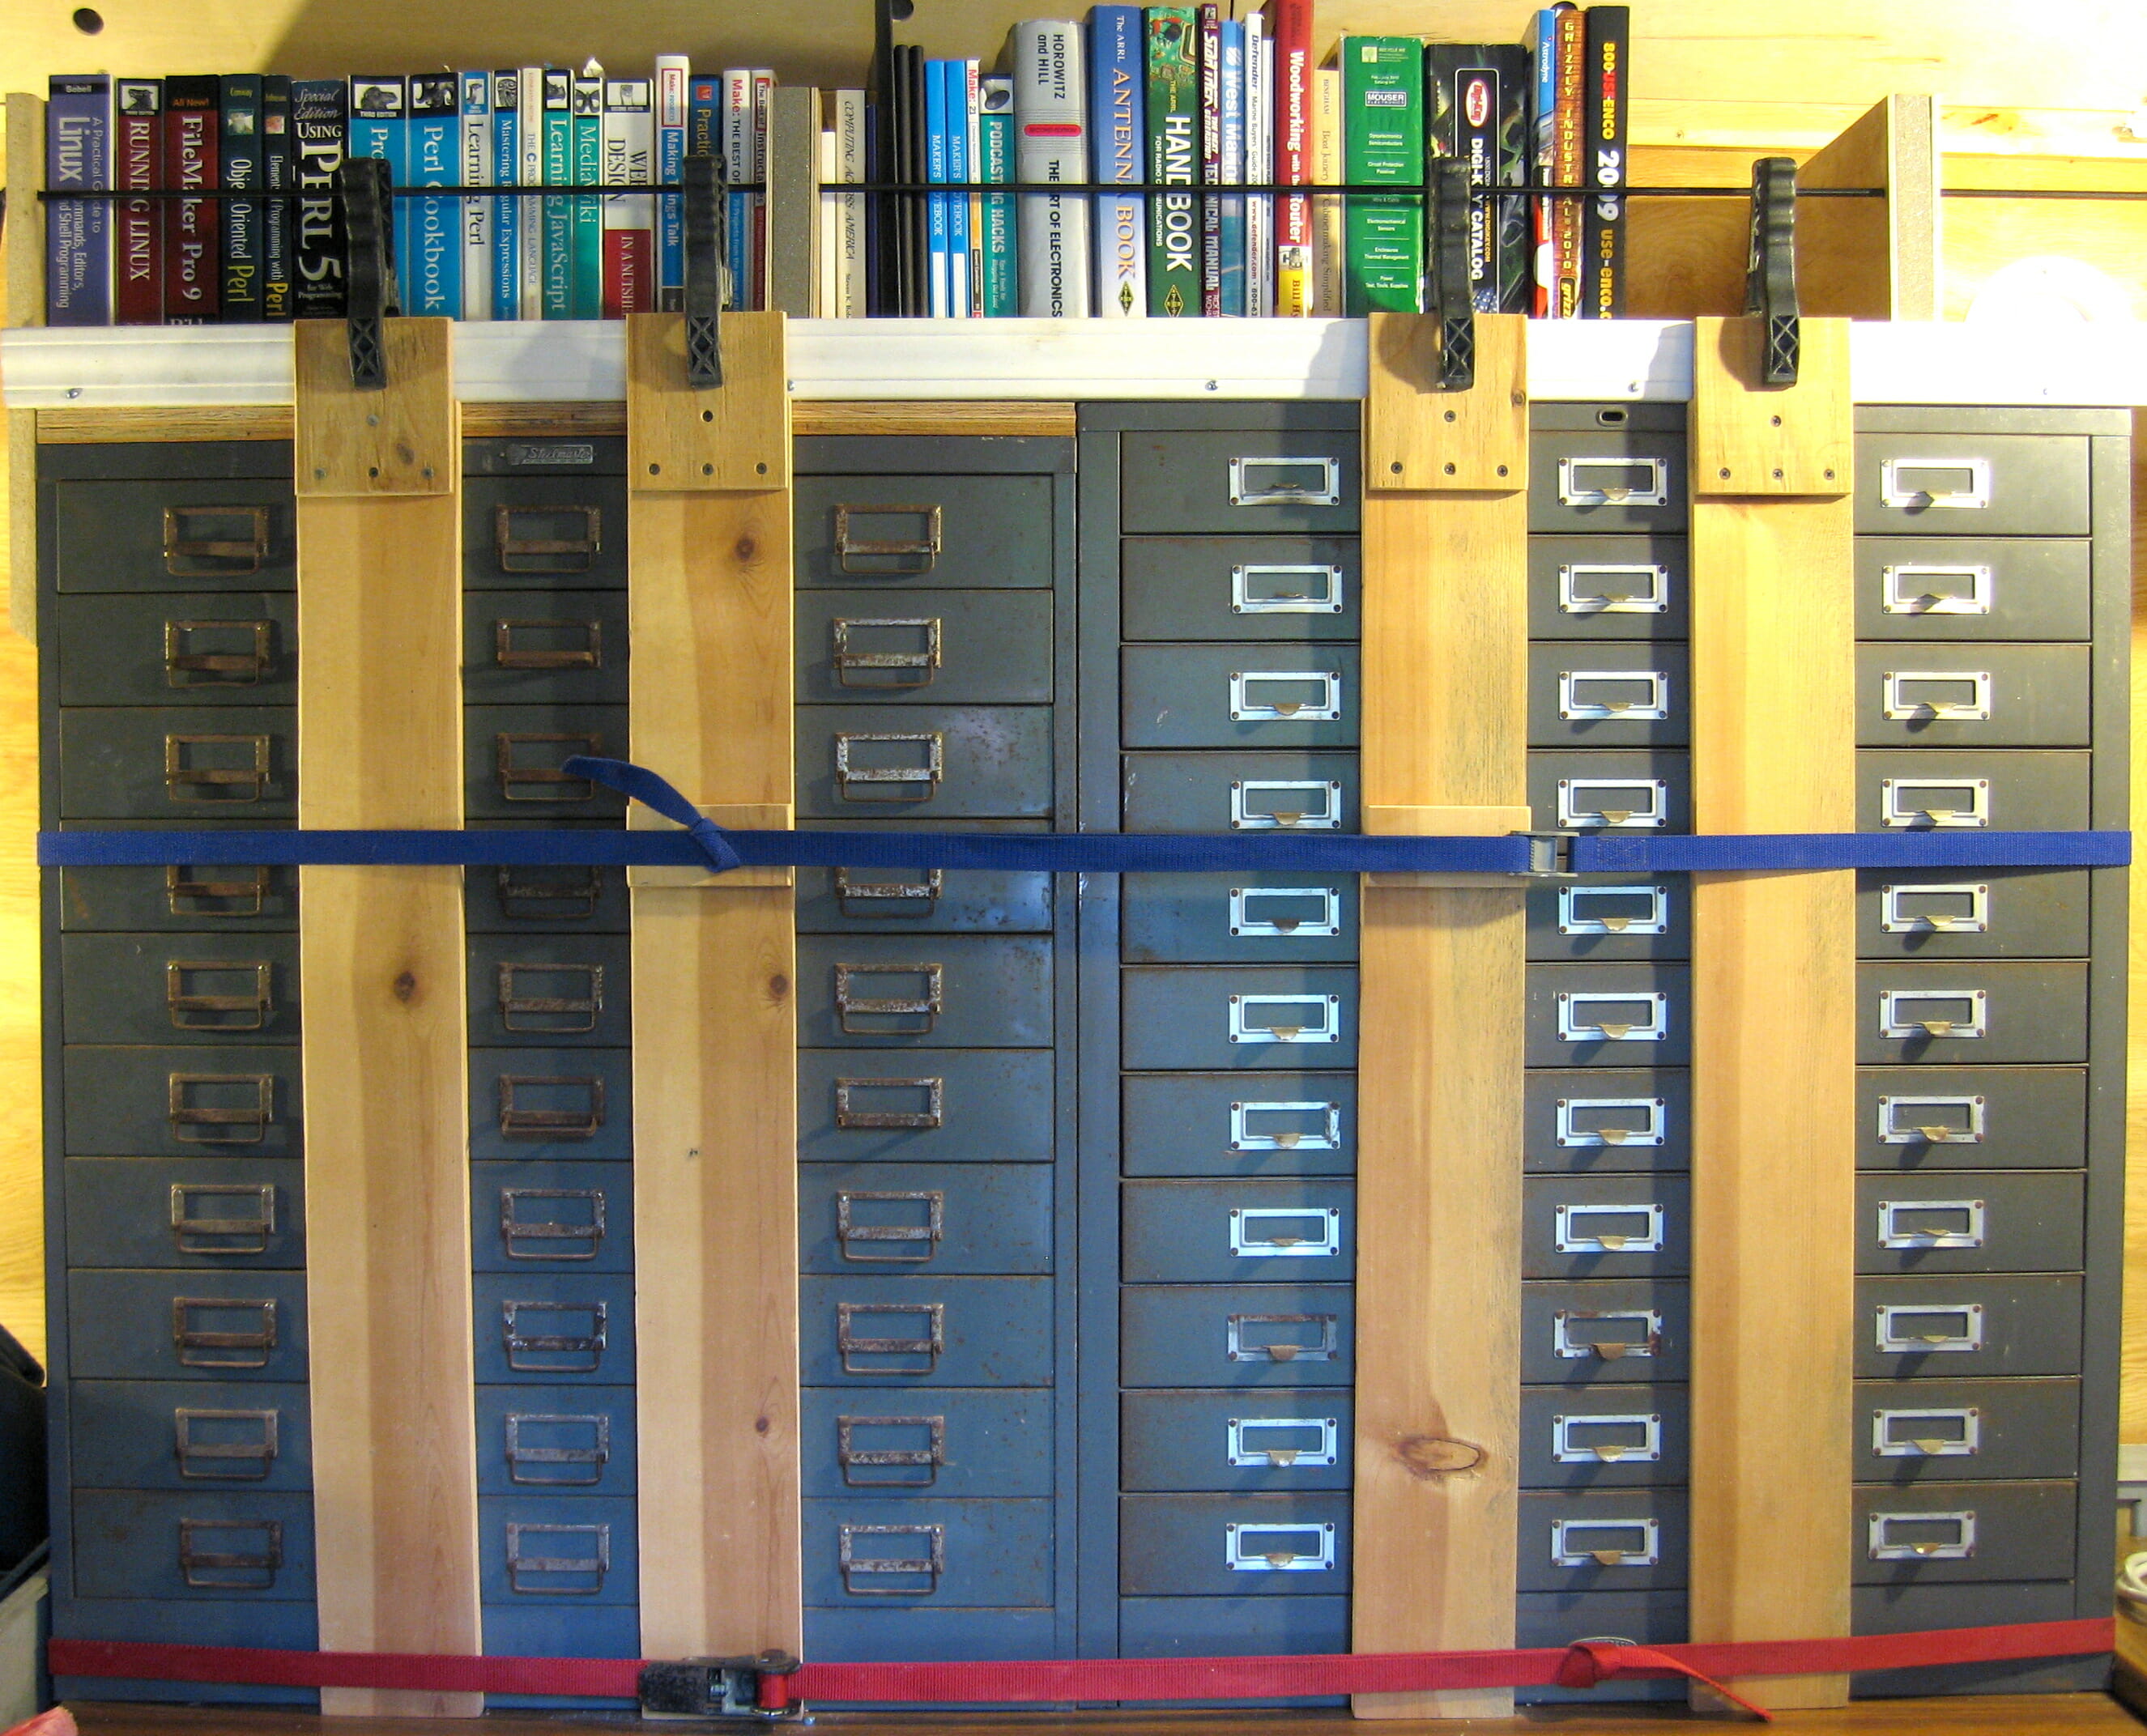
The spring clamps at the top are at their limit, and keep the strapped-on boards from wandering off at funny angles while helping with the task of keeping them in place. In the photo, you can also see the bookshelf… this continues another couple of feet forward to a bracket on the forward wall, and is mounted to the side wall by two very heavy brackets encapsulated inside foam-core veneer-skinned sandwiches (to be nice to adjacent books). A shock cord runs the full length, keeping the library from taking a dive on an abrupt tack to port.
But the most ambitious drawer-retention challenge was the Wall of Inventory — 755 small-parts drawers. Their cabinets are all screwed to the wall and tightly constrained between a top shelf and the base, but a hundred thousand or so bits of hardware would be a nightmare if they got out of control.

To solve this problem (and provide a useful brainstorming surface), I made a hinged 93×32-inch framed whiteboard with a couple of additional 9-inch wings that cover the cabinets above the speakers. This latches down with marine-grade slide bolts (which glide across the mounting shelf and drop securely into receivers with a satisfying clunk). When I need access to inventory, the whiteboard swings up and latches to the ceiling… and a little nacelle of leftover space handily holds the Metcal soldering station base unit (Amazon link is to newer model), You can see it below in both modes.
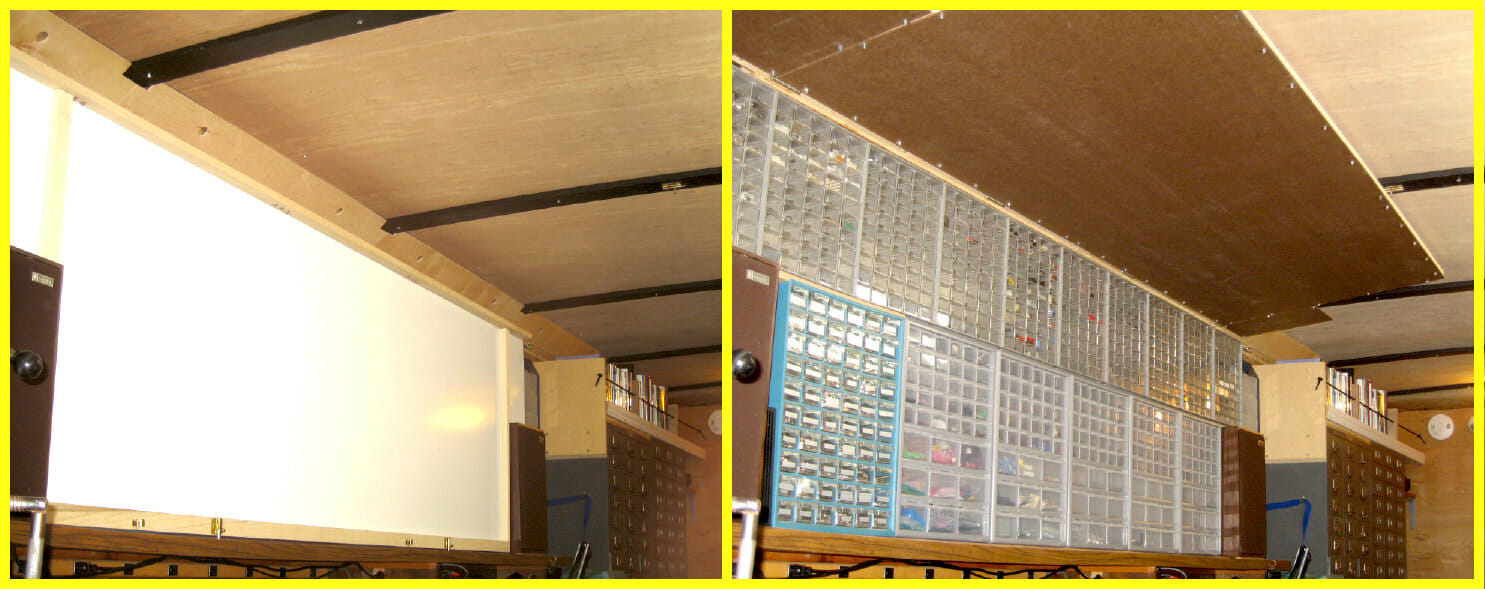
The whiteboard itself is Melamine “tileboard” or “shower board,” which is around $10 for a 4×8 sheet at the big-box home improvement stores. It’s 1/8″ thick and very easy to cut, though the edges bump easily and framing is recommended. This stuff behaves well with standard dry-erase markers, but will stain if you leave drawings for a long time. A proper whiteboard material of Ceramicsteel would be tempting for its magnetic properties and greater longevity, but weight and cost are issues.
The hinge structure was critical; in order to provide a stable mounting edge, I had to bring a top shelf out from the wall. This ensures that the four hinge pins are collinear, and carries the static load of the whiteboard as well as any dynamic loads encountered on the road. It also provides additional support by encapsulating the stack of cabinets… they’re not going anywhere!
This is by no means complete — I still have to tie off or otherwise protect loose items like lab instruments that I’m not ready to bolt down. All these steps are collected in a preflight checklist pinned to a bulletin board by the door, since it is very easy to make a costly mistake.
Mobile Lab Power
My installation was shaped by equipment I had on hand (and a general preference for marine hardware), but is by no means cast in stone. In fact, a minimum configuration may be all that’s needed if you’re creating an alternative to a traditional outbuilding: run a cable to a dedicated outlet on your house and distribute power internally with a generic breaker box. At this level, “big box store” resources are adequate, and there’s no reason to get fancy unless you need to survive power failures.
But a mobile workspace calls for batteries, an inverter/charger, and at least one primary energy source.

The control panels are mounted on a door that I cut into the nose of the trailer, which was easy since it has an aerodynamic “nose cone” that renders that area conveniently hollow for wiring. In most installations, a power panel like this would require either an additional enclosure or repurposing existing cabinetry (as in an RV). From upper-left to lower-right, the access door carries:
- DC circuit breaker panel (lights, embedded systems, and auxiliary jack)
- Control panel for ProSine 2.0 inverter/charger
- Analog AC voltmeter directly connected to main bus
- Link 10 battery monitor (fuel gauge)
- AC circuit breaker panel (main switch, lighting, desk, forward benches, machine tools)
- Control panel for Trace C40 solar charge manager
The wall to the left of this carries a water bottle in a cage, which is actually a pack of Lithium-Ion batteries. The charger for this is local, providing a handful of isolated DC when needed.
Below the door is a GFCI outlet and light switch, both protected by a stand-alone fuse. This may seem redundant, given that gorgeous marine-grade AC breaker panel with two unused positions, but I felt it worthwhile to provide a power source that is connected directly to shore power upstream of the whole inverter/charger environment (in case of system failure.

Continuing down, we see the two big boxes: a 2-kilowatt inverter/charger and the solar charge controller. Neither of these would be my first choice in a new installation, but they were lying around the lab; the ProSine is inefficient and noisy, and the Trace is nice but has long since been superseded by more efficient MPPT (maximum power point tracking) solar charge controllers from a number of vendors. If you venture into this territory, I recommend Home Power Magazine as an excellent information resource. This industry has evolved a lot in the past few years, and there are some excellent systems that support data logging, more efficient battery chemistries, and so on.
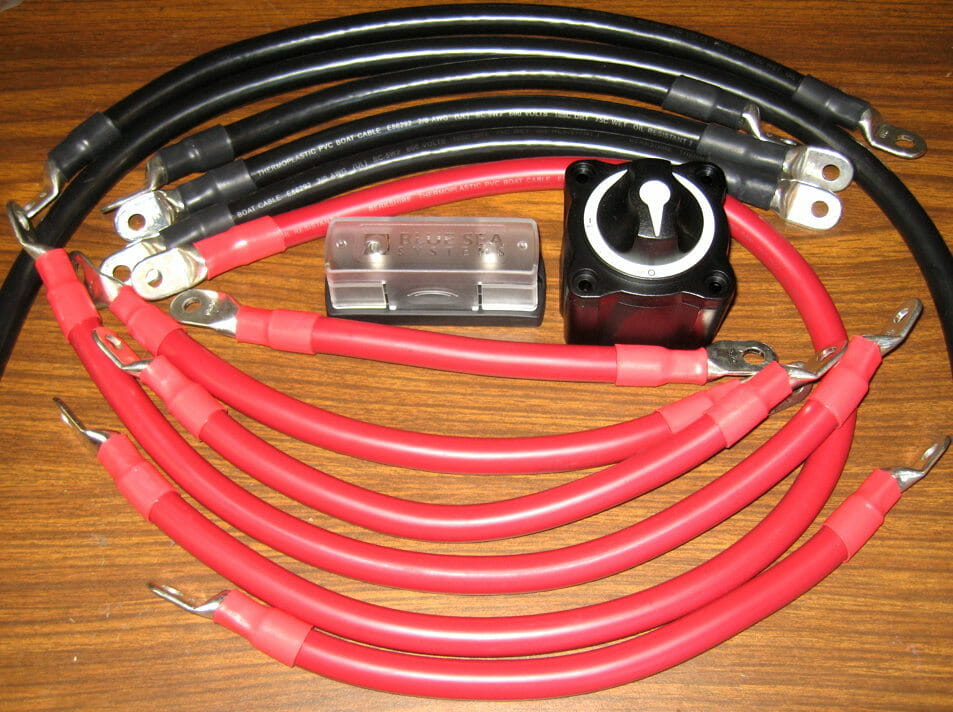
The heavy red and black battery wiring is next: a main disconnect switch, 300-amp fuse block, a shunt for current measurement… then the cables (2/0 size) disappear into a steel cabinet where they are connected to a bank of AGM deep-cycle marine batteries. I had the big cables custom made and terminated by Custom Cable USA (formerly Genuinedealz), which has become my favorite resource for marine wiring.
Behind the access door, it’s the usual rat’s nest of cabling. The key bits of advice here are to provide a generous hinge loop to allow gradual twist rather than focused wire flexion, use stranded wire only, and make sure cables are well clamped to something solid before they are terminated (to prevent breakage at the stress-riser of a crimp).
This may look like a crazy amount of power-related hardware, but consider the capabilities, starting with the 30-amp marine shore power connector mounted on the outside of the nose cone (a very short cable run to the main breaker). Normally, I have a standard marine cordset running to a nearby building (house, lab, or marina), with a pigtail adapter on the other end that converts it to the 3-blade RV standard. This keeps the hardware interoperable with boat stuff.
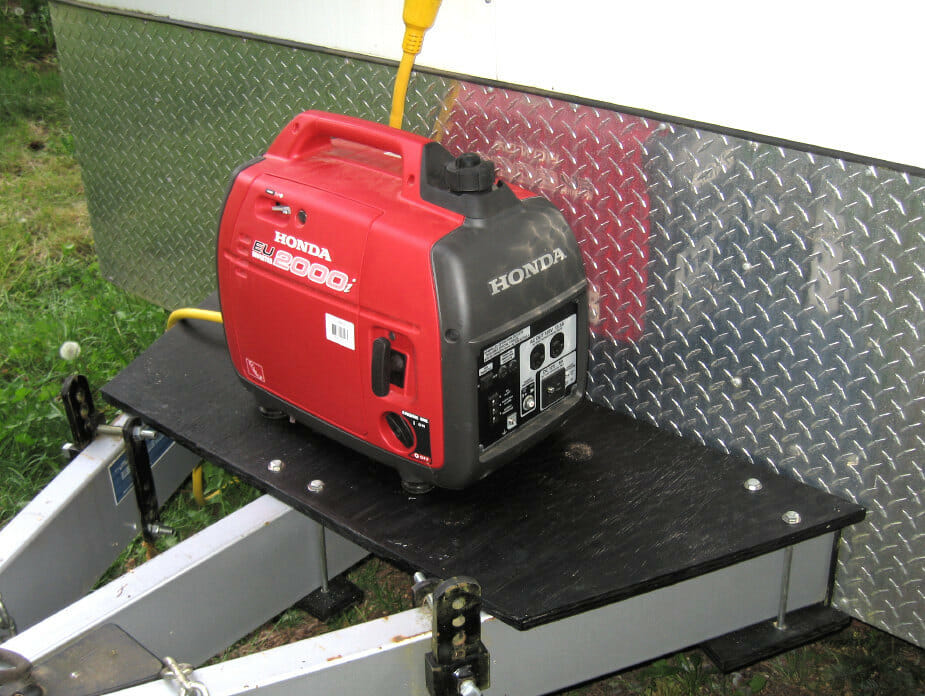
I have a couple of other AC options. First, if needs are modest (lighting and office equipment, not machine tools), I use an adapter that converts to a 15-amp household-style plug and go sniffing for an outlet with a regular orange outdoor extension cord in hand. Failing that, the pigtail adapter is long enough to plug into a quiet little Honda eu2000i generator (2 kilowatts, link to newer model) that rests neatly on a shelf just below the nose cone.
Regardless of the AC source, the path is the same: a 30-amp main breaker feeds the inverter/charger, and its output returns to the panel and feeds all the branch breakers. When AC is present, this keeps the batteries charged, but if shore/generator power disappears, then it switches to inverter mode and continues to provide AC. In other words, it is just a giant UPS (uninterruptible power supply), and the change-over is so quick that I barely detect a flicker.
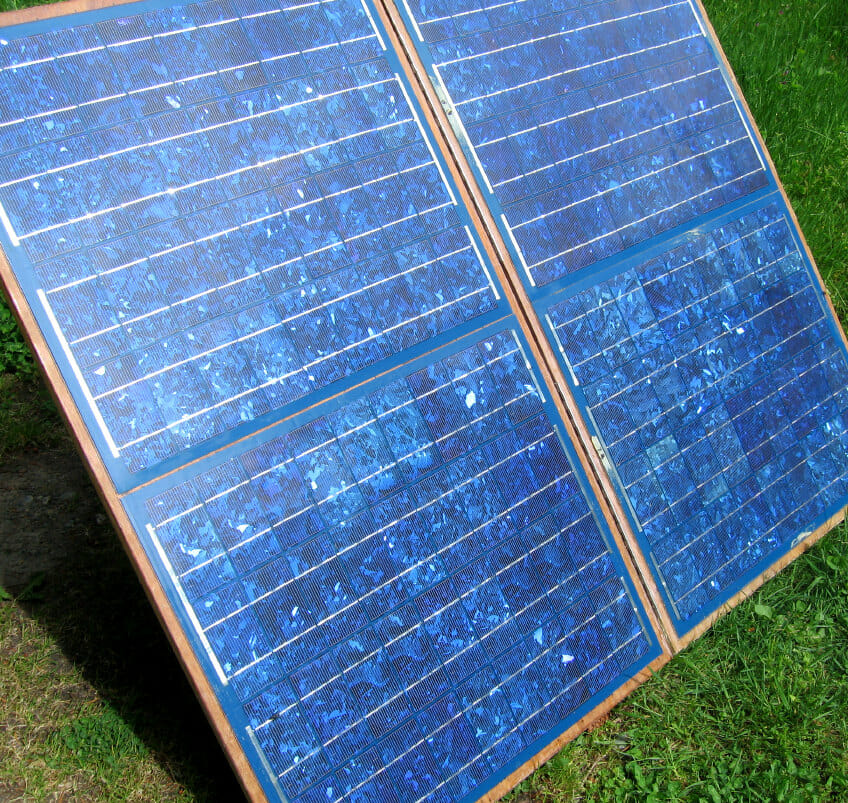
Meanwhile, DC loads are derived from the battery bank. I’m based in the Pacific Northwest, so sun can be iffy at times… but the system is set up to handle a large solar array (the one in this photo was borrowed from the Microship for testing). I have a Renogy suitcase 100-watt unit that I use with the Shacktopus power cart, and it works well with this system… although a permanent installation on the roof is a better long-term solution with one less thing to worry about having to deploy and secure.
All current in and out of the battery bank passes through a shunt on the ground side, which generates a proportional voltage drop (50 millivolts per 500 amps). This, along with terminal voltage, is monitored by the Link 10 (harvested from my boat when I pulled out the legacy stuff and installed new Outback power management gear). Displaying real-time volts and amps, along with an amp-hour tally, fuel gauge, and extrapolated time-to-empty, it goes nicely with my retro AC voltmeter that I’ve had since the 1970s.
As you’ve probably noted from some of my comments, there are many ways to put together a system like this. If I were starting fresh with a healthy budget, I would use all Victron equipment.
Closing Notes and 2025 Footnote
I urge you to consider this approach if you find yourself stuck for lack of workspace, impossible commutes, or restrictive marinas that panic at the sound of an electric drill. Whether “high-profile geeky” or stealthily tucked into a funky old panel truck, a mobile lab can keep you working when normal facilities are not an option!
Update from 2025: this rig sat idle for ages after fulfilling its original need, but now it is becoming a new mobile lab to support the Bionode project. All the work described above helps a lot, even some of the furniture, though now it has a folding workbench and a comfy place to sleep. I’m covering the roof with solar panels, adding a mini-split, and added a small milling machine. There is good introduction here.
You must be logged in to post a comment.