
Elevated Music Stand for Casio PX-5S and other Digital Pianos

After much research into the best digital piano for my boat (including many hours of participating in the Piano World forums), I chose the Casio Privia PX-5S. I am pleased with the decision; this is a 24-pound board with excellent touch and fabulous sound, no larger or more expensive than it needs to be, yet rich in capabilities and so easy on 12V power that it can run on an internal AA battery pack. Sweet.
One of the recurring forum comments involved the lack of a built-in music stand (or any provision for same). This is not uncommon with stage pianos, and is indeed frustrating… my previous machine, a Roland RD-700SX, didn’t have a stand either, but I incorporated it into a large studio desk and it was not difficult to add. In a performance setting, depending on available stage furniture, keyboard players can use a music stand with a tripod base, or one with an arm that clamps to other structures.
None of that really helps, however, when the piano is sitting on a desktop as in the photo above, aboard my boat. I found myself propping sheet music against the equipment console mockup behind it, which was not only sloppy but about five inches too low. What I needed was a desktop music stand tall enough to clear the back of the keyboard and open enough to not interfere with cables… and I was unable to find anything off-the-shelf.
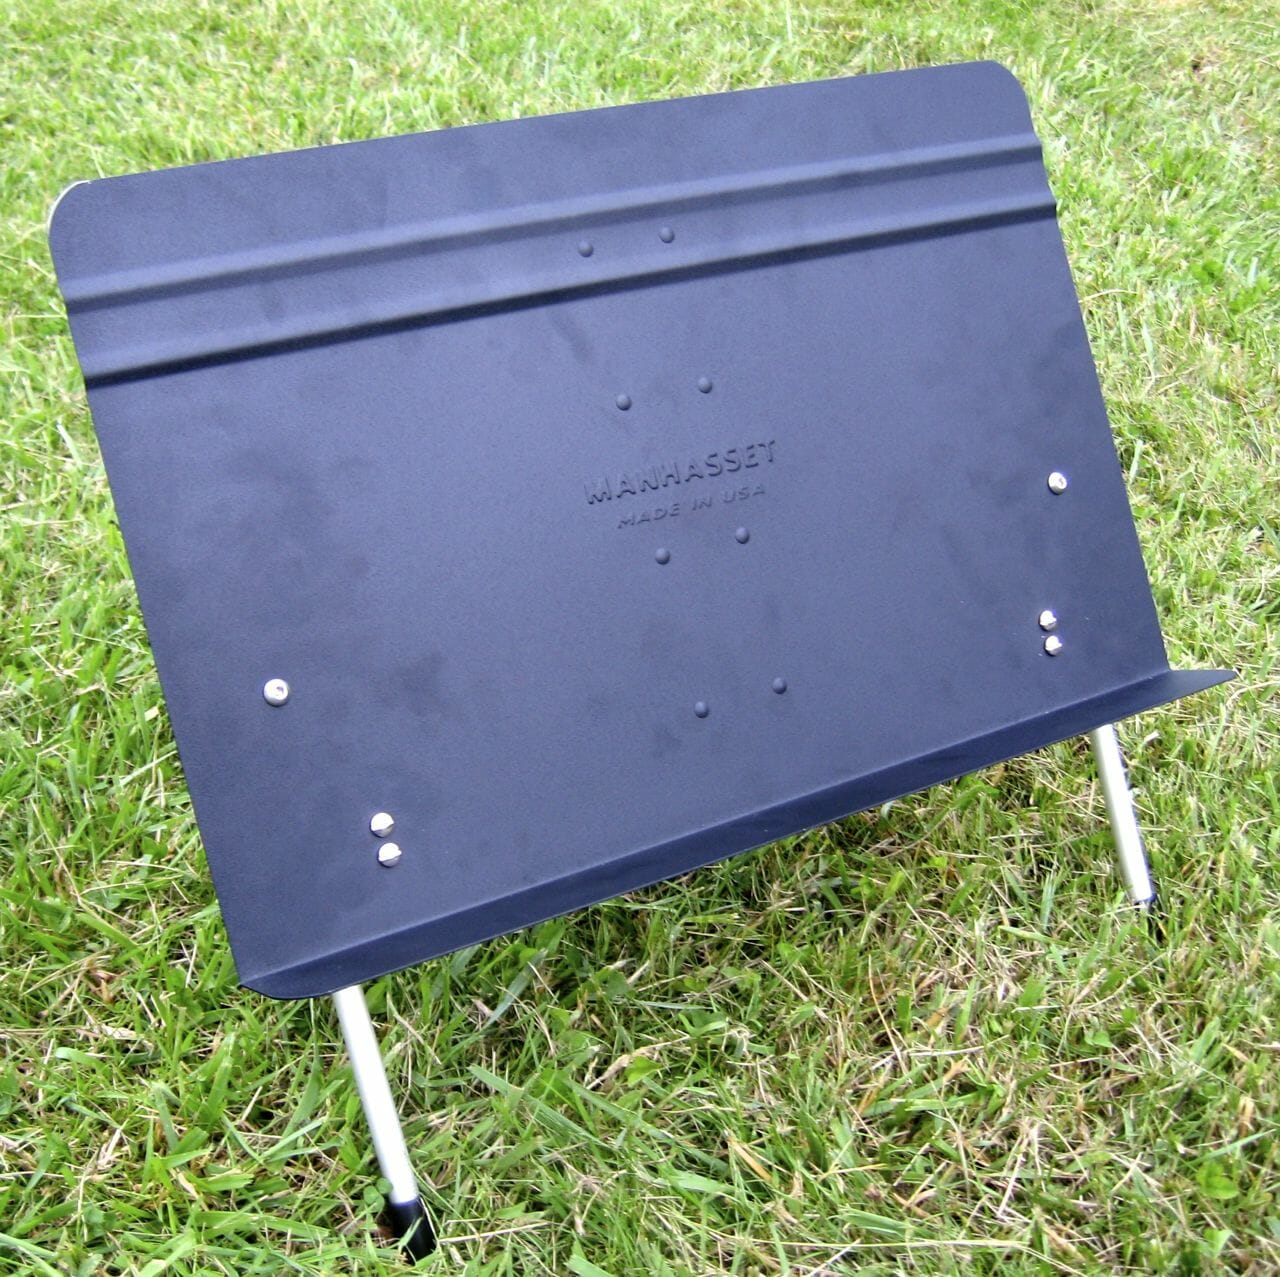
Life is too short to reinvent the wheel, and of course there is no reason to fabricate the “music desk” part itself… The Manhasset 5301 table top music stand is a classic and refined starting point for this little hack, and $30-ish gets you a nice aluminum orchestra-grade support that’s about 20″ wide and 12″ high (product info on Amazon in Feb 2019 is incorrect, so I have temporarily deleted the link). It has a little tilt-out leg and a couple of felt pads at the bottom corner of the shelf, and works fine. Now let’s raise it.

The basic challenge here is to add five inches of height without making it awkward to move around… so we certainly want to keep that original folding leg. An 8-inch piece of 21/32 brass tubing from a local hardware store was a pretty close fit, though it needed a piece of heat-shrink tubing (electrical tape would work just as well) to mate tightly with the original clamp. This angle adjusts easily, so you don’t have to be terribly precise with leg length. I suspect there is a dowel size that would work also. Their original chrome-plated tubing is about .675″ OD.
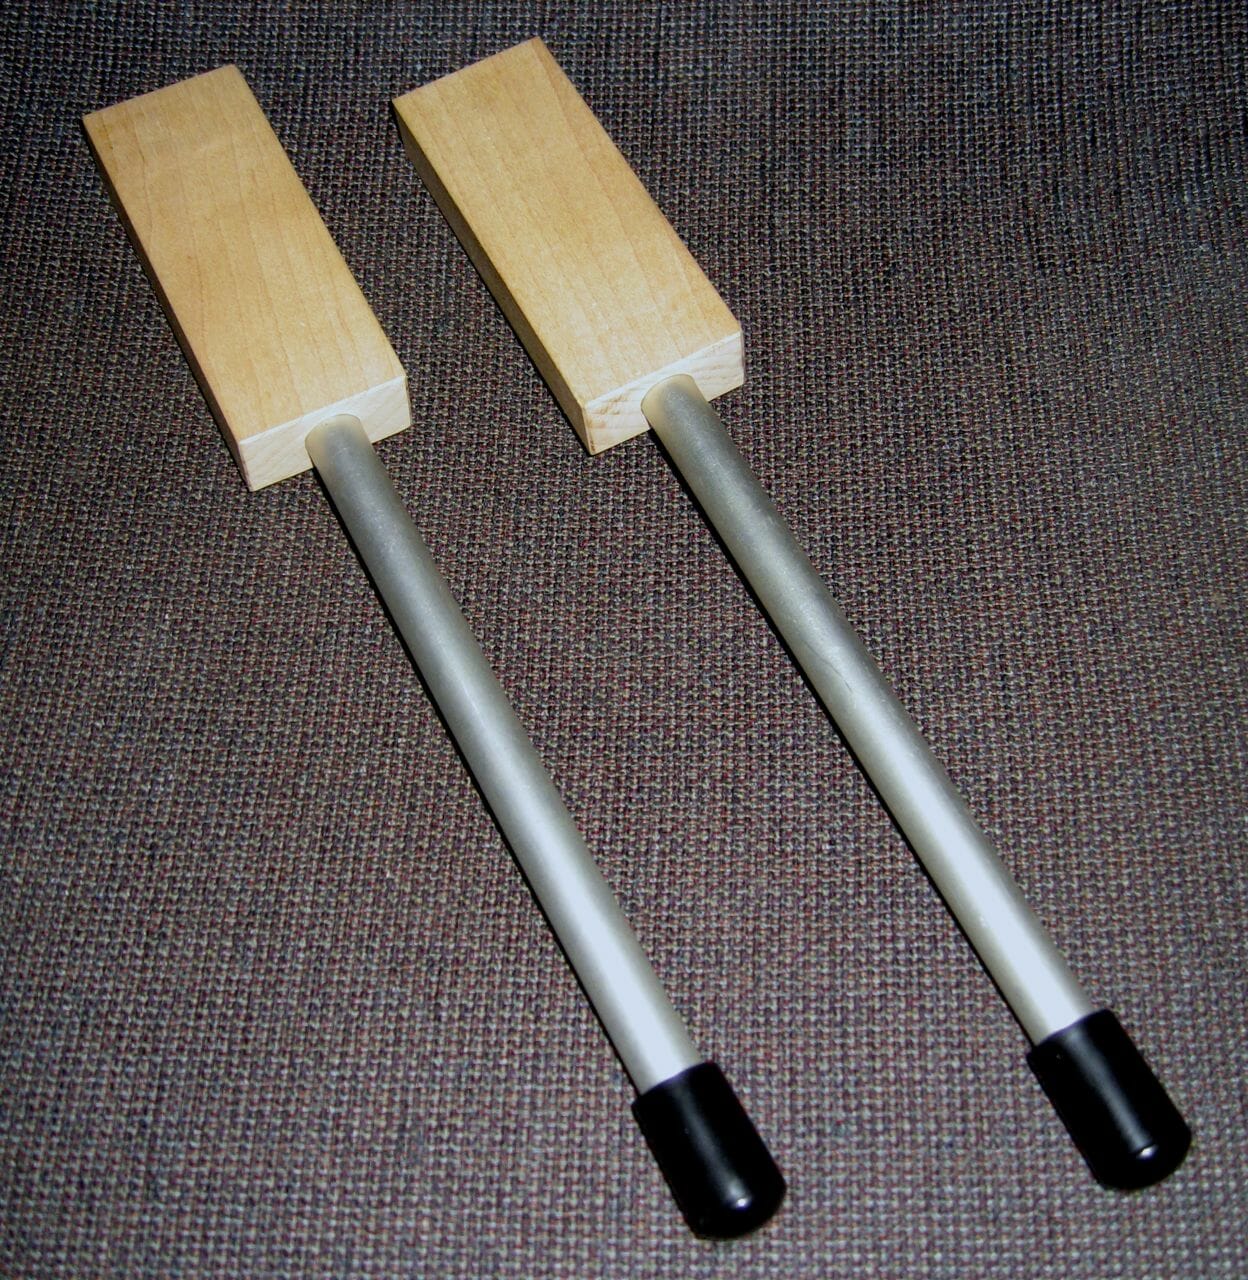
Now we need two legs on the front, and there are lots of possibilities… but in the spirit of having it pack for stowage, I decided to make them pivot. I cut a couple of 4-inch pieces of hemlock 1×2, then… since I already had some beautiful .5″ diameter anodized aluminum thin-wall tubing… drilled a 3-inch-deep hole of that size in each one and hammered in the 9″ struts. (That depth was overkill and led to difficult assembly; if you clone this, a 2-inch hole depth, with 8″ of tubing, would be easier.) With the addition of a couple of cheap tips, I had front legs ready to attach.
But how do we keep them properly locked in position with the stand is in use, carrying many pounds of music books? I puzzled over this for a while, almost accepting the ugly notion of having removable screws (hardware that can get lost). A little ramped detent was an intriguing possibility, but the wood would probably wear over time and make it sloppy… and it would be a pain to machine.
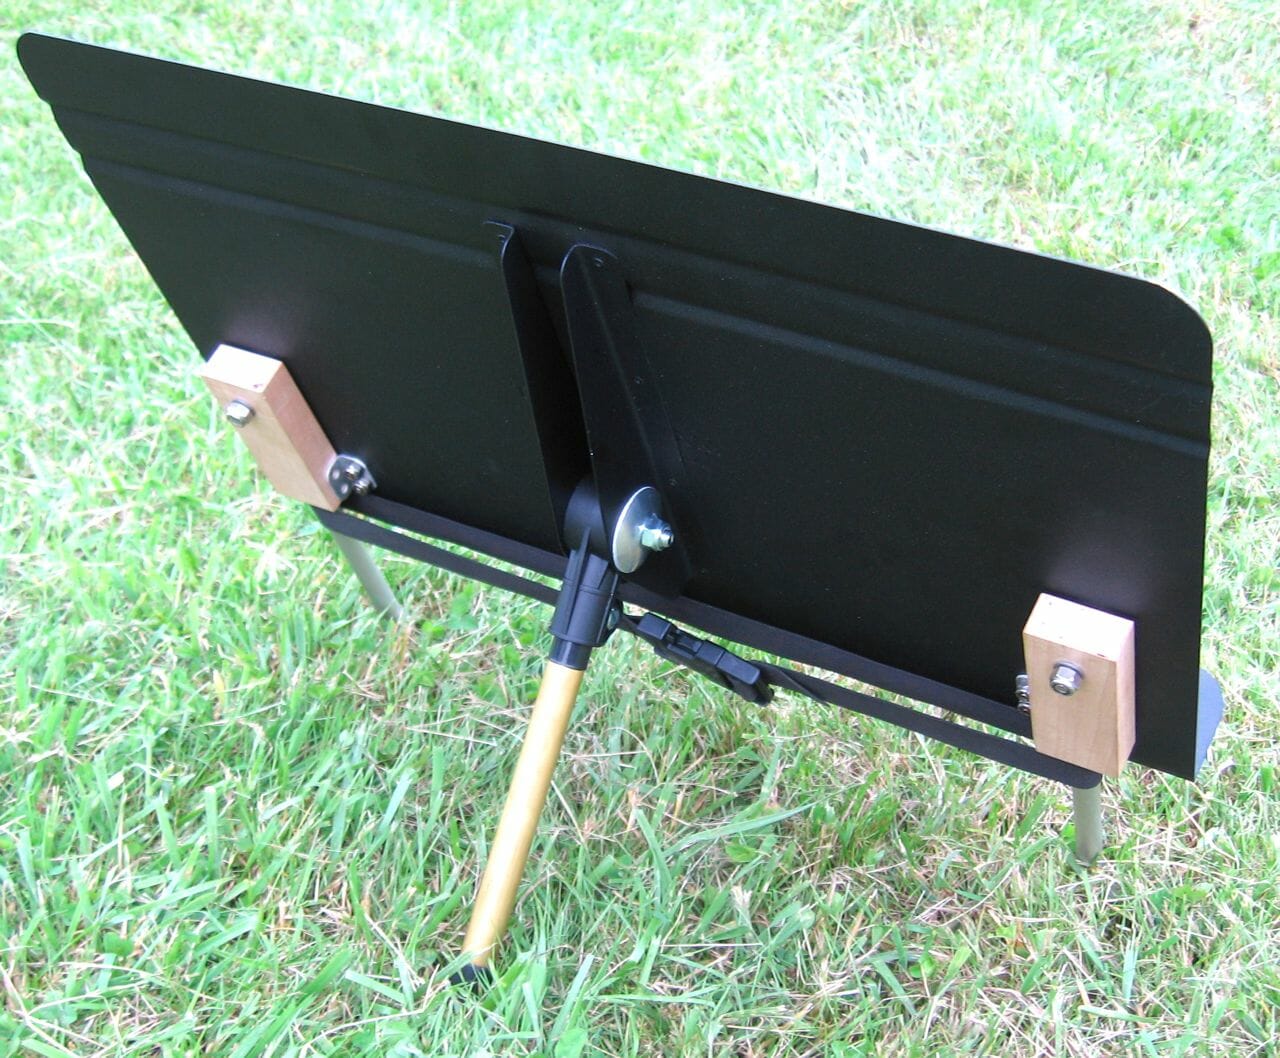
The solution may look a little busy, but it is strong and effective: I hinged each block on a single quarter-inch bolt with a large fender washer between wood and sheet metal, then mounted a couple of stray angle brackets in the desired “stop” position. To keep the legs firmly in place, I used a scrap piece of 1″ nylon webbing with slide-release buckle, and the resulting assembly is surprisingly strong. I suppose I should radius and paint those blocks black one of these days… they are a bit unfinished-looking.

To fold the thing up and stow it when not in use, I simply pop the buckle and swing the front legs up to the top of the stand (with the nylock nuts and fender washers providing enough friction to keep them in place), then pivot the original extended leg up to join them. Unfortunately, the added length does make this peek past the top of the stand, which could be annoying for some folks; if that’s a problem, you can just loosen the clamping screw and pop it out.
This is one of those simple projects that ended up taking about 5 times longer than expected, and could have been done in a variety of ways. If you don’t need portability, there’s no need to bother with all the moving parts; just extend the middle leg as described and clamp on a couple of struts for the front (dowels, tubing, or even ripped square pieces of hardwood). In my case, living on a boat, every cubic inch counts… so folding was an important feature!
Of course, you could do the whole thing from scratch with some thin plywood or clear plastic, and another approach is to start with a book stand of about the same dimensions such as the Freesia… I almost bought one with the idea of mounting it to a 5″ support. That would accomplish the same objective, though it would not fold as small nor allow as much cable clearance from the back of the PX-5S.
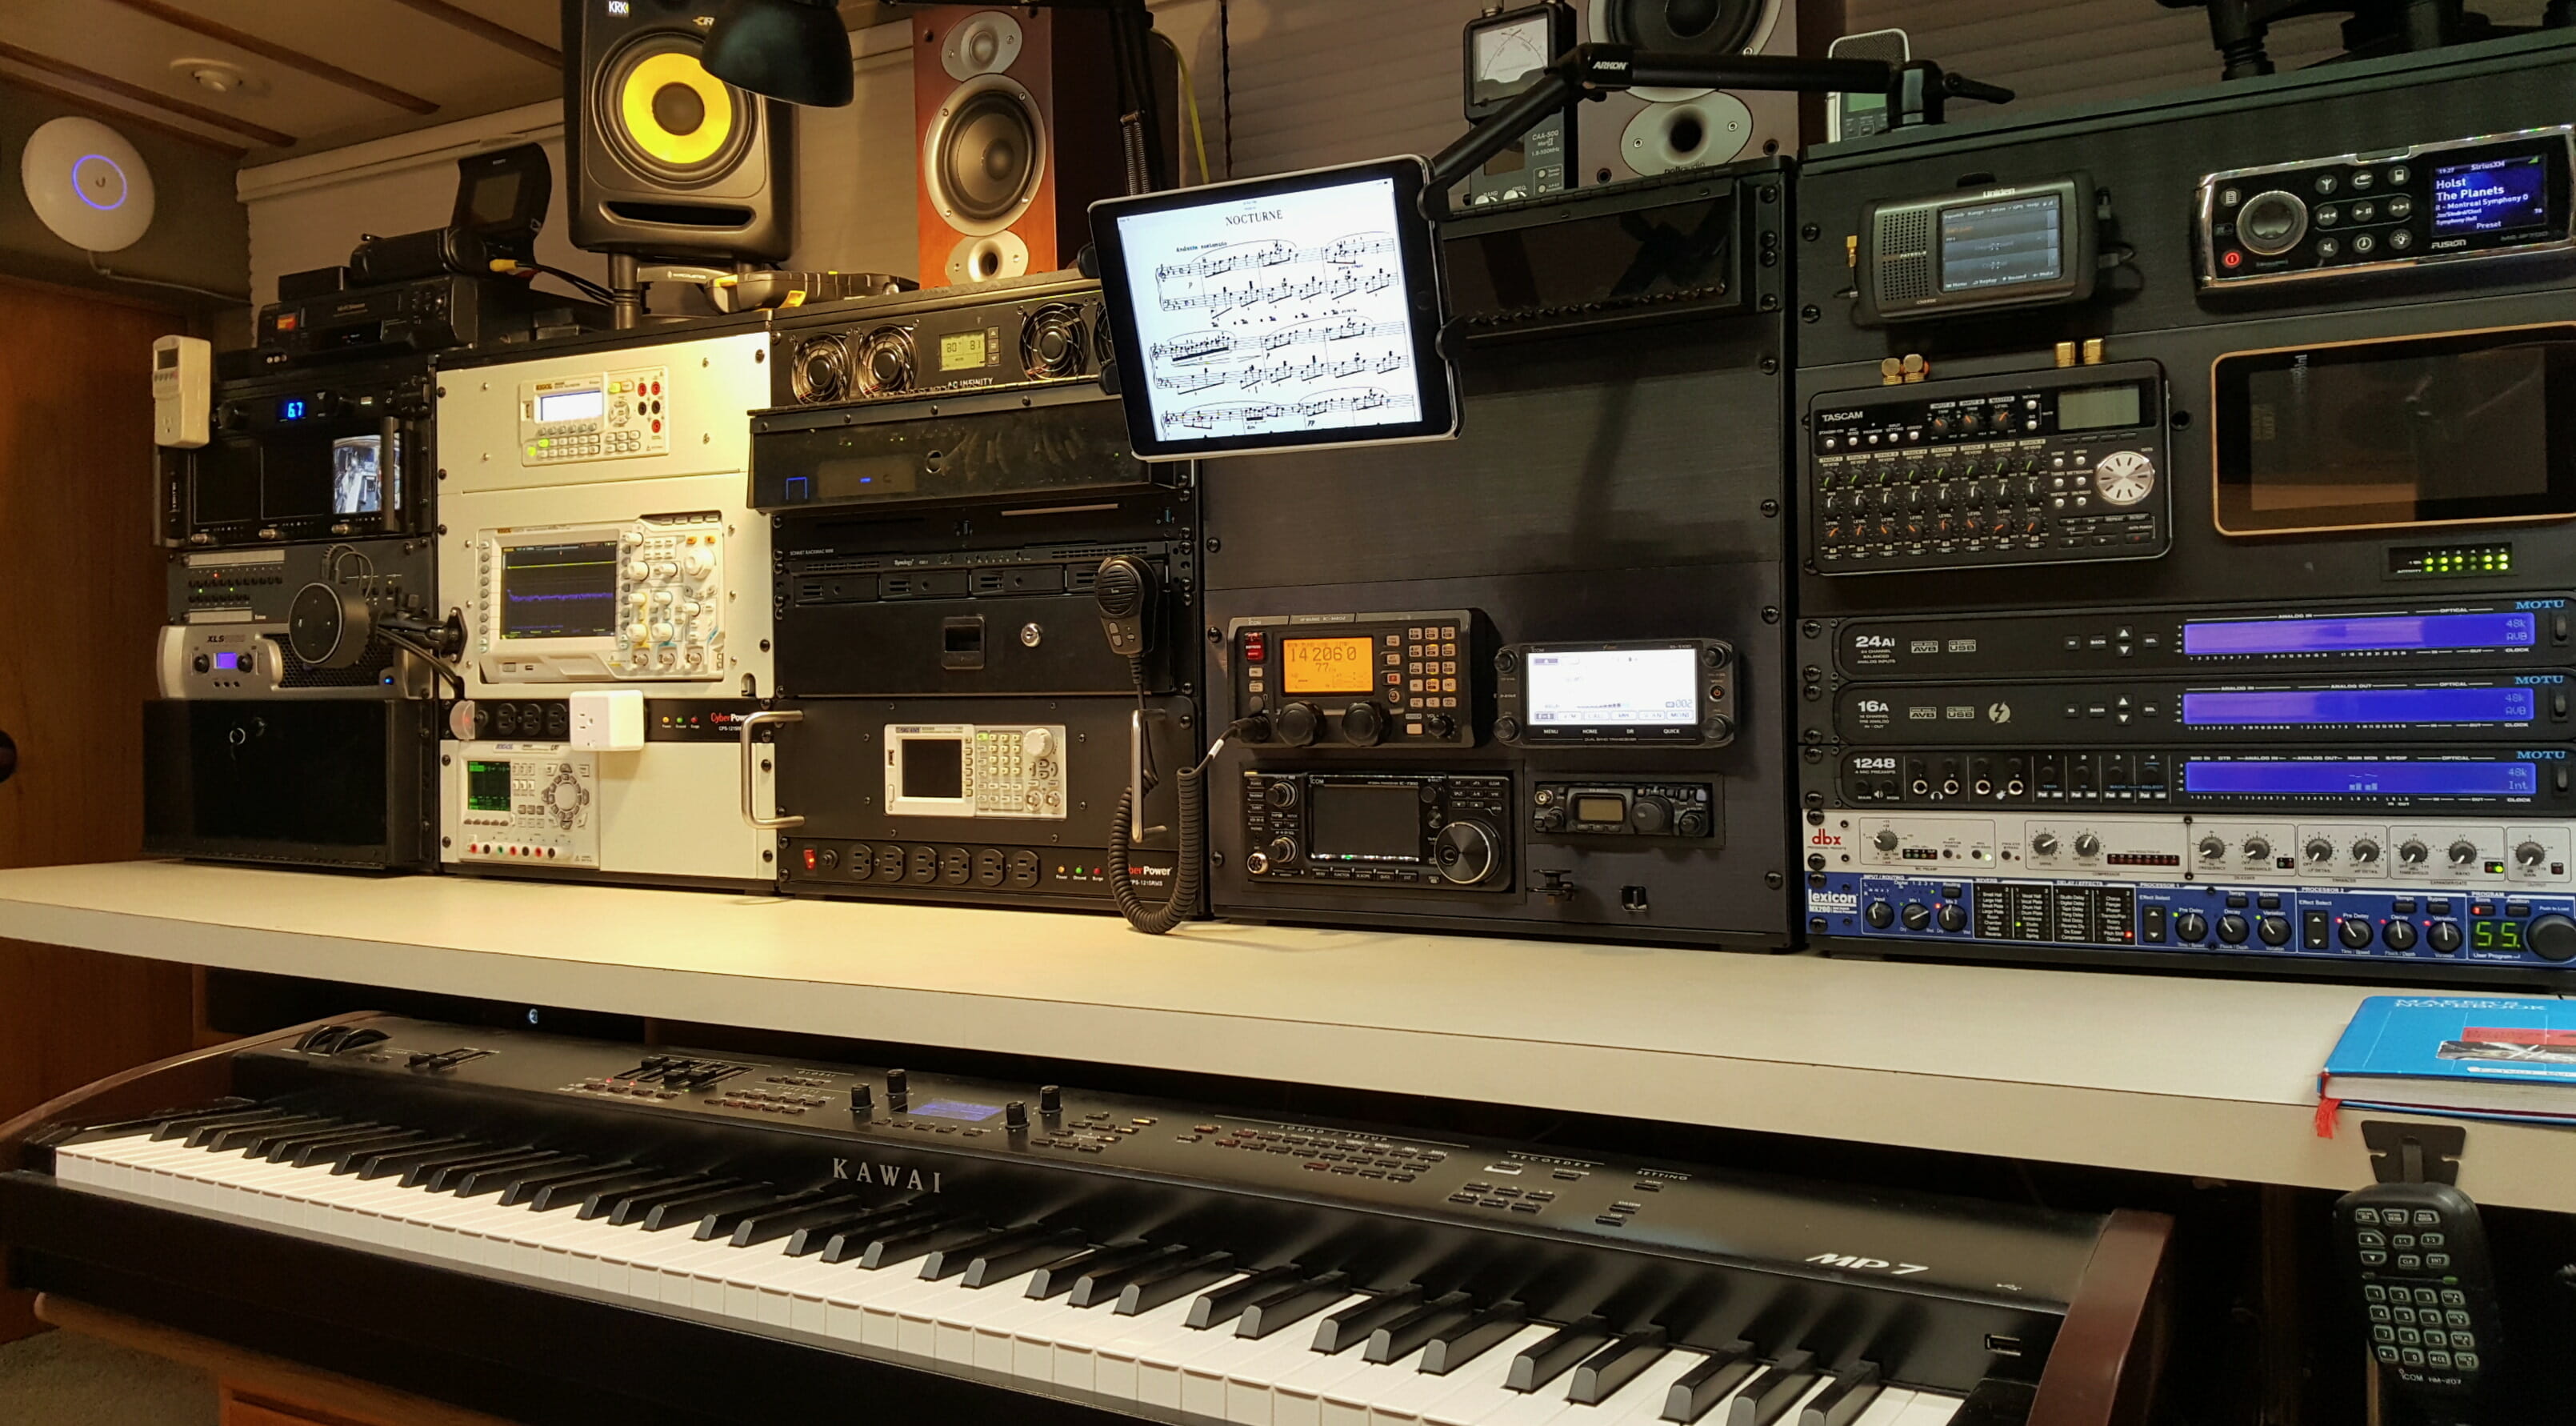
This stand works well the iPad too. I am having fun imagining Erik Satie, 99 years ago, having just written “Le Yachting” as #8 in his Sports et Divertissements series to accompany a set of drawings depicting the popular pastimes of Parisian society. Could he have imagined it being played, one long human lifetime hence, on a synthesized piano aboard a sailboat, using a tablet computer to display the sheet music? How quickly things change…

However you do it, enjoy having the music up where you can see it… and cheers from Nomadness in the San Juan Islands!
2016 Follow-Up
A few years have passed since I wrote the above, and I have sold both the sailboat and the PX-5S… and moved aboard a 50-foot Delta powerboat with a Kawai MP-7. This created a different sort of packaging problem, and I have a post about building a heavy-duty locking piano drawer incorporated into my lab console:
Great job with the stand. Any ideas for building something similar to attach to an existing keyboard stand for gigging purposes? I’m trying to pair down my equipment and if I could find something like this to attach to a keyboard stand rather than carting another piece of equipment to a gig it would be great. Well done again!
I did see some commercial stands that come with an arm for clamping to existing stage structures like those in drum kits… I was hoping to prevent some wheel-reinvention! Still, with the weight of books and binders on a long arm, I thought might be wobbly or saggy. After seeing your comment, I did a quick Amazon search but nothing jumped out at me. Surely, though, there must be! I can’t believe everyone uses separate tripods unless their keyboard has a fixture built in….
Great ingenuity. I love what you made and the detailed photos.
Thank you, Barry. And your music stand is a work of art… gorgeous!
[…] the back of the piano, so have restored the Manhasset 5301 to its original configuration since my modification for the PX-5S three years ago… and it is a loose item that has to be […]