
Keeping Rodents out of your Pole Building
© 2004 by Steven K. Roberts
Nomadic Research Labs
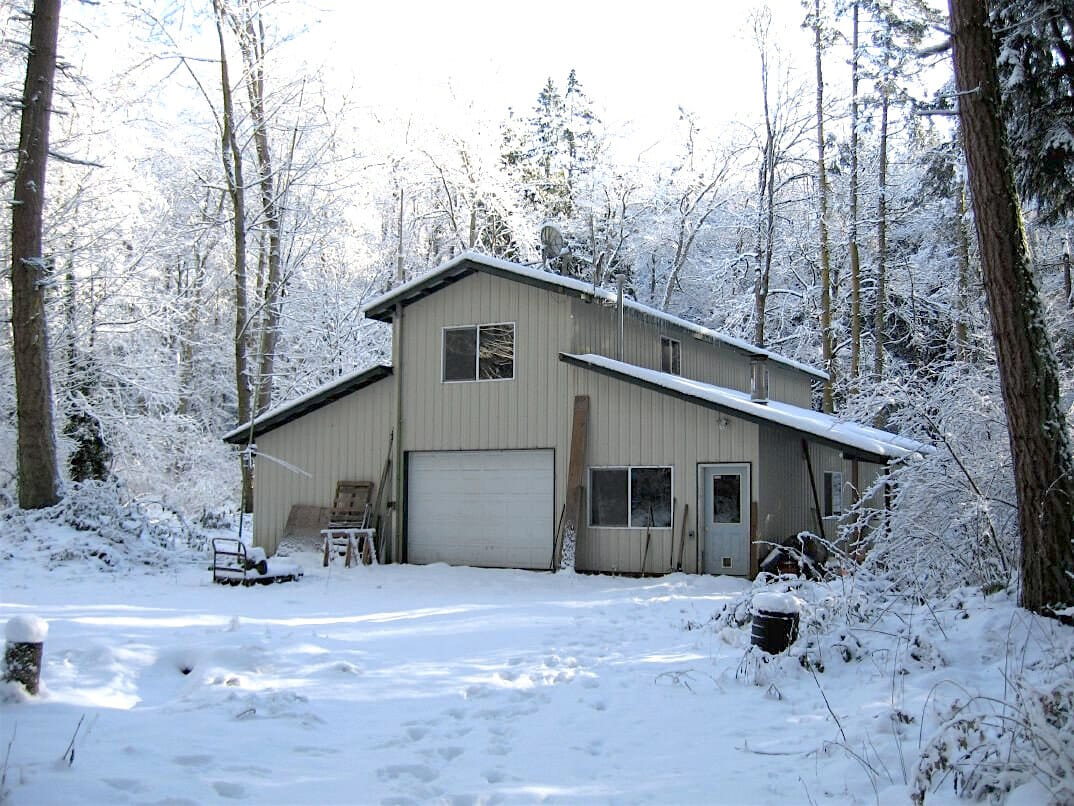
It would not have occurred to me to do a how-to article on this arcane topic if I hadn’t been thrust headlong into an expensive and time-consuming retrofit project. The groundwork was laid in 1998 when I contracted the construction of our 3000 square-foot Microship lab to Pioneer Pole Buildings (of Ferndale, Washington, not this company with the same name in Pennsylvania). I was pleased with their work, the crew was efficient, and the price was reasonable.
Basically, I was a happy but uneducated customer.
About 3 years later, the dreary Northwest winters induced me to add an extra layer of insulation to the R-11 that came with the building: I slit the original vapor barrier to minimize condensation issues and added R-19 kraft-faced batts between all the rafters. This helped a little (though probably not $1200 worth), and the combination of a propane-gobbling unit heater and the original wood stove named “Miss Piggy” made the working environment tolerable whenever I was willing to spend money or chop wood.
But unbeknowst to me, I had elevated an already serious rodent problem to a level that, within 3 years, would become critical enough to require complete removal of all insulation (even the original stuff) as well as a time-consuming retrofit to the building that would have added less than $100 to the cost if it had been done up front.
Easy Access and Optimum Habitat
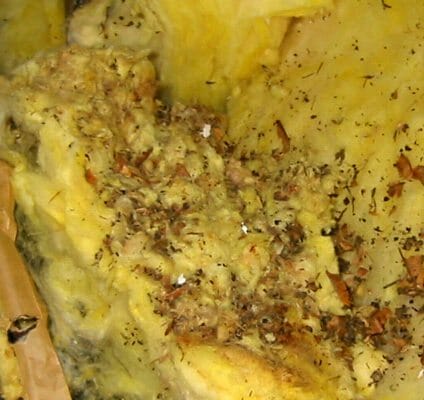
The problem first became evident to our noses… the odor of mouse urine started to pervade the place, sometimes almost overpowering in its intensity. At the same time, we were discovering more and more mysterious wet spots on the insulation facing, complete with telltale crystallization that made it clear these weren’t roof leaks. Here’s one of the worst areas:
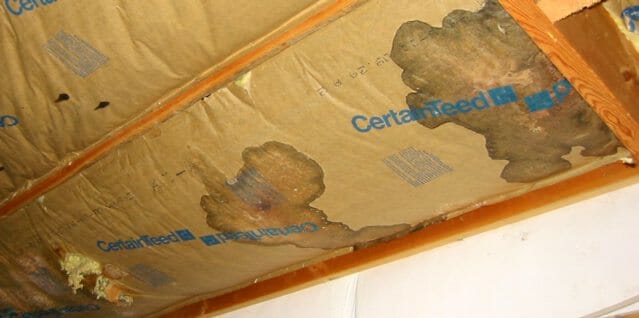
Obviously, mice were nesting in the soft and cushy space between the layers of insulation; by adding more, I had created an absolutely ideal habitat. But how were they getting up there? I scattered mousetraps all over and caught a few; occasionally, I would rudely awaken my cat (Java) from a nap and bring her to the lab, but she would just stare quizzically at the ceiling with a little “so, what am I supposed to to about it?” thought bubble over her furry head. The worse the problem became, the more puzzling was the situation: obviously I had a rodent problem, but where was the access point?
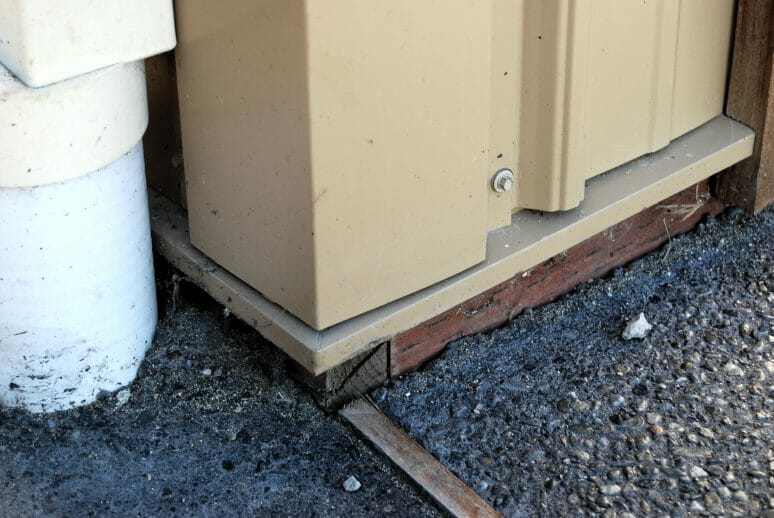
Then the reality sunk in. Every 9″ around the building, there was a designed-in mouse door! Here’s one that became visible after ripping out some insulation above the baseboard:
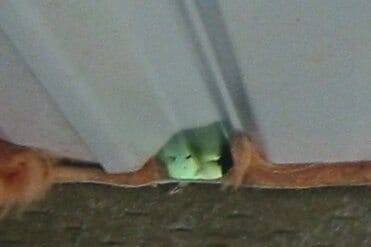
That’s right… that ridged metal skin of the building was simply overlaid on the wood, with nothing but soft insulation stopping mice from tunneling up… up… all the way to their condo complex in the ceiling.
But it gets worse. I had an expert come look at the place, and he identified some highly damaged areas as being the work of rats, not mere mice. Those are too big to fit through the little mouse tunnels, so how were they getting in? It turns out that the four corners of the building were sloppily slapped together and covered with a decorative molding… with a big hole in the bottom. In one instance, the metal skin gapped so much that I could insert my arm all the way to the elbow. Here’s one of the corners viewed from inside after the loose cover piece and old insulation were removed… note the built-in gap caused by the width of the wooden girts versus the actual pole on the right:
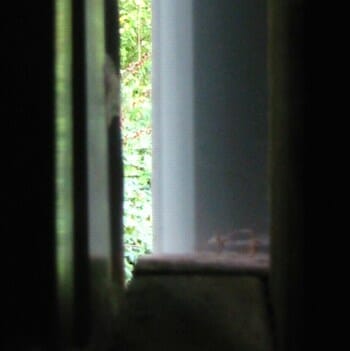
A little poking around revealed that this area, hidden by the corner cover, was easily sufficient to pass rats, who could either head all the way to the ceiling or venture into the sections of wall insulation between the girts.
So… the obvious question was what to do about it? Merely keeping them out, at this point, was insufficient… the level of infestation was so severe that it was getting embarrassing to have company in the lab, and there were some serious health issues (scat analysis indicated that some of the intruders were deer mice, carriers of the dreaded hantavirus). It looked like we were going to have to remove all the insulation… a job that, after trying one section, I quickly discovered I was neither equipped nor motivated to do. And so, for about $2600, I hired Clean Crawls to do the job. A crew of four, aided by a truly scary truck-mounted vacuum, completed it in one day:

Had there been any doubt about what was going on in my insulation, it was quickly resolved (although it was heartbreaking to see how much untainted stuff was ripped out and discarded as well). The guys also pointed out areas that had been inhabited by bats, indicating that we’re going to have to seal off gaps up near the roof in addition to accesses from the forest floor. Here’s a typical infested area:
So. Now I was left with an uninsulated building, out about $3800 including the insulation that I had put in 3 years earlier. How do we insure that this won’t happen again?
Rodent Exclusion
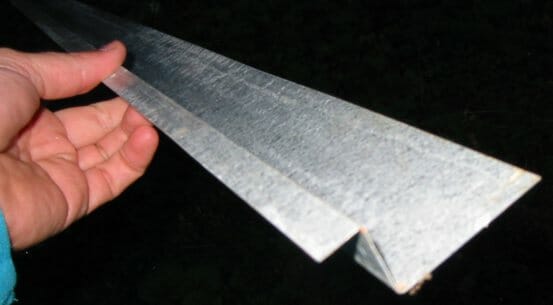
A little research, including a call to the builder, revealed that all I had to do was block the access ports with Z-shaped flashing from the local Home Depot (and no, while friendly and understanding on the phone, he didn’t offer to help… though I broadly hinted a few times during the conversation). The stuff is cheap; about $60 worth was more than enough for the 40×56-foot building. It’s in the roofing materials department, and comes in 10-foot lengths. The long flange is 1 3/4″, the step is 7/8″, and the short flange is 3/8″:
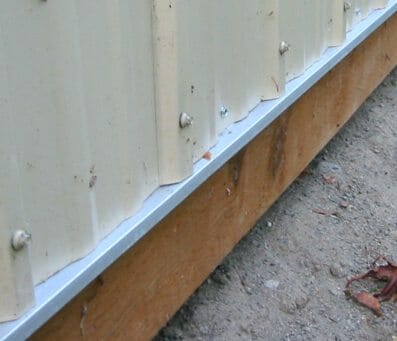
It’s easy to install: just loosen the bottom row of screws holding the skin to the baseboard, slip the long flange under it until the step is snug, then screw in place with 1″ self-drilling #10 screws:

I briefly considered running a bead of sealant along the joint, but I didn’t want to block water from escaping if there were any condensation problems. There are gaps here and there large enough to pass spiders, but they don’t bother me… and besides, when I re-insulate there will be 1.5″ rigid foam glued to the metal between the girts. If arachnids want to hang around in the tunnels, that’s fine with me.
The flashing installation, when completed, looks like this:
It may incidentally lead to a cleaner building; I watched a banana slug try to figure out how to get past it and then give up (they leave ugly castings and slime trails on the exterior skin).
But this doesn’t solve that other problem… the corners, where there are huge gaps big enough to pass rats. I stared at these for a long time, imagining cutting chunks of wood to shape and also plugging all the gaps between the girts with 2×4 scrap for good measure, then realized that the solution is much simpler: stainless steel wool. Rodents can’t chew through this, and it still passes random condensation drips… so I cut a generous chunk and imprisoned it under each of the four corner moldings:

And that completes the first phase of the repair job. Many hours of crawling around in the nettles, two cuts on my hand, and about $60 in materials to do what should have been obvious to anyone erecting a building in the middle of a forest. I’m also embarrassed that I didn’t think of it myself until it was too late.
From here, we move to the next phase of the repair job: installation of a suspended ceiling with fluorescent lighting troffers (might as well make the place better than it was while spending all this money!), with R-38 unfaced batts and rigid foam on the walls. And, to keep out the bats, I guess I’ll risk my life clambering around on the slippery roof for a couple of days, squirting cayenne-flavored foam into the generous gaps that became visible when the cosmetic layer of R-11 insulation was removed. Along the ridgeline, the opening is so big that on windy days tree debris rains down into our offices, now that there’s no insulation to catch it and hide the evidence.
The lessons in all this are clear.
- If you have a metal pole building, examine the skirt to make sure there are no rodent access tunnels, and add flashing if there are.
- If you are having a building installed, make sure the contractor deals with this problem NOW; in Washington, there is only a 2-year window to file a complaint with the Labor & Industries folks.
- Don’t add a second layer of insulation over an existing one like I did… it not only creates mouse habitat, but it can easily lead to condensation problems at the original vapor barrier.
Good luck keeping the critters out!
Footnote August 12, 2006
I heard from the owner of the other Pioneer Pole Buildings, the one in Pennsylvania I mentioned in the opening paragraph. He writes: I am sorry for your need to do the work you had to on your building. I make the rat guard or base trim standard on every building and it should be standard industry wide.
Footnote Oct 27, 2007
I have been in touch with another local pole-building contractor, Common Ground Construction, who wrote: I have attached a photo for you (not the greatest but it shows the intention—please excuse the dirty building) showing proper installation of both corner and base flash. A great way to finish off the corner and close the gap you have left between your two pieces of base flashing is to take one piece, cutting and bending it to create one continuous piece around the corner. In our photo you can see what this looks like from the top. As far as the corner flashing goes, when properly installed, it should not protrude farther than the ribs of the side wall metal. Basically, yours is too pointy. It should be taken off, pushed farther against the building and re-screwed farther out—a relatively simple task since you installed the base flash yourself. It should rest nicely on top of the base flash which creates kind of a shelf for it. This would close off that gap completely and eliminate the need for the use of steel wool (although that is also a creative solution to the problem).
We do use base flashing as a company standard, however since many other companies don’t, we always mention it to our customers so that they can compare apples to apples on their bids. In some cases, where people just want to cut costs, they choose to eliminate the base flashing. I am glad I stumbled upon your web page… I have been referring these customers who are contemplating eliminating the base flash to your website hoping that they, too can learn from your experience. It is nice that you are willing to help other people by sharing what you went through.
Here is their method of corner/base installation:
You must be logged in to post a comment.