
Mounting the FT-817 Transceiver in an Embedded Application
During the first “Shacktopus” project in 2005 (not the new one), I was integrating a variety of communication, data collection, and audio devices into a backpackable substrate. I put the project on hold to go shut down the old family home, then never got back to it… and now we have smartphones that do almost everything I was trying to incorporate into a much larger package. This article from that era presents a simple way to mount the venerable Yaesu FT-817 onto a chassis.
by Steven K. Roberts, N4RVE
Nomadic Research Labs
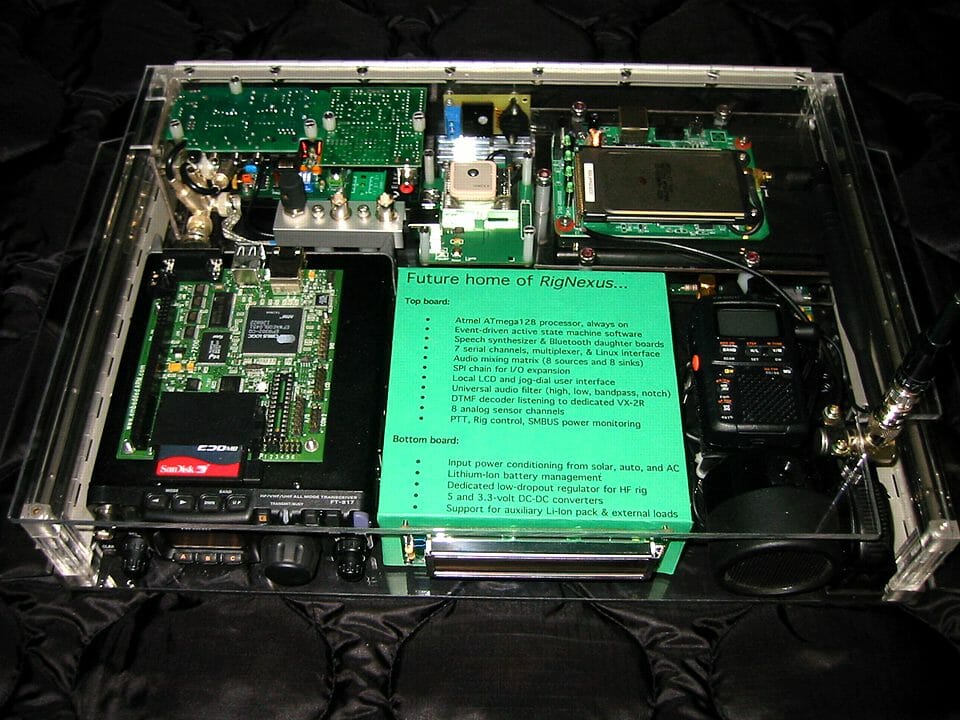
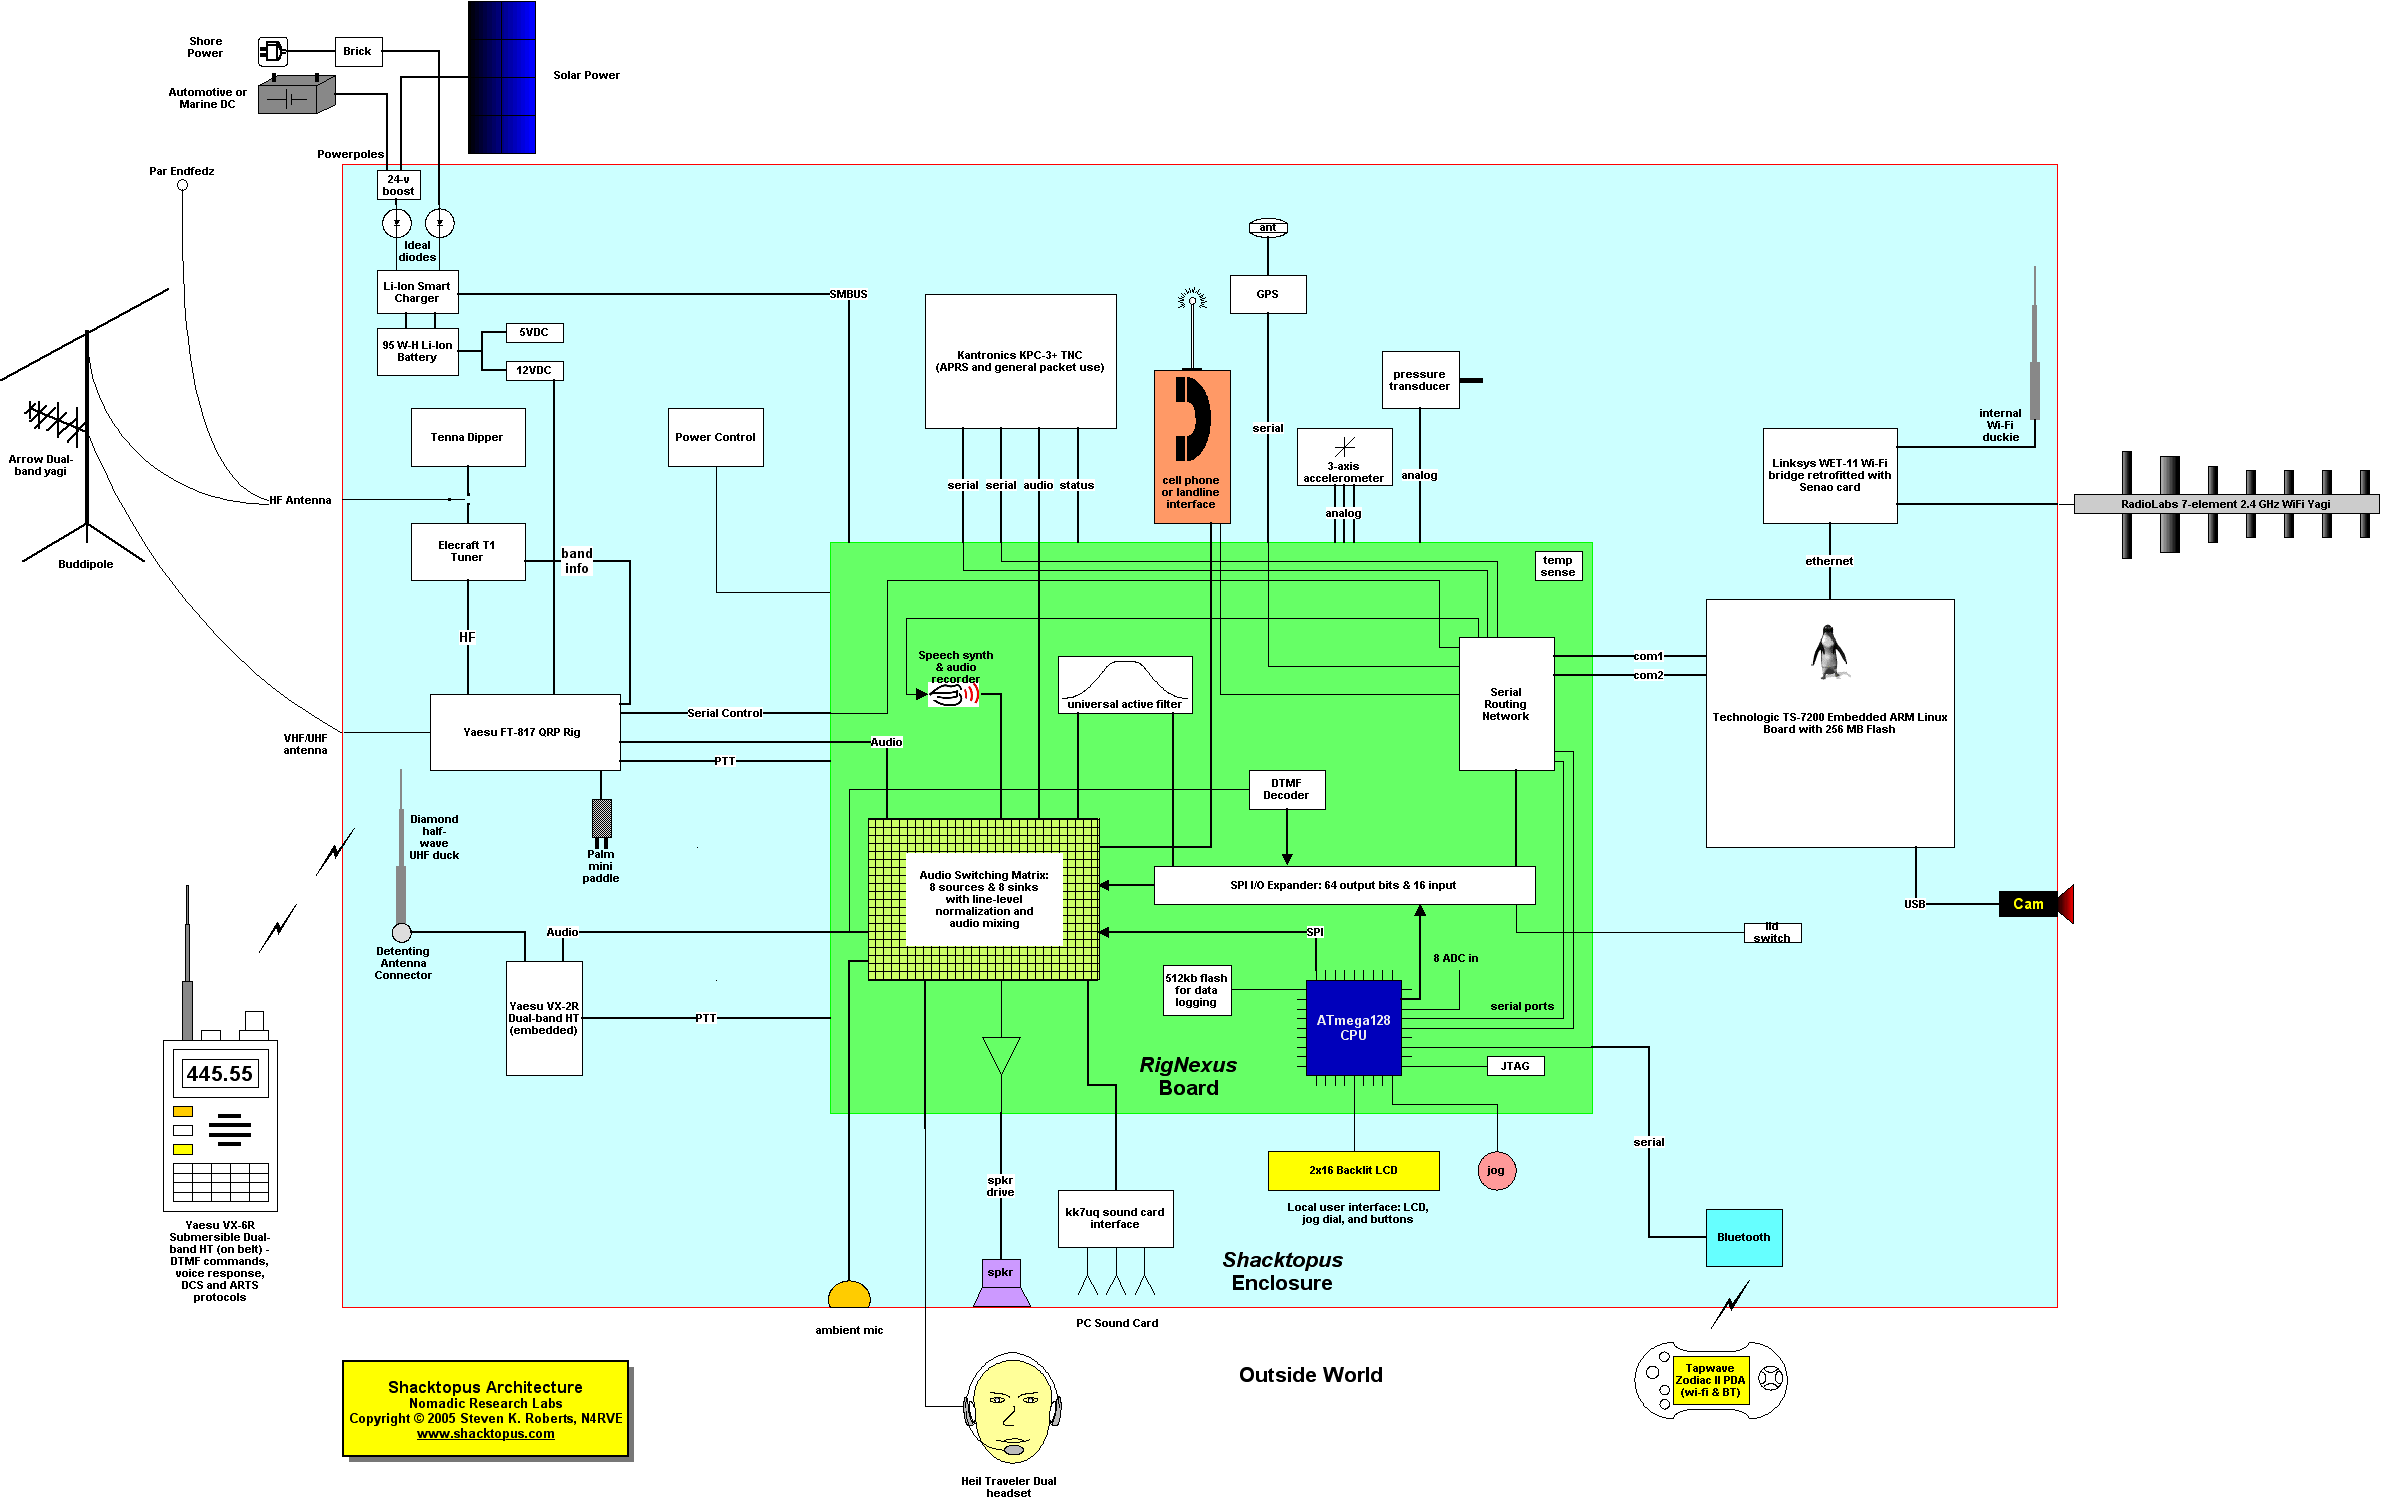
Shacktopus consists of a wide variety of commercial products integrated into a coherent package, all incorporated into a single user interface environment and provided with centralized power distribution (see the system architecture drawing below for an overview). For the most part, product repackaging is easy: remove circuit board from housing, mount somewhere on suitably scaled stand-offs, and cable it into the system.
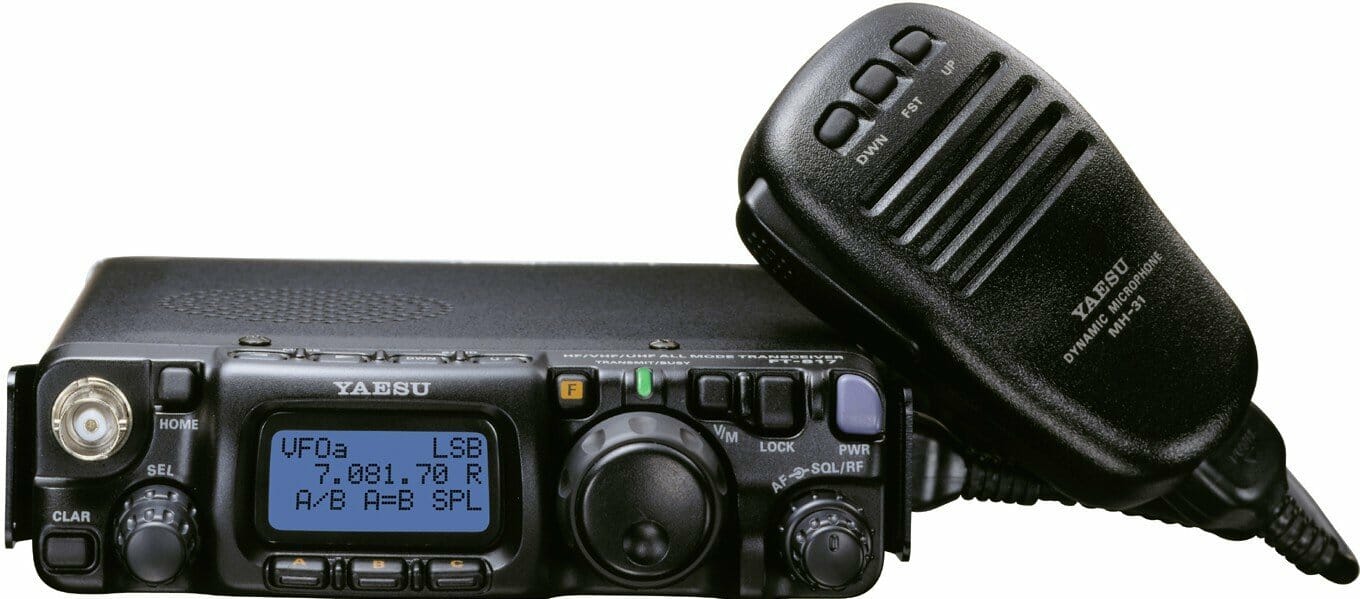
The lovely little Yaesu FT-817ND HF ham rig presented a more difficult challenge, however, as I had no desire to “unpackage” it. The enclosure is tight and contributes to RF shielding, and very little if any space advantage would be gained from eliminating the covers (although losing the steel box would have saved me a few ounces!). Also, the radio offers no provisions for mounting in the classic portable rig sense… it lacks bracketry.
At first I made some delicate little aluminum fixtures to engage the screws that attach the case halves to the chassis; some clever fellows have a product that uses these to support pivoting peg legs that bring the radio to a reasonable operating angle on the desktop, and they also accept fixtures that allow attachment of the carry strap. I was concerned about depending on the tiny case screws in this application, however, as the type of shock encountered in a drop is likely to be much worse than the static load on a desktop or the “sprung” load on a shoulder strap. It was not difficult to imagine them shearing off completely, or damaging the internal casting through cyclic loading. An additional bracket on the rear skirt would have stabilized it, but it still didn’t feel right… and I didn’t have the space for beefy parts.
The old standby method, sticky-back hook-and-loop fastener, was my next obvious choice; I used it to attach the embedded VX-2R, and have had excellent luck with it in similar applications over the years. But here I ran into a series of gotchas: the “industrial strength” stuff was too tall and would have caused the Linux board’s connectors to impact the lid, the lighter stuff would have been able to “peel” from cyclic loading and thus require an ugly cable tie to hold the rig down, and most of the useful flat bottom surface of the radio is a fragile little door for the battery compartment that definitely shouldn’t be trusted structurally.
Ah, wait. The battery compartment!
It didn’t take me long to discover after buying this rig that I’m not a fan of the included FNB-85 Ni-MH battery, nor with its charging circuitry. It’s a dumb charger that either trickles from a robust external supply, or is switched by an internal timer from a provided wall-wart… and Ni-MH batteries have a high self-discharge rate anyway. And besides, scuttlebut on the FT-817 Yahoo Group seems to anecdotally suggest a correlation between batteries dying on the shelf and blown finals, though that has never been conclusively proven. In my application, integrated into a system with an actively managed 95 watt-hour Lithium-Ion smart battery, the internal one would be dead weight, or possibly even a serious liability. (I should mention that most of the shortcomings of the stock battery have been addressed by the “One Plug Power” product from W4RT electronics, which seems to get good reviews from users.)
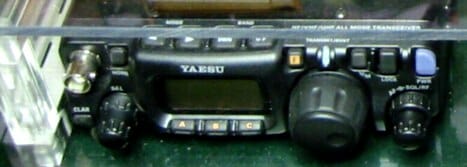
So, how does all this relate to nailing down the rig? I sold the FNB-85 on eBay and fashioned a couple of aluminum brackets that interface with the battery compartment. One has a slimmed-down nose to allow insertion into the case cavity, and both have sawn slots that allow them to bridge the stiffening ridge around the opening and apply clamping force to flat steel:
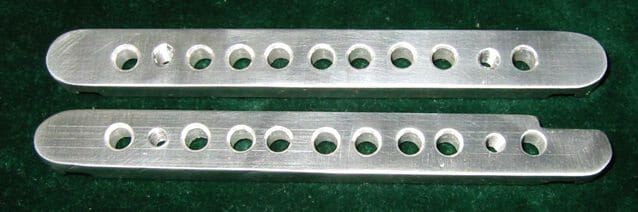
These are neither optimized nor particularly pretty, as they were banged out late one night on the table saw and drill press (with a few token lightening holes added and the ends rounded for aesthetics), but they do the job. The smaller holes, second from each end, are drilled and tapped for #8 flat-head machine screws, and the installation looks like this:
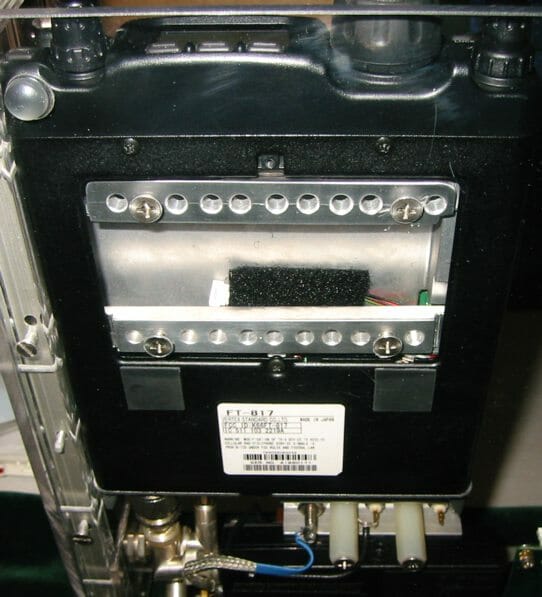
The baseplate is 3/16″ surface abrasion resistant polycarbonate, a very tough clear plastic that machines smoothly. I countersunk the holes, then lay on the floor for a while… fiddling with getting everything lined up. All threads finally engaged, and the rig drew down nicely.
In the photo above, you can see the clearance slots just as the brackets meet the Yaesu case. There are also two thin adhesive-backed rubber pads just behind the battery compartment; they provide a little compression and also prevent the radio from point-loading on the screw at the center. Also visible in the photo are the left acrylic side rail of the enclosure and the RF “plumbing” area behind the rig, including a braided ground strap. Inside the battery bay, the original cable to the FNB-85 has been preserved and stuck down with a stray bit of hook-and-loop, just in case it needs to find a new home someday…
This is a very low-tech and relatively crude solution to the mounting problem, but I can recommend it if you need a solid attachment to this rig and you don’t mind giving up the original battery.
You must be logged in to post a comment.