Using a FLIR ONE Thermal Camera Aboard
A driving force in my years of building technomadic machines has been a toolset for seeing the world beyond the limitations of my usual senses… something that is not only intrinsically fascinating, but essential for diagnostics. The latest addition is a FLIR ONE thermal imaging camera (the Gen-3 USB-C model for Android; there is also one with Lightning connector for iOS), and it joins the extensive suite of sensors, cameras, radios, probes, test instruments, microscopes, ROV (eventually), and other tools for getting a more detailed look at the world around me.
It has already been useful. In the first day of ownership, I’ve found a thermal issue on a friend’s boat, detected a few phantom loads, and gotten a better look at a serious airflow problem in my console that allows heat to build up dangerously on summer days.
The model I chose is the cheapest one, with only 80×60 thermal pixels, but they also have a higher-resolution (160×120) Pro version for Android, as well as an equivalent model for iOS… both at twice the price of the low-res models. For my relatively casual needs, the basic model at $199 is probably sufficient. Here it is, nestled in my hand… showing the two lenses. The top one is for regular visual sensing, which is used with edge-enhancement to emboss a reference context over the blobby thermal map… something they call multispectral dynamic imaging, or MSX. This is a brilliant idea, and as you’ll see in my images below, it turns those 80×60 infrared images into something that is actually useful and interesting.
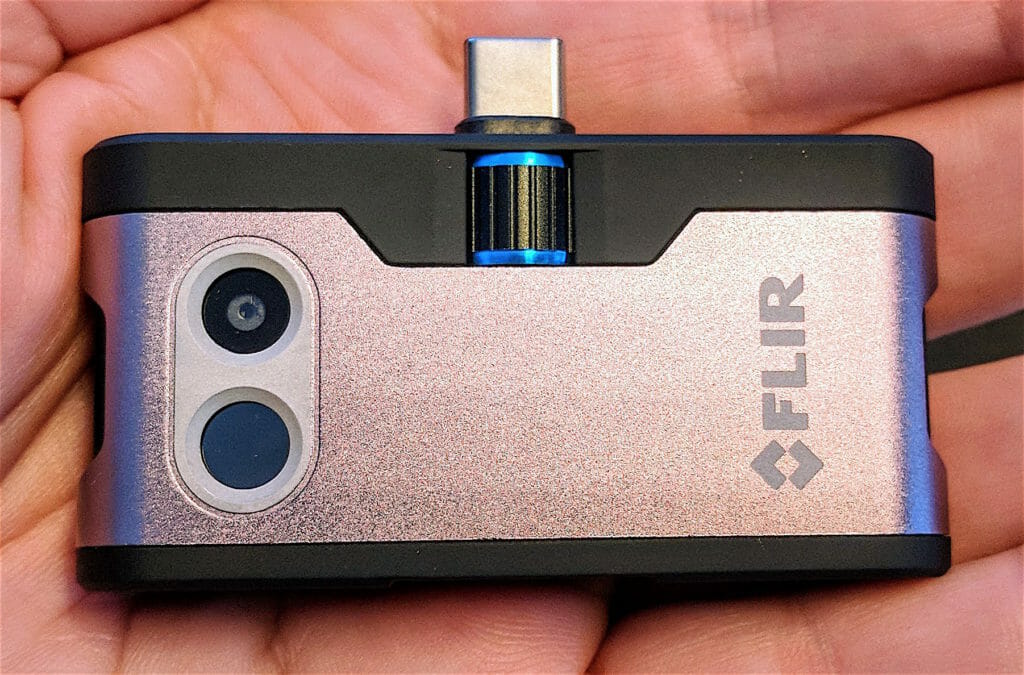
Another feature visible in the photo above is the thumbwheel attached to the USB-C connector, allowing you to adjust how far it extends from the camera body. This OneFit allows the unit to work with your phone even if it is in a protective case (as mine is), and is vastly better than having to disassemble the thing every time you want to use an attachment. It reportedly can even handle an Otterbox Defender phone case, though mine is the much sleeker Caseology Parallax enclosing a Google Pixel XL. Note that the USB-C connector is symmetrical, so it can be flipped around for thermal selfies.
This page is a quick look at some of the uses for infrared imaging aboard a boat. My original motive involved power cabling; as I am about to dive into fabrication of a new power-distribution system, including shore power and source-switching along with elimination of the ancient 32-volt cruft, I need a way to detect undersized wire or inadequate crimp connections that show heating effects. But it didn’t take long to see other uses for this new tool, which people sometimes describe as “Terminator vision.”
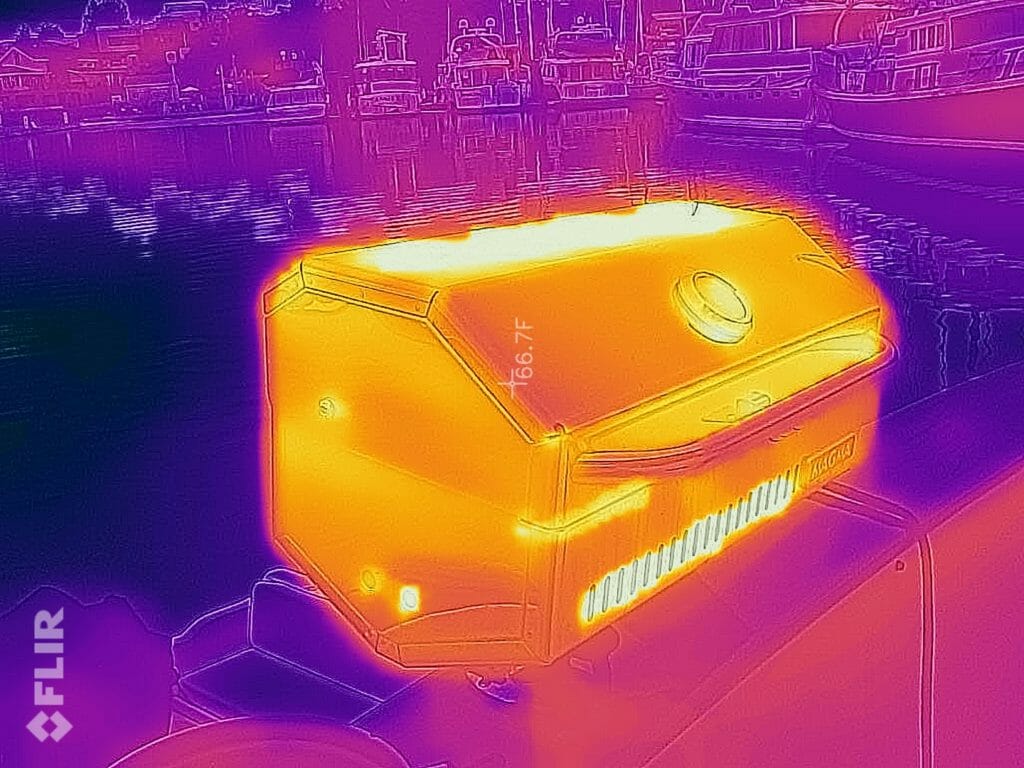
The photo at the top of this post is the marine barbecue on the afterdeck of a friend’s boat as it cooled after dinner, framed by the outlines of other boats in the marina. While there, I looked into an issue with refrigeration, and found a rectangular vent on the wall behind the galley, allowing warm air to exit from the refrigerator. That’s all good, but the hotspot above it is from a header tank for the hydronic heating system in a cabinet on the other side, reducing the convective heat flow close to the overhead, making the fridge work harder:
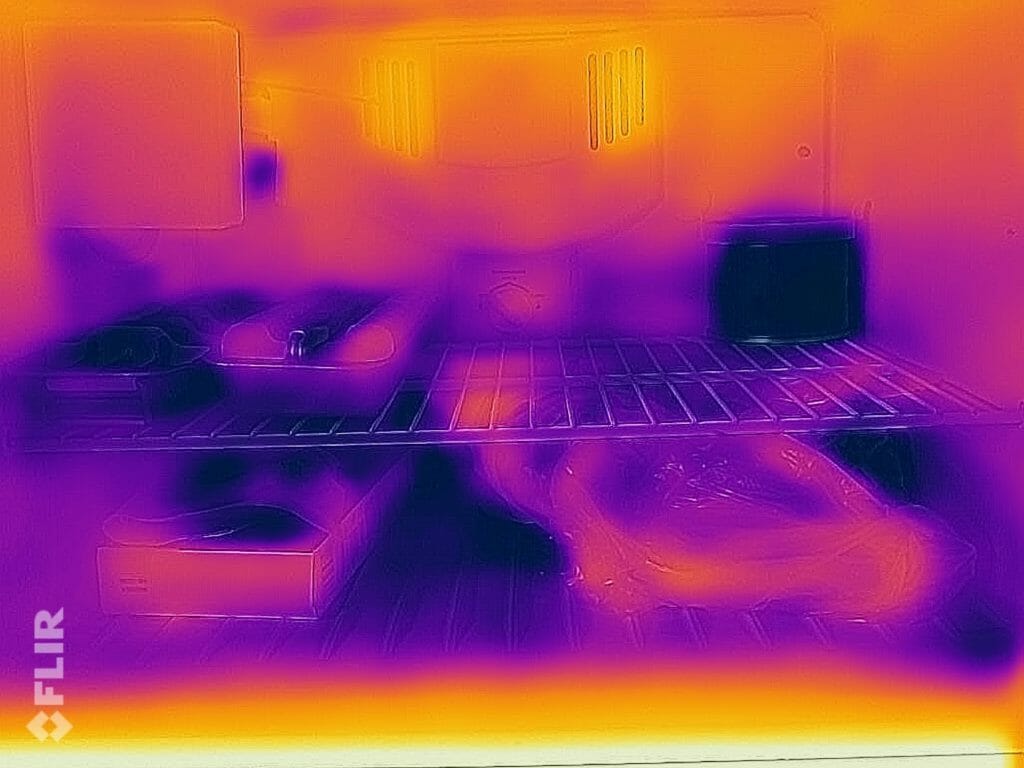
Back aboard Datawake, I took a look at my own fridge. I remember from the big drop-in aboard Nomadness (using an excellent Grunert cold plate) that there was a very wide distribution of temperatures inside the space… I learned over the years where to put things to take best advantage of this and avoid freezing delicate stuff. I popped open the freezer and was surprised to see this complex image:
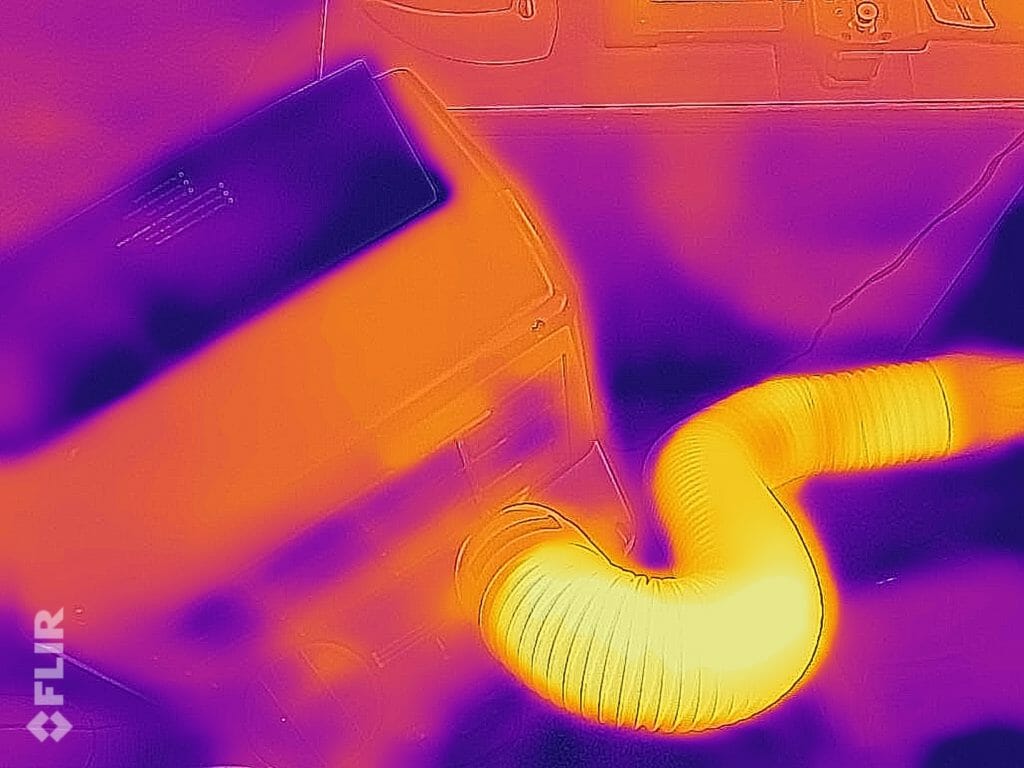
It’s very good at spotting this sort of thing, and differentiates regions of varying temperature with ease. I turned on my free-standing Honeywell air conditioner, and within a few minutes could see the heat loss through the hose that heads out through the wall (something that was another reason for buying this camera… I have been dumping its hot air into the Jefferies Tube that is used for engine aspiration, but it’s not adequately exiting through the vents on the side of the hull as I had hoped. Now I know that when I get around to fixing it with a vent through the outside surface of one of the baffled ports, I will also add insulation to the hose.
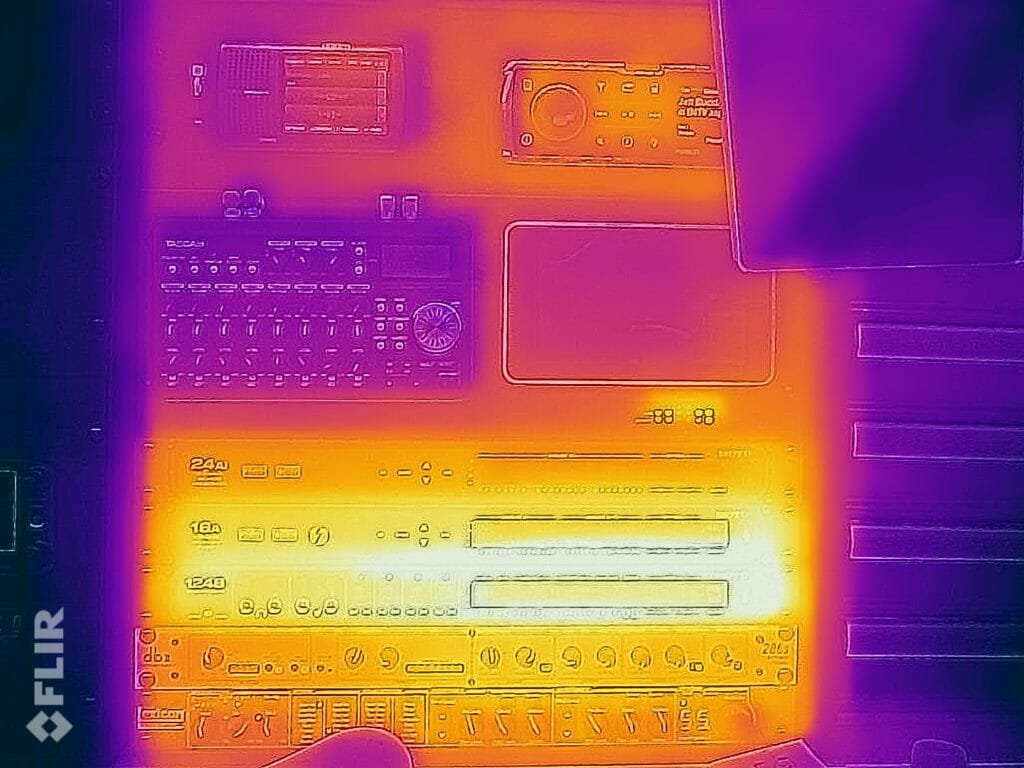
I turned around to take a look at my console, starting with the audio system. I had noticed that the MOTU units were getting significantly warm, especially on hot days when my haphazard fan system can’t keep up, but now I can really see it. The lesson here is to close in the back of the equipment racks, forcing the air past the offending equipment to pull heat away more aggressively… my current system just takes the path of least resistance and doesn’t really accomplish much:
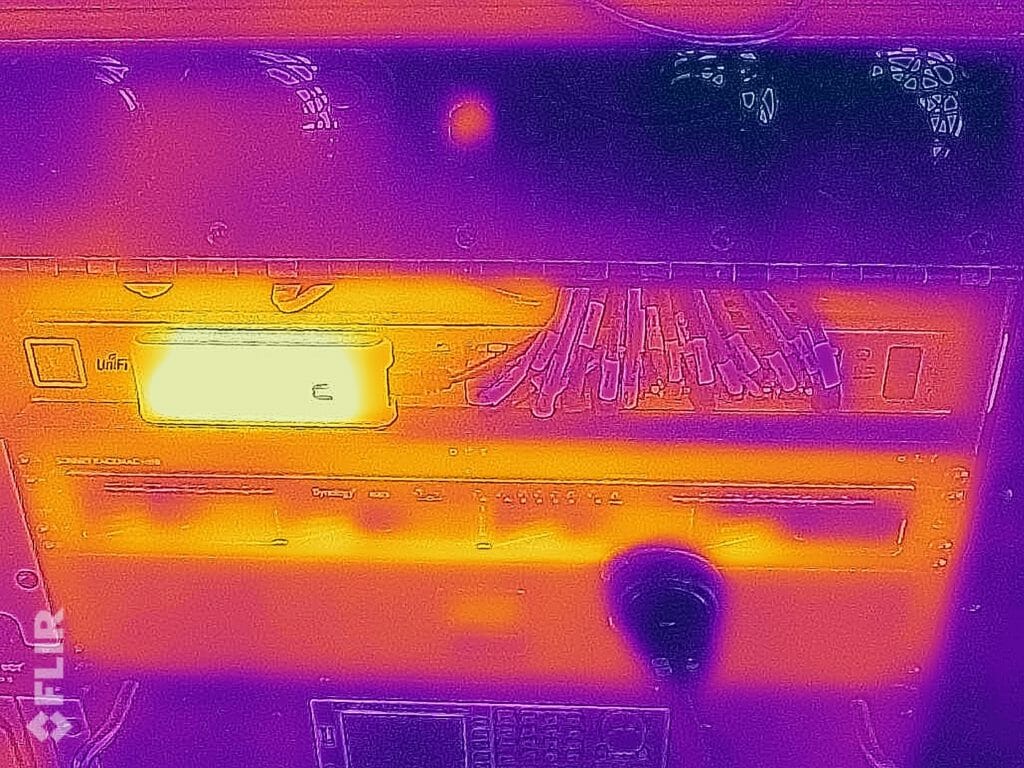
Moving to the center of the console (zone Gamma), I took a look at the networking region… something else that has been known to cook in the summer, which one day took the whole system down while I was over on the mainland (exacerbated by a pilot error with the fan controller). Same problem with undisciplined airflow, though the built-in cooling fans on the NAS seem to be doing a good job. That small rectangular hotspot to the left of the CAT-5 bundle is the Cloud Key on the front of the Unifi switch, and the cool blob below is the microphone for the Icom M-802 marine SSB radio:
Stepping back and looking at the whole console, you can see all this in context.
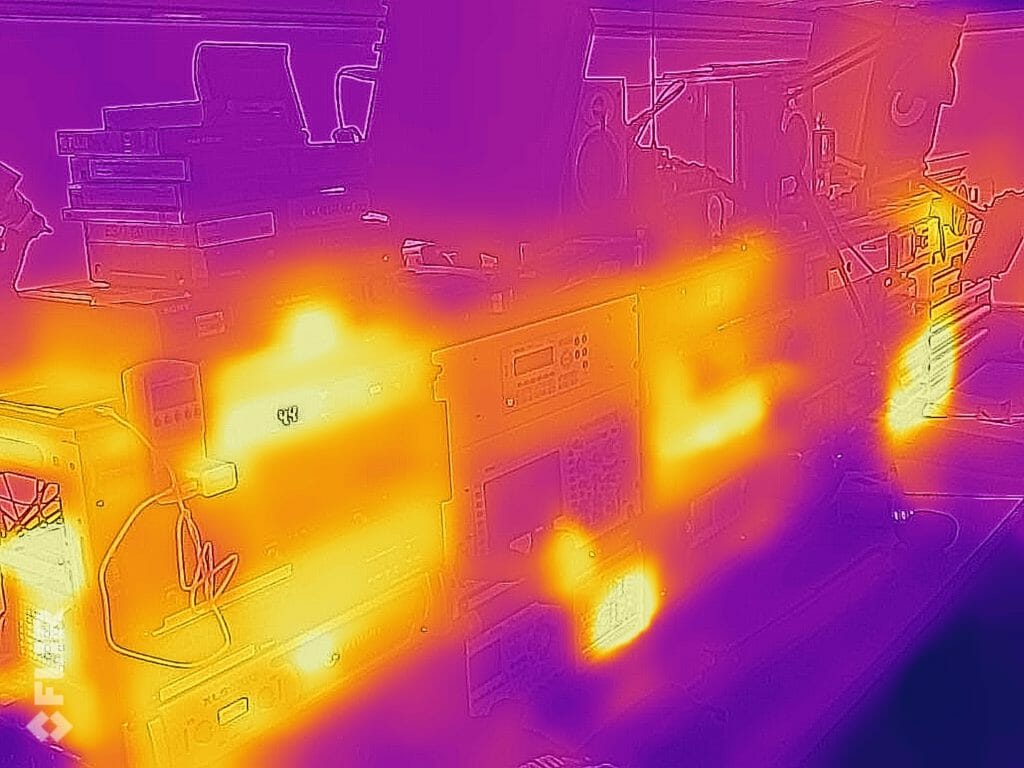
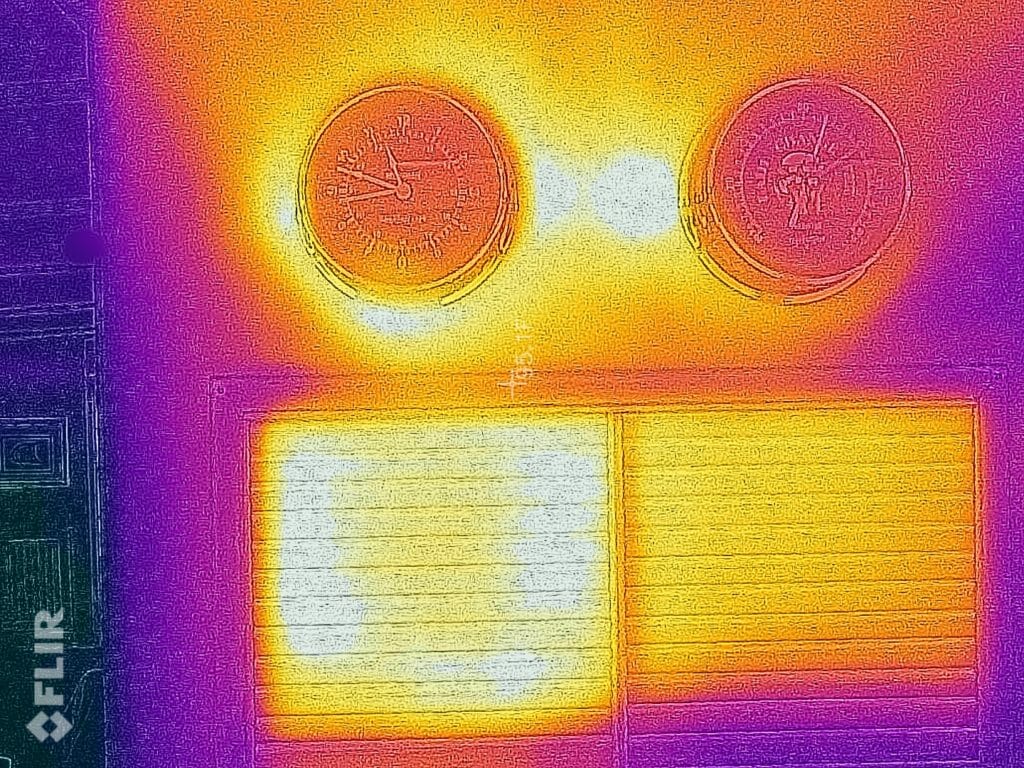
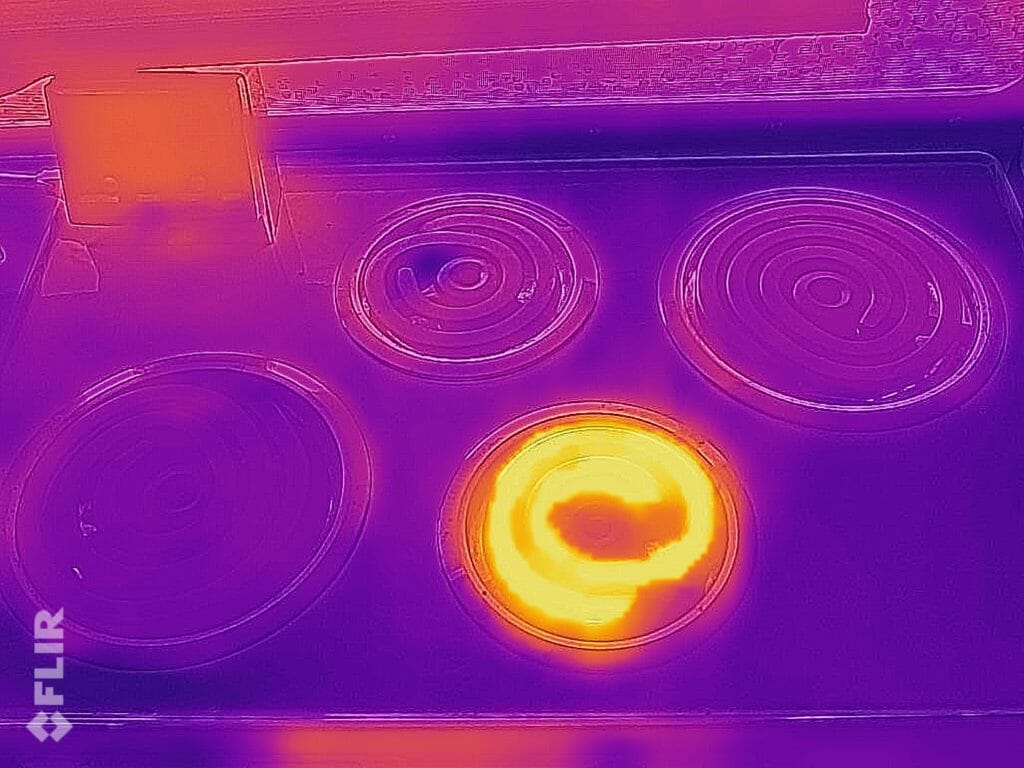
Note that the heat maps are auto-ranging… a numerical overlay can show the actual temperatures of the regions ranging from deep blue to white-hot. Turning on a burner on the electric stove for a few seconds allowed me to observe this in real-time; it wasn’t very hot yet, so the glow of the ancient analog clock/timer at upper left is still visible:
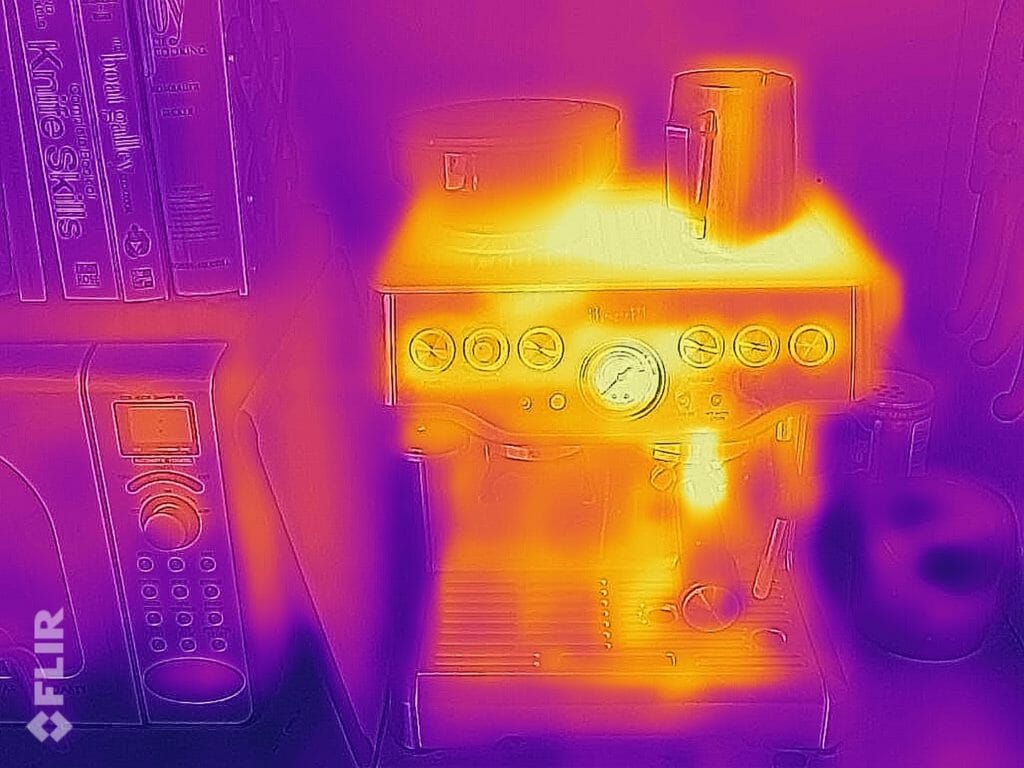
While in the galley, I naturally had to check out the Breville espresso machine, which had been on for about a half hour. You can see the phantom load of the microwave’s control unit next door, just sitting there wasting energy… when the time comes to power all this at anchor from the solar array with occasional generator cycles, the FLIR is going to be an essential tool for spotting parasitic power wasters that may be low-current but have 100% duty cycle…
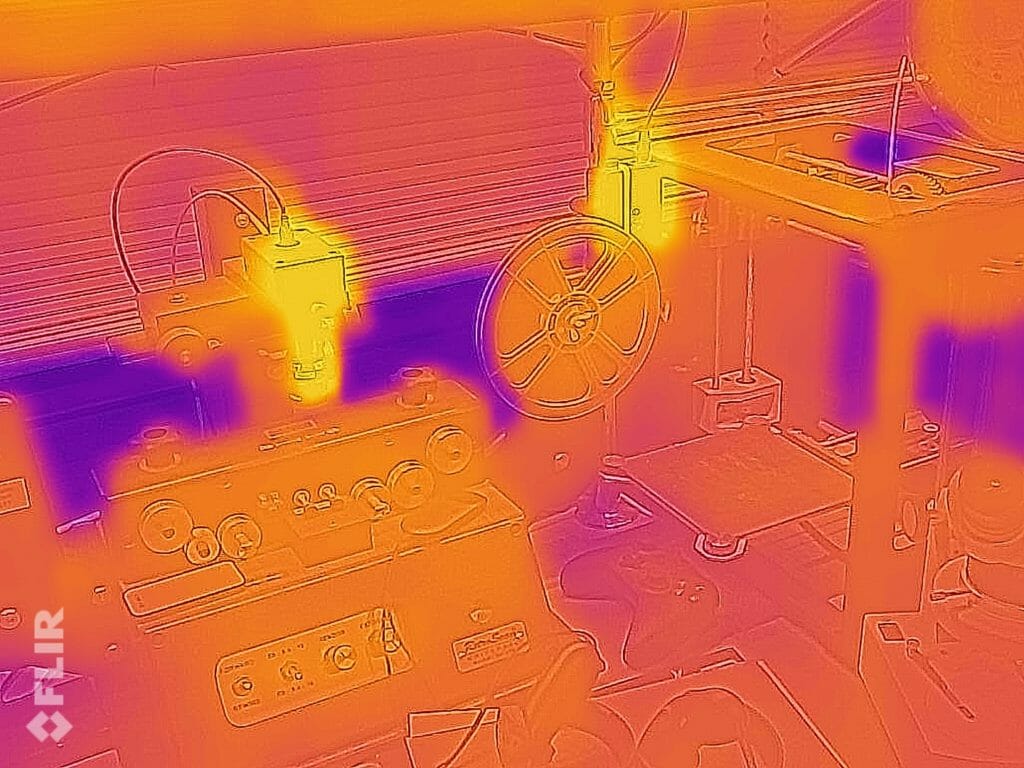
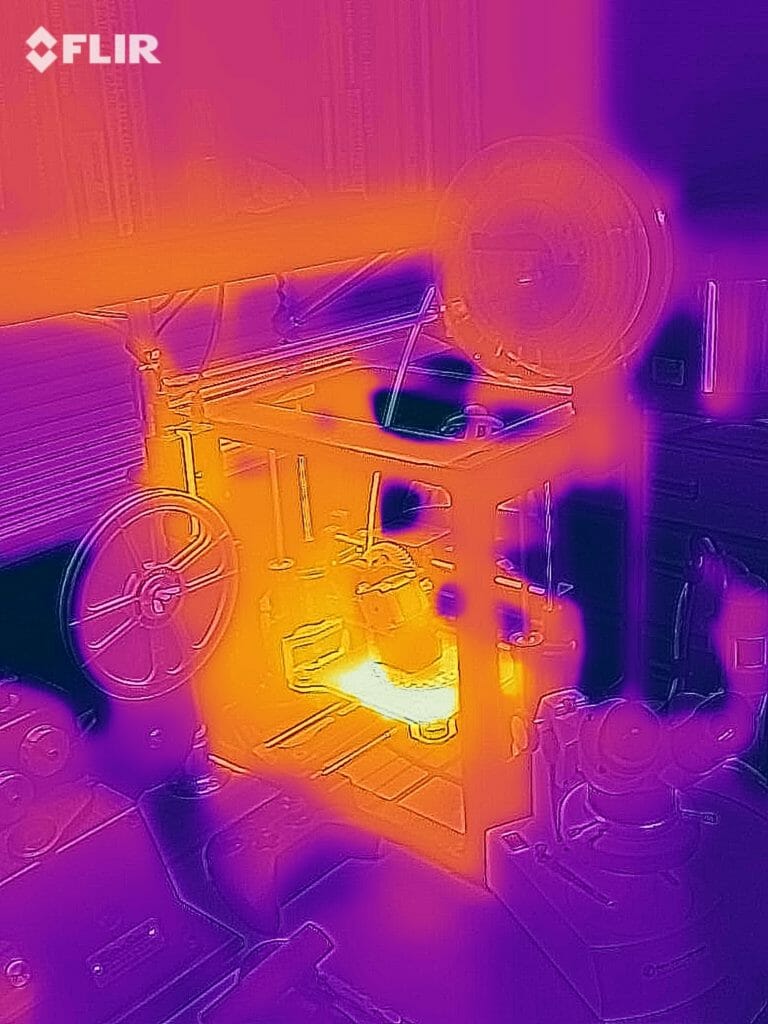
Speaking of things that are on all the time, I was surprised to note that the camera on my film digitizing system is guilty… I had forgotten that this is powered independently of the machine itself. The other hot spot in this photo is a Raspberry Pi running OctoPrint and controlling the LulzBot Mini 3D Printer:
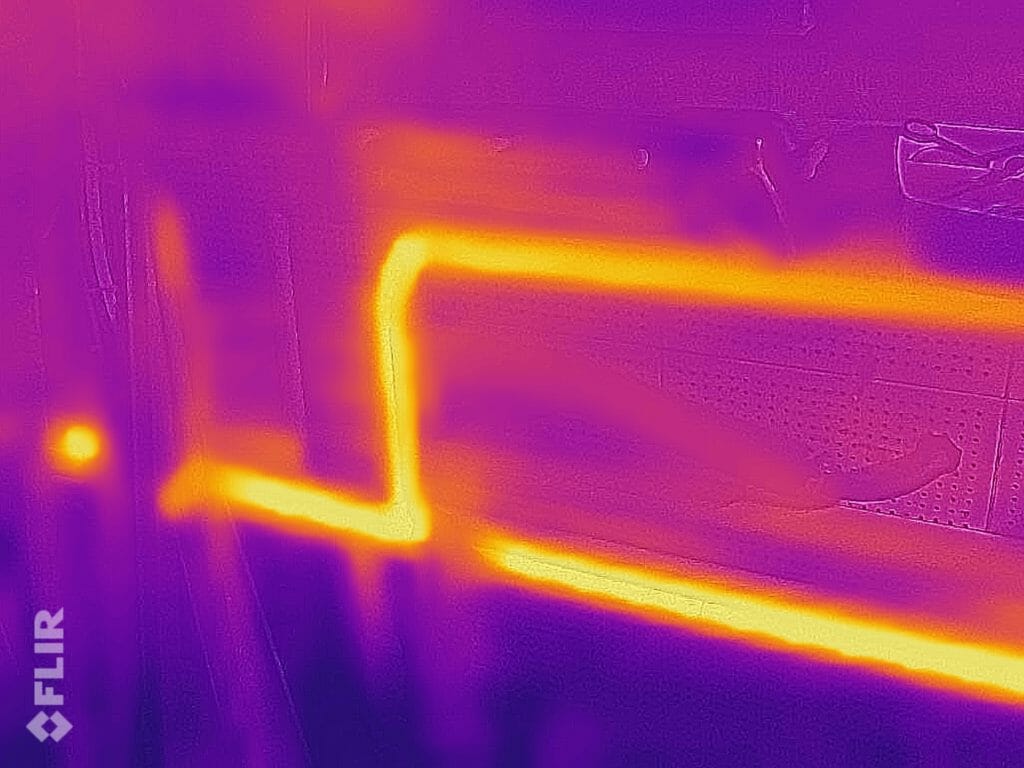
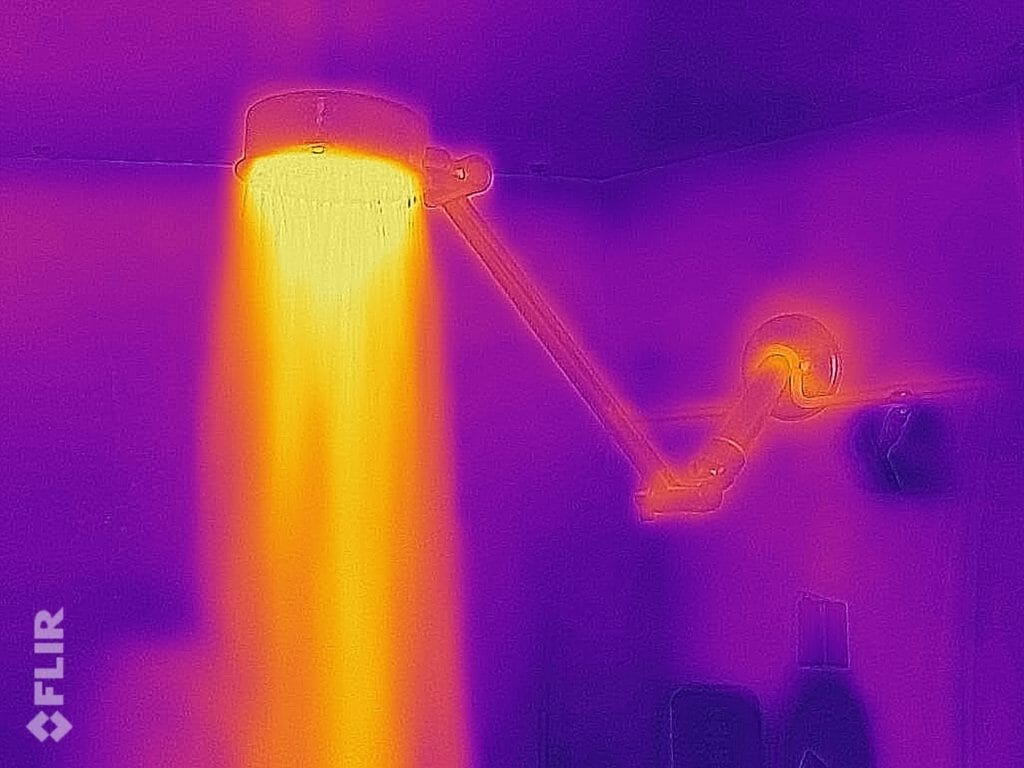
I had just taken a shower, so headed down into the machine shop to take a look at the plumbing. No ambiguity here! This reminds me to add some foam wrap, and look again at using a demand water heater located closer to the major points of use (instead of an old domestic tank-type, located in an awkward spot down in the engine room).
After that, of course, it was necessary to go see what a hot shower looks like in thermal vision….
Hey, where is that cat? Ah! Hi Isabelle! Are you blushing?
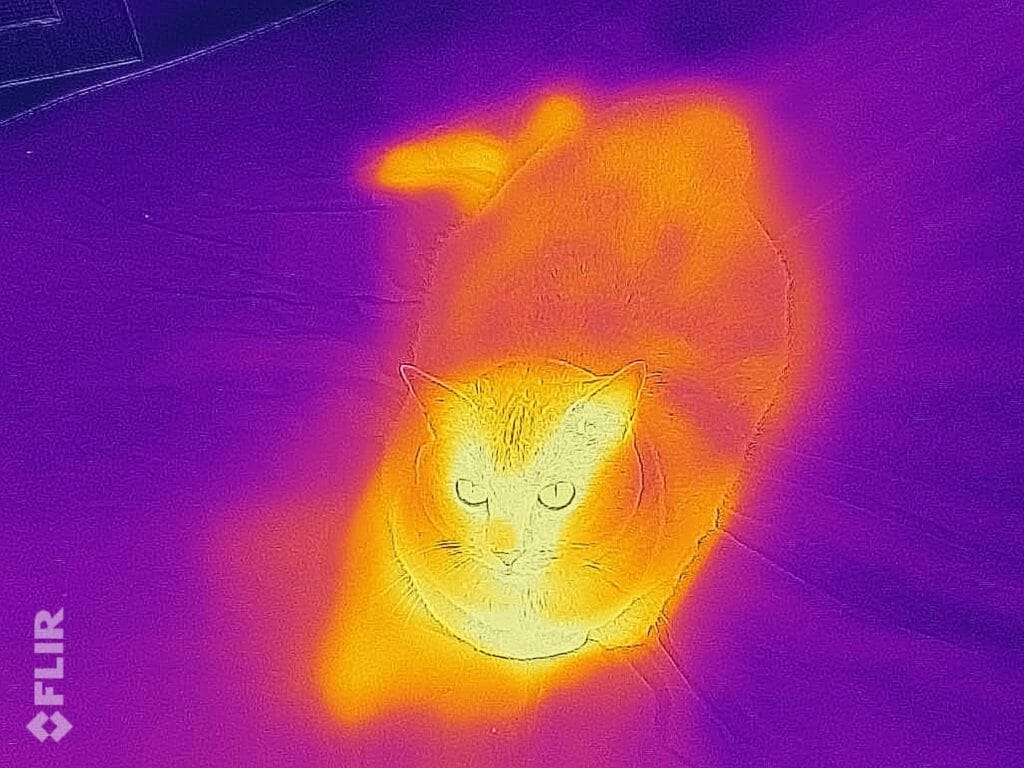
I’ve since noticed that I can see where she’s recently been, and am looking forward to using it to spot critters in the water or on nearby shores. And speaking of looking at biological beasties, I of course had to close this little tour with a selfie (or a “thermie,” as IR aficionados call them)….

There’s a quick, first-pass look at the utility of this new tool. I still haven’t played with color maps and temperature ranges, fine-tuned the parallax between the lenses, or even really gotten to know it. It did require signing up with their (free) cloud service, and seems to be pretty leisurely when it comes to moving new images into my photo library where I can use them for things like a blog post… but their Facebook support folks are very responsive and, as with all new toys, there is a bit of a learning curve. At this point, I feel that getting the cheaper one was sufficient for my casual needs, but it’s good to know that resolution can be doubled in both axes (and the temperature range increased) if ever needed.
I’ll be adding thermal images to posts about the various systems aboard, and couldn’t resist starting with one of my favorite recent additions… the boat bidet! That heated seat is a thing of beauty.
Bonus closing photo: my LulzBot Mini 3D printer…


You must be logged in to post a comment.