
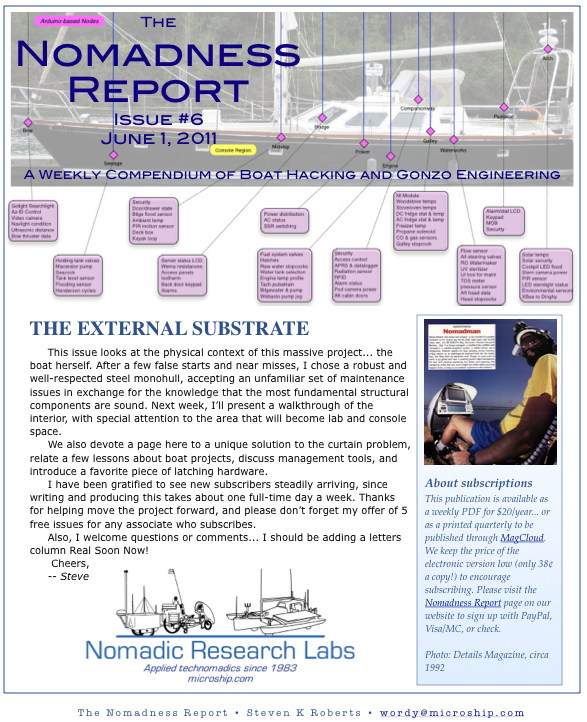
Nomadness Report – Issue 6
This issue looks at the physical context of this massive project… the boat herself. After a few false starts and near misses, I chose a robust and well-respected steel monohull, accepting an unfamiliar set of maintenance issues in exchange for the knowledge that the most fundamental structural components are sound. Next week, I’ll present a walkthrough of the interior, with special attention to the area that will become lab and console space.
We also devote a page here to a unique solution to the curtain problem, relate a few lessons about boat projects, discuss management tools, and introduce a favorite piece of latching hardware.
Privacy in the Fishbowl
One of the early discoveries with Nomadness was that the pilothouse is a greenhouse on sunny days. Those low-angle raked forward windows may look sleek, but they are a solar oven… and too exposed to dock walkers.
Normal curtain hardware would have been challenging, requiring tracks on the sides or some other method of preventing sag. I considered running Velcro all the way around, but that would be forever annoying.
What I really wanted was a window treatment that would go away when not needed, but otherwise provide good and attractive coverage. How about strong neodymium magnets?
These are amazingly powerful, especially the ones graded N52. My favorite supplier is K&J Magnetics, and they have everything from micro magnets to ones that will crush your hand (seriously). For the curtains, given the size of the aluminum framing around the windows, I chose the DC1-N52 (3/4” diameter and 1/16” thick), which at the time were a little over a buck apiece.
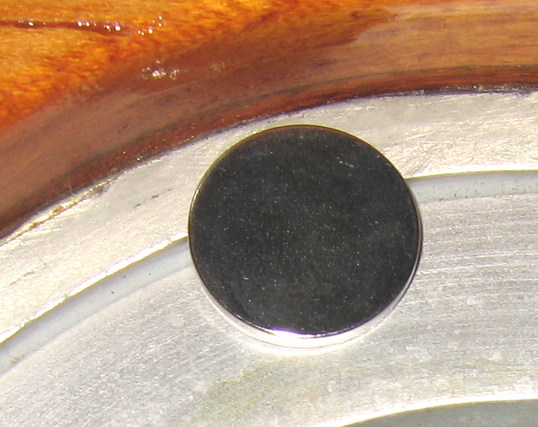
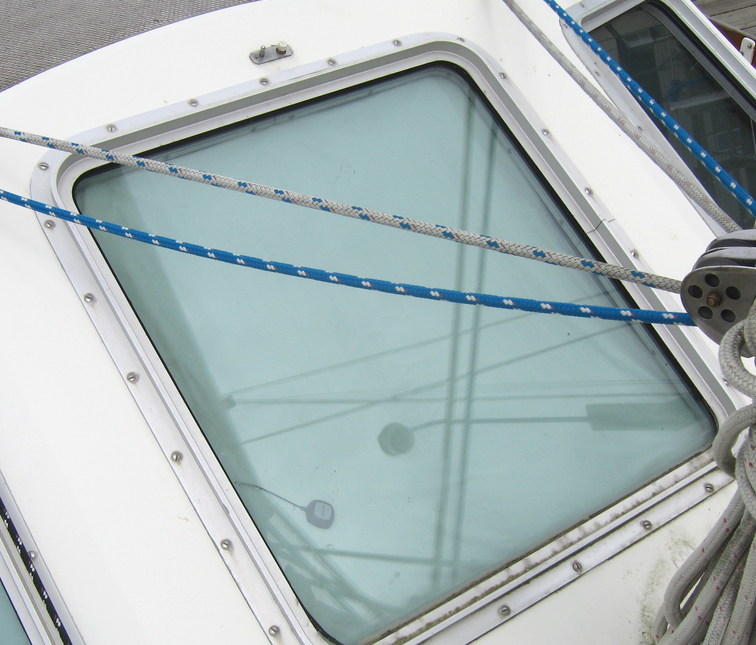
Attaching to the window frame wasn’t quite as trivial as I had imagined… both kinds of double-stick mounting tape I tried tend to either weaken over time from condensation and solar heat, or fail to grip reliably where the surface is stepped (as in the photo here, mounted with a pre-formed disc of polyurethane foam tape – McMaster-Carr #76535A76), so I’m about to bed them all with some kind of goo like 3M 4200 that should be much more permanent.
On the curtain side, the trick is hand-sewing the magnets, since machines will grab them and not let go. My partner Kirsten used our White sewing machine to “laminate” Solarplex exterior UV-resistant fabric and blue patterned Jacquard, working from paper templates lifted from the windows last year. Before closing, she dropped magnets in the specified locations and hand-stitched around them. This photo shows one of those, with the mating magnet in place prior to attachment. They’re pretty much self-fixturing, so this part was easy!
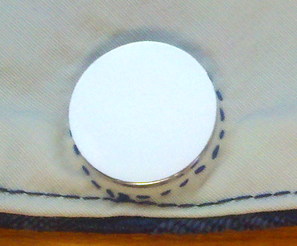
Although it technically doesn’t matter, I recommend matching all the polarities… they behave more logically if all the poles face the same way. I made a little test fixture that Kirsten used to check each one before sewing it in place.
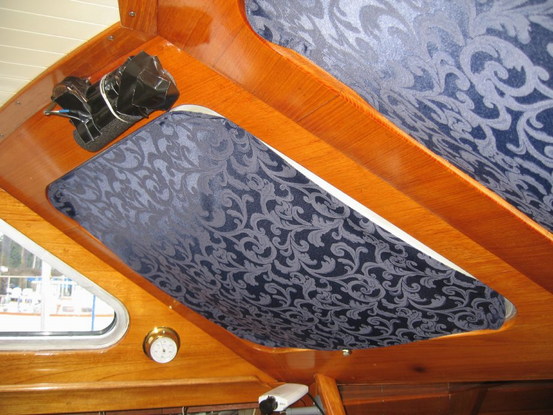
The net effect is quite clean, even with a little inevitable sag and gapping along the edges. There is no protruding hardware as is common with curtain rods, and when they are not in place, the magnets are hardly noticeable.
One of the best parts is that any corner can be opened to peek outside or control lighting, as in the photo above. The cabin is noticeably cooler on sunny days, and reduces exhibitionism at the dock (that was getting really annoying as I started living aboard). The Solarplex outer layer should last for many years… it combines tough Cordura and high filament-count Supplex yarns.
I’m fabrics-challenged, and am very grateful for excellent help on this project from Karen Kelly (forward curtains), Sky Myers (templates), and Kirsten Hansen (side curtains).
Nomadness Substrate

A Quick External Walkthrough
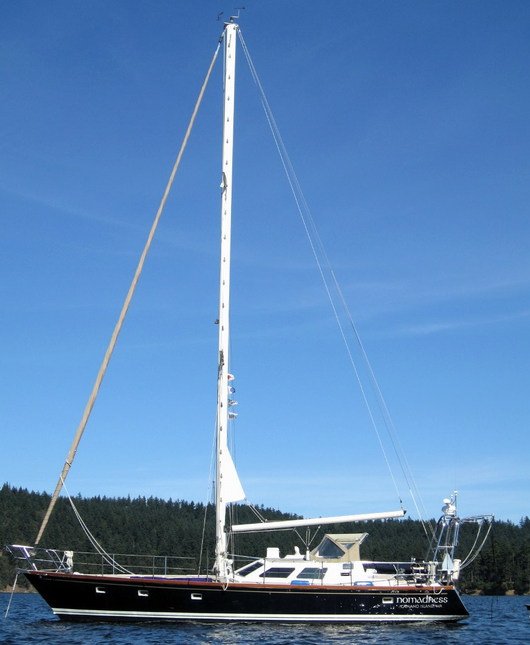
Before we delve into system-integration and console-packaging issues, it’s worth taking a few minutes to introduce the boat… we’re already at Issue #6 and have only briefly touched on the substrate (Issue #4, page 2, yearning for a bow thruster).
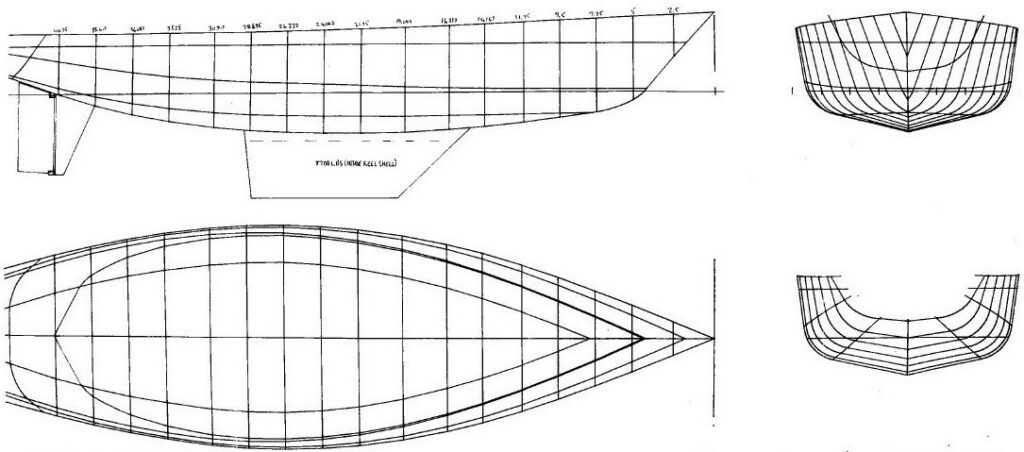
Nomadness is a 44-foot steel raised-salon pilothouse cutter built in 1987 to the Grahame Shannon “Amazon 44″ design by Dieter Pollack of SP Metalcraft of Vancouver, BC. She had a major refit in 2002, and has covered both coasts of North America including two transits of the Panama Canal. I believe I am the third owner.
Steel boats cover a very wide range, and to some extent have gotten a bad rap since so many are homebuilt… with a corresponding uncertainty about the quality of materials, welds, and coatings. Even insurance companies are somewhat wary of them, and I had a thorough survey before taking the plunge. The plating thickness is .2″ with very stout structure and deck backing, and the foamed insulation stops properly at the waterline. (Foam all the way to the bilge is deadly, since it can trap moisture; steel boats, as fiberglass owners will happily tell you, rust from the inside out.)
Nomadness was built in a real shipyard, and has been well-maintained with proper coating systems above and below waterline, along with careful attention to galvanic action. The rig includes a Hood in-mast furler that allows all sailing operations to be handled from the cockpit… with massive Barient 35 winches for the furling headsail. She’s technically cutter-rigged, though the inner forestay is currently stowed along with the corresponding jib.
Ground tackle includes a Lighthouse 1501 windlass, 300 feet of chain, and a 65-pound Bruce claw anchor… a nice combination that has only failed me once (I also carry a smaller stern anchor as well as a backup).
She has a pilothouse, which is a wonderful thing, allowing control from inside when the weather is unpleasant. But it’s a compromise; although the design is sleek and sexy, visibility through those low and sharply angled forward windows (about which I complained in the curtain discussion) is not always clear enough to inspire confidence. With radar and the upcoming suite of video cameras, though, I suspect that will become less of a concern… and when things are tricky, like picking my way through a sea of fishing floats, I just saunter to the bow with the Bluetooth wireless remote for the Simrad autopilot.
The default operating position is the outside helm back there at the stern, and the big change coming there is a 360-watt solar array that interfaces with the stout radar arch. This will also add antenna mounting space, increase the sense of security, and provide weather protection for the helmsman… not to mention a major power source for the Outback charging system when off-dock.
The aft cockpit, like everything on a boat, is a trade-off. The foot well introduces serious head-bangers in the aft cabin (better known as “the cave,” no longer my preferred sleeping spot), and there is very little exterior stowage space on this boat… just a shallow lazarette under the aft seat at the helm. A custom deck box is about to be added on the foredeck (further impacting visibility from below, already hampered by mast, kayak, and other gear). The later addition of a hard dodger will have the effect of adding an “upstairs” pilothouse, also increasing stowage and living space.
The arch is a key structure, and carries the dinghy (Nomadling) that hangs from the davits whilst underway:
That dink is a Gig Harbor Navigator with forward-facing rowing system, a surprisingly capable sail rig, and a pair of Dinghy Dogs to provide flotation when most needed… she is quite a delightful little sprite.

I also carry a Hobie i12s inflatable pedal-kayak, which I quite adore… but as any cruiser will tell you, the dinghy quickly becomes the “family car.” Most folks have a motor affixed to the transom for added practicality, and I have a little 2.5 horse Yamaha… but really, rowing is less hassle. The motor spends most of its time clamped to the stern rail.
The current dodger (that tan cover over the companionway, under the boom) is a beautiful piece of work… but tired. I’ve been eyeing that space for its potential in mounting antennas, lights, cameras, sensors, solar water heater, and other equipment… so along with the big solar project at the arch, I am planning to replace the dodger fabric with sheet stainless. With those two structures in place, the next step will be a deployable cockpit enclosure, creating an exterior “room” on the boat when conditions warrant.
Much of this project involves surgical enhancement or modification of existing structures, and it is difficult to begin such invasive operations. For 3 years I was stopped by logistical issues, but at last I’m living aboard with development facilities nearby. Although it is excruciating to fire up a Sawzall in the presence of fine teak/holly joinery, that’s the only way we’ll get this starship off the ground…
In the next issue, we’ll look at the interior and see how we’re going to shoehorn a lab onto the boat!
The Zen of Boat Projects
I’d like to share a few lessons I’ve learned about boat surgery. Some of these are in the category of “expensive education” and others are just part of the whole gonzo-engineering ethos. This is updated from my 2009 blog post on the subject…
- Never hire a guy who hates his work. I’m still fixing messes left by the plumber-from-hell, and there were lots of clues while he was on the job that should have been grounds for termination. Example: instead of using the correct bolts and nuts for the SeaLand inspection plate, he just shot in some sheet-metal screws, distorting the polyethylene Ronco tank material, with one screw even penetrating the sidewall of the oversize cutout… creating a gap that leaks under pressure and insufficient material for a proper re-installation. This hotshot charged me $80/hour. Hiring him was a mistake, even though some of the tasks were intimidating and I felt I needed his skills… ever since, I have been chasing leaks (two hoses, the access plate, and a botched Spinweld) and otherwise cleaning up after him.
- DIY should always be first choice, with the hiring of professionals limited to cases of esoteric knowledge, true gurus, or jobs requiring expensive capital equipment. As I proceed with the geeking-out of the ship, my casual “business model,” is publishing the designs (and in some cases assembling kits). I think a lot of boaters are coming to the conclusion that most of this is not rocket science, and the economy has a lot to do with it…
- To-Do lists are fractal. The closer you zoom into one item, the more it expands into a cluster of component items. I try to anticipate this with what I call “CDTs,” or Clearly Defined Tasks. Writing these out ahead of time may seem like over-detailing, but pays off when it helps avoid gross underestimation of time and costs (you also get more-frequent happy moments of checking something off, even if you do something that’s not on the list, then add it and cross it off… although switching pens in between is getting pathological).
- Project management tools can make or break a job. I like OmniFocus since you can list by projects and then review by contexts (like, “what else do I need to do now that I’m aboard with oscilloscope in hand?”). Scrivener is useful for keeping the sprawling collection of design documents in one cohesive environment… before that, I had stray files everywhere. I’ve just begun using graphic outlines in OmniGraffle, letting me visualize the tree structure of project categories. And for lab notes on paper, I prefer the beautiful Maker’s Notebook.
- If a project requires (n) components, there will be (n-1) units in stock (from an ancient collection of Murphy’s laws, circa 1969). It is really worthwhile to buy in bulk… and besides, you end up with repair inventory and trade goods. For hardware, McMaster-Carr is spectacular although not cheap… their extensive online catalog eliminates the need for that very hard-to-get yellow book that was indispensable in industry for ages.
- Tool duplication between home and boat is unavoidable. You’ll end up needing ‘em anyway. Expensive tools are usually good investments, though they sink just as fast as cheap ones (don’t be too macho to use a lanyard when leaning over the rail). The Li-Ion Makita LXT power tools are awesome… I love them, along with the best drill bits I’ve ever owned, Milwaukee Cobalt. This felt like a splurge at the time, but has been a winning investment.
- Document, document, document! Buy a labeling machine and ID every cable as it is identified. Take the time to do good drawings (I use OmniGraffle Pro for overall diagrams, and Eagle for detailed schematics… and have settled on an 11×17 standard drawing size). Start a binder for known-correct information that you will want to be able to find again… sprinkled throughout project notebooks and random scraps, it gets lost. Dedicate portable file boxes to manuals and individual projects. Use your digital camera to chase otherwise invisible mysteries, and save the images. Take photos before closing off an area so you will know later where not to drill.
- Save labeled core samples from hole-saw adventures. Just… because.
Speaking of Projects…
Carpentooning
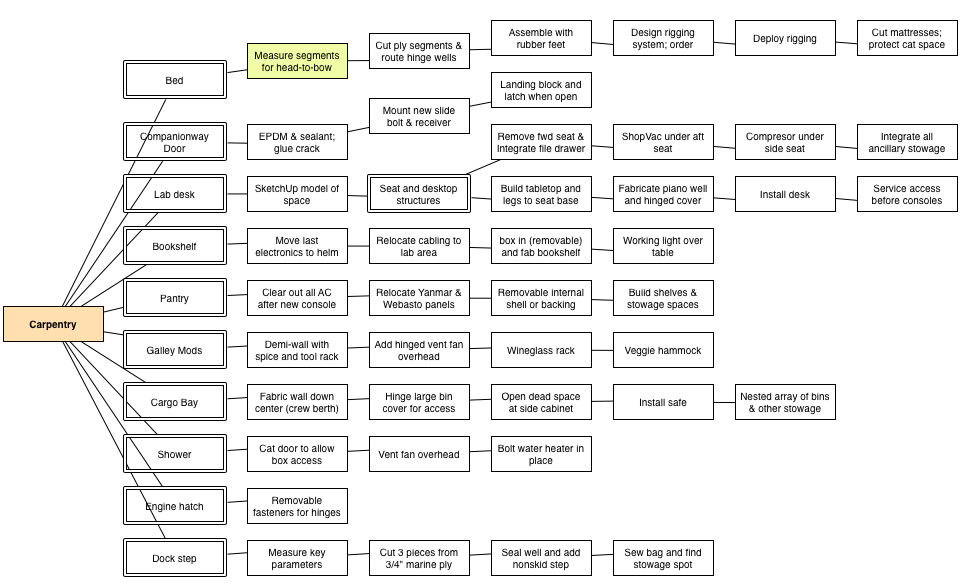
The drawing above is one of a whole set of graphic to-do lists that have fallen out of my obsession with the 11×17 project binder. Each is a broad category of jobs (this one is “Carpentry”), with the column of double-outline boxes being sub-projects (bookshelf, pantry, companionway door, bed, shower, etc). The regular boxes are bite-sized tasks… not as fine-grained as the CDTs mentioned on the previous page, but things that I can think about as single, focused jobs. When one is done, I get the fun of coloring it.
Note that branching is possible, as in the lab desk thread that forks into desktop fabrication and modification of supporting structures. The above is not intended to be readable in this PDF – it’s just to show the management tool, which is native to OmniGraffle.
Southco Soft Draw Latches
These are one of my favorite tools for holding things shut… they come with three flavors of mating catch, and have a satisfying hysteresis from the stretchy rubber. They are a little over 4 inches long, and cost about $13 each from McMaster-Carr.
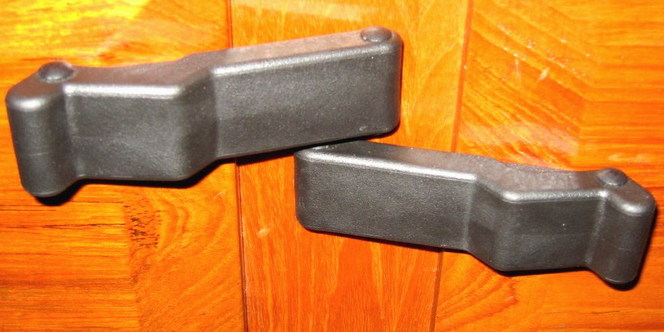
In the photo above, they are holding a couple of adjacent drawers closed… one of which is heavy with tools. The original plastic thumb latch had grown weak, and one day on a pounding port tack the drawer flew open and shut repeatedly with loud bangs until we managed to clamber down there and tape it shut.
You must be logged in to post a comment.