
Work Trip #2 – Tankage
In what is probably going to become something of a routine, I’m now on my second “winter work session” aboard Nomadness, blogging as I go. Since the last installment, I’ve done a fair bit on the home front, and also posted an introductory walkthrough of the boat… the first of what should be a large collection of articles by the time this is all over.
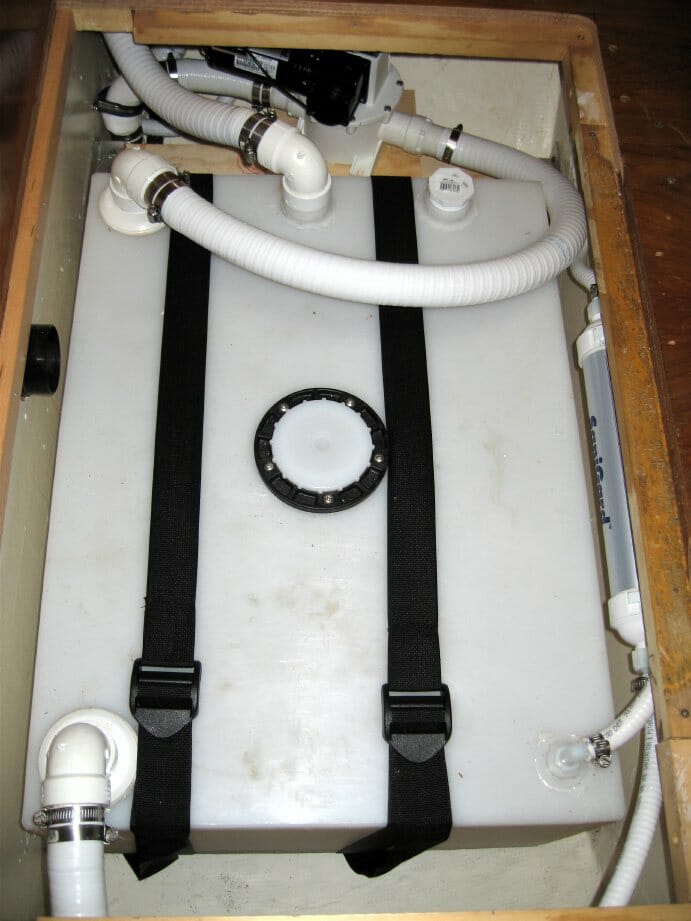
But this trip is largely about tankage… I came equipped with three beautiful Wema level sensors, another Maretron TLA-100 for the diesel tanks, the Katadyn 40E watermaker, and a SensaTank II for the new holding tank. It was the latter that I tackled first, as it would be a quickie.
Holding Tank Blues
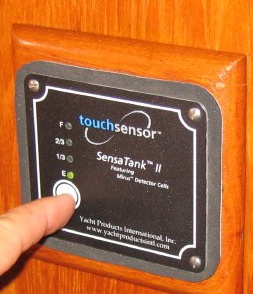
Like anything on a boat, of course, this little project took about 5 times longer than it should have: find a nearby source of power, splice and run a cable, mount the panel on an unused bezel originally intended for a hot air duct in the forward cabin, locate and mount the three “Mirus” sensor cells on the tank wall after cleaning with Isopropyl Alcohol, wire it all, add labels, and test. So far, so good:
Time will tell how well it works, and if the cells stay attached; polyethylene is not the most chemically active substance. That brings me to the reason for the “blues” in the title above.
Back in August, you may recall, we parked in Port Ludlow for a few days to have some major plumbing surgery done by First Mate Marine. Bob took care of a number of tasks that I would have found difficult or impossible… including the extraction of old sewage hoses (ewww), installation of a new pumpout in the steel deck, and preparation of the Ronco 35-gallon tank for installation on a platform that I built under the forward berth. There were some glitches, but it was a big job with a hefty hourly rate and I was happy to have someone else handling it.
A few days later, the smell began. Bob had used the best quality hose and proper double-clamped fittings, there were no shortcuts, and the tank is 3/8″ thick rotomolded polyethylene and thus impermeable. It wasn’t making sense, but the cabin would stink after sailing (or sometimes just while anchored in bad weather). More times than I can remember, I sniffed around in there, probing for a clue… even theorizing about air-pressure variations and using my Kestrel weather station to log the barometer a period during which the smell increased. No correlation.
I thought I had the problem solved when I spotted a dip tube fitting that had not been tightened… I managed to get two full turns out of it, as shown in this before-and-after photo:

Smugly, I buttoned ‘er up, launched a good-natured jibe at Bob, and moved on to other projects. Only… the problem didn’t go away, and it wasn’t just residual stale air.
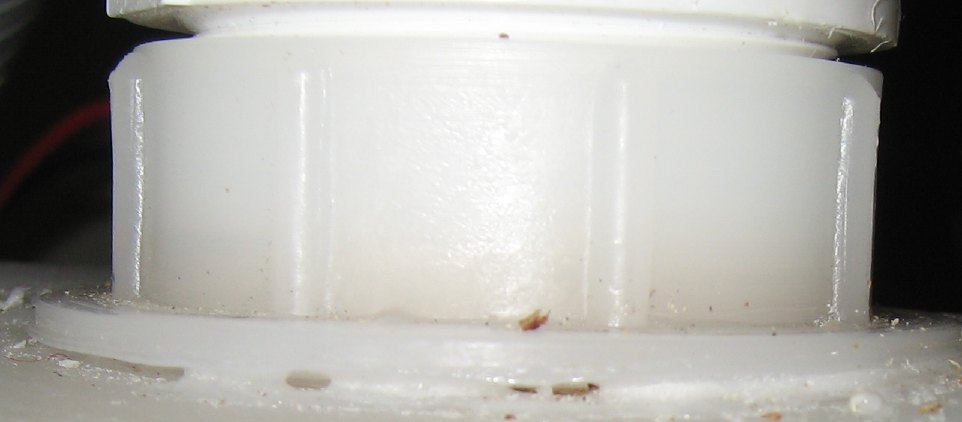
So, while doing the tank-sensor project, I continued the quest. And now I really do think I found it, though the fix may not be as easy. The major fittings were installed with a process called spin welding, in which a special hand-held router fixture spins them in place so fast and with such force that they melt together into a solid unit. That’s the theory, anyway, but for some reason the dockside process didn’t go quite as planned. Take a look:
I sent this to Bob and he suggested that I “slap some silicone on it,” but I am not so sure… that doesn’t actually stick to polyethylene (no goop that I know of really does), though since it only has to fill a void with quite a bit of surrounding material, it might form an acceptable plug anyway. I’m hesitant to try, though, since one thing I learned from my fiberglass years is that once silicone has been on a surface, nothing else will stick. Ever.
I welcome suggestions.
The big take-away from this is not the temporary problem that will certainly be fixable, or even my current annoyance with the contractor. It is the need to be more careful about blithely abandoning my Do-It-Yourself principles when a job looks hard or unfamiliar. $80/hour is more than I have paid for attorneys, and I am now spending my own time troubleshooting and fixing somebody else’s sloppy work… reminiscent of the steering pump installation by Anacortes Marine Electronics that included overfilling the fluid reservoir so dramatically that for weeks it streamed down cabin walls and ruined my brand new bedding. I paid for that because I didn’t know how to deal with the hydraulic fittings, just as I paid for this because it was messy and intimidating (and also because there were a few things, like, ironically, the spin welds, that I don’t have the tools to do).
I am more annoyed at myself than anything, partly because I am noticing as I get older that a lot of jobs take longer and are more difficult than they were a few decades ago. Maybe this is normal for aging geeks, but I prefer to think I’m just out of shape… and experiences like this reinforce my lifelong belief that the old saying is true: if ya want it done right, do it yourself!
Besides, I am not part of the mythical deep-pockets “yachtie” demographic, yet the marine marketplace is populated by businesses that expect people to roll over and pay huge labor rates without batting an eye. It is way too easy to underestimate how long something will take, and here there be dragons.
An old lesson learned afresh.
Fuel Sensors, Take One
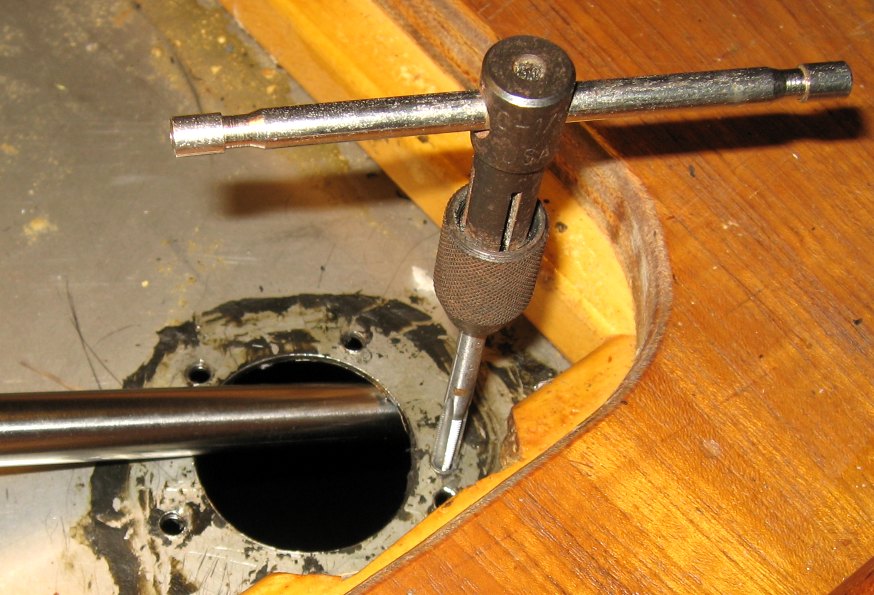
Moving on to diesel, I started with the tank under the aft berth… that’s the easiest one, since it has an existing 5-hole pattern in an accessible spot (the other two will require surgery on the aluminum inspection plates). Of course, nothing on a boat is ever trivial… I found out why the previous sensor had been so liberally bedded in gaskety goop. Whoever did the original bolt circle didn’t finish it.
Tapping a hole in an existing fuel tank is nerve-wracking, not just because of chip control but because I kept playing a mental slide show of all the times I’ve broken taps in stainless. But I proceeded gingerly about an eighth of a turn at a time, and got away with it:
Once the new sensor was snugged down onto its cork gasket, I connected it to the Maretron TLA100… the “tank level adaptor” that converts the 240-30Ω output proportional to fuel level into a PGN (Parameter Group Number) message on the NMEA 2000 backbone, thence to be displayed by whatever system has the capability.
The core device in that department is the Maretron DSM250 mounted at the lower helm. This is a beautiful gadget that can graphically present all sorts of on-board data, and indeed the somewhat random number that had been reported by the original swing-arm float sensor stabilized immediately at 90% (a believable value, as I had filled up just before the pre-election price drop).
At first, however, there was a disturbing phenomenon, reminiscent of some glitches associated with the B&G Network insistence on sending 18-degree variation data and causing the compass display to glitch every few seconds. The fuel gauge started doing exactly the same thing!
I wrote to Maretron and quickly got an answer… and it is included here in the hopes that it might save others from similar confusion: When I added the third TLA100 tank-level adaptor, I didn’t configure it with a unique tank number. Oops. The phantom “fuel tank 0” interacted with the real one, causing the phenomenon captured above. They are now properly configured as 0 (90-gallon aft), 1 (75-gallon port), and 2 (75-gallon starboard).
The fun is always in the interfacing, isn’t it? It’s a long way, both philosophically and technically, from a big tank of sloshing diesel fuel to a tidy little graphic that can pop up wherever needed.
Next daylight work session, I’ll take on the port and starboard tanks, and I’m now considering the mounting environment for the watermaker and related equipment. I need good filter serviceability, access to valves, and a gravity-feed day tank… all while moving potentially corrosive water-processing equipment safely away from the AC electrical panel where the old one was located. Water corrodes; salt water corrodes absolutely. Candidate locations are the space under the galley sink and the wall of the aft head compartment (space freed by elimination of the old demand water heater).
More soon…
-Steve
I took a look at that polyethylene fitting that was spin welded onto the
tank, and I suspect the PVC male fitting has expanded the polyethylene fitting and popped the weld.
If I had been the plumber, I would have probably used a bolt-on, gasketed stainless female fitting; or I would have strain-relieved the female fitting with hose clamps.
I realize that you have to get the fitting inside the tank, but these overpriced beauties are sort of what I would have used (they can be had for cheaper, of course):
Grainger
If it were my boat, I would pressure test the whole blackwater system: block off the inputs and outputs with conventional plumbing test plugs and wienies, and introduce regulated pressurized air at no more than 5 or 10 psi. Then inspect joints and fittings with a spray bottle of soapy water.
Thanks for the thoughts, Dan!
I have had some emailed comments as well, including a suggestion to attempt a re-welding of the fitting with soldering iron or heat gun. This scares me a little, as it might make things worse. There was also a suggestion to use hot glue, which I think I will try… I trust it more than silicone for the reason mentioned in the article, and no harm done if it doesn’t seal well. Other adhesives are unlikely to bond to the plastic (though they might form a good solid plug); hot glue is the easiest to test.
Thanks for all the feedback!
-Steve
Steve
polethylene can be welded. Get some scrap poly shave it into thin pieces, then get a butane torch and make a small flexible spatula. Heat the spatula till red hot, then use it to melt a small piece of scap – working the melted plastic into the gaps. If you need to build up thickness – do it slowly.
We do this nearly everyday at work. Spinwelds suck.
Craig B
Craig… wow, great to hear… I’ll try it. Haven’t tried any adhesive yet, and it makes sense that this approach would be the most robust. I have had very similar advice from two folks via email, and it’s starting to seem less intimidating than it did at first.
I emailed the plumber, dropping plenty of hints for an offer to come fix the sloppy work, but no such luck (even in this era of a reputation-based economy, courtesy of the Internet). He did say he was sorry, though.
Cheers and thanks again… I’ll give it a try.
Steve
Pressure testing is a good idea but I definately would not go over 2 or 3 pounds.
Follow-up, months later… after talking with Ronco tech support to be sure, I used a proper heat gun (VT-1100) to soften the flange enough to get it to flow, mushing it into the softened tank with a butter knife. Hopefully that will be the end of it.
And the take-away lesson from this expensive job by Bob-the-Plumber is to never hire someone who constantly talks about how much he dislikes his work. Better yet, just do it yourself.