
The Little Cod Boat Wood Stove
The season is turning, that’s obvious. We’re pinned down in Deer Harbor with a frontal system coming through… 30-40 knots tomorrow, a brief respite on Sunday, another blast on Monday. We parked here to rendezvous with Andrew of Navigator Stove Works and get the black-enameled Little Cod wood stove installed.
The timing couldn’t be better. My Webasto AT-5000 diesel heater chose this cold weekend to stop working, failing to start and presenting the 1-blink error message that means, according to the manual, “No start.” Well, yes. I noticed that. But why? (Later note: it was just a bubble in the pickup line that dips into the starboard tank, sucking air when the fuel got low… a trivial re-priming, once I understood what was going on.)
So this was the week for conversion to wood… and quite the marathon it was! In the narrative below, all photos are clickable for larger versions.
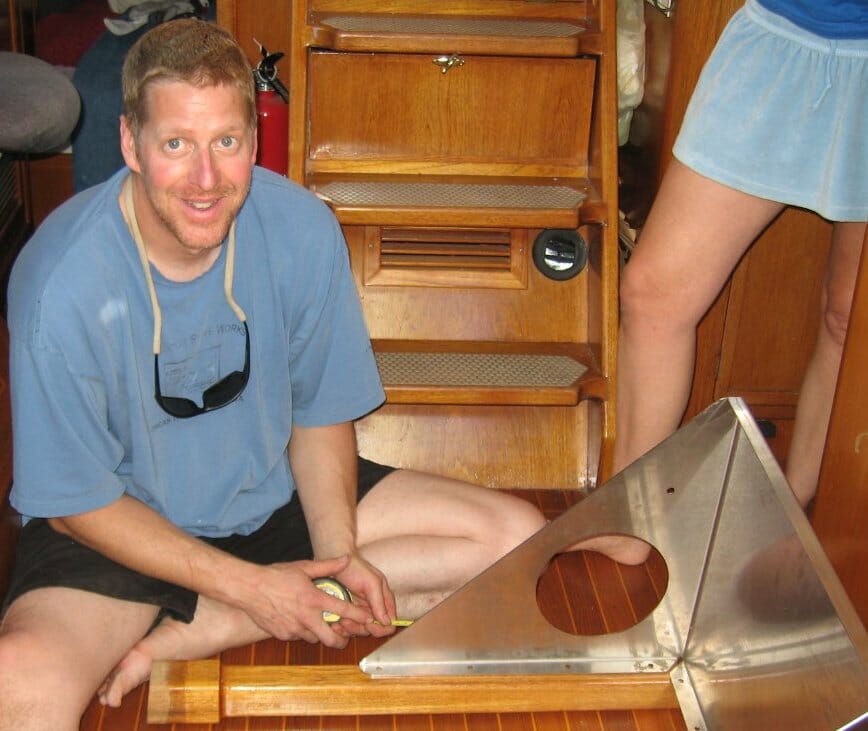
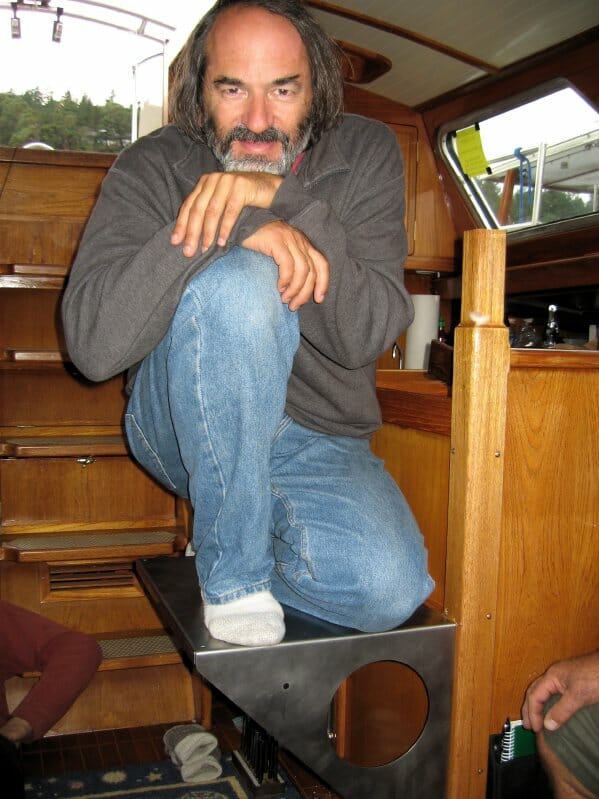
First, meet Andrew, shown here contemplating the surgery necessary to mount the custom stainless shelf to the side of my galley counter. This turned out to be somewhat less trivial than expected, as I had been rather cavalier with initial measurements… meaning that without a bit of additional fixturing the triangular leg would extend over the initial curve of the radiused corner. Fortunately, since we had to sacrifice the pole that went from rail to the cabin top, we had some perfectly finished mahogany to harvest for the application:
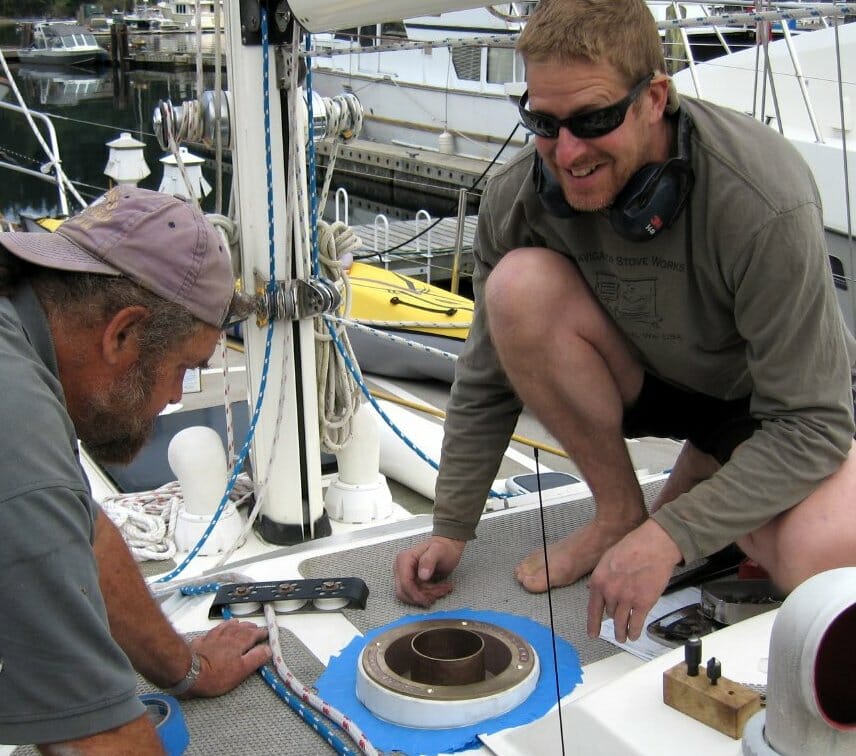
Once the overall scheme was signed off by all, it was time to start with the surgery. Any sailor knows the trauma of adding a new hole to the boat, even above waterline… and this one was a doozy: a very large opening in .2″ steel topped with Treadmaster, backed with a very dense .75″ marine ply, and blocked for the extricated pole amidst an expanse of foam insulation filling a grid of steel ribs. After much head-scratching and calling out reference marks ‘twixt deck and pilothouse, we punched a pilot hole, then broke out the jigsaw. Here, Andrew’s assistant Jeff from Indian Summer II is carefully slurping up any remaining steel bits to prevent future rust spots…

The guys headed back to the shop to conjure a few parts, including a trim ring that compensates for the 5° camber of the deck and supports the beautiful cast bronze deck iron. This was all bedded in place using screws for clamping pressure, prompting the first of many comments that it looks like it was meant to be that way. (2012 update: I later had serious leak problems because the Treadmaster was not cut back far enough to allow a fillet of sealant… and various sealing problems developed including failure of the primer-Dolphinite interface and a crack in the trim ring from too much screw tension on the curved deck surface. I finally pulled the ring, which popped off with no effort, gave it a proper coat of wood sealer followed by Brightside polyurethane, then bedded it with 4200 after cleaning the old residue):
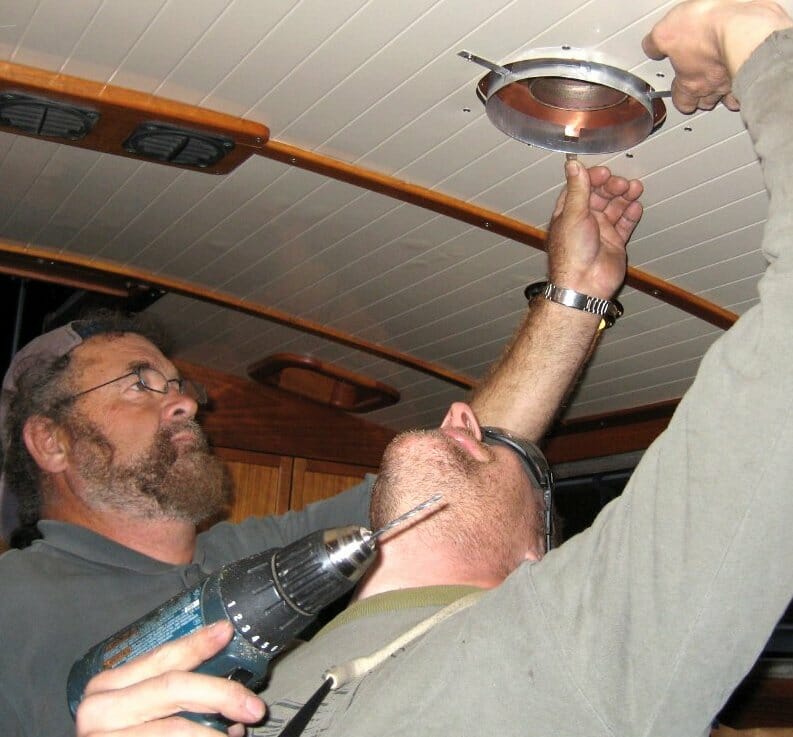
This made for a nicely finished exterior appearance, but from below we could still see the wood “underlayment” – meaning that it would be exposed to radiant heat as well. The hole had been lined with copper sheeting as a first step:
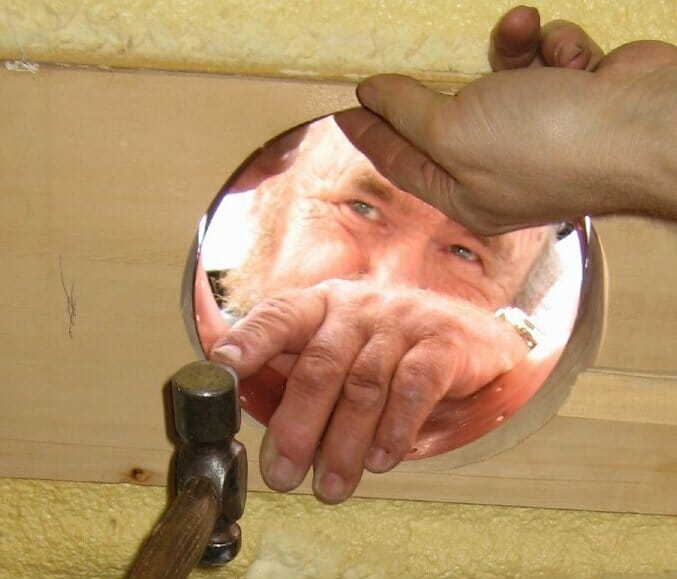
In a flash of inspiration, Andrew conjured a pair of aluminum components that would further reflect heat while allowing cooling airflow. It also prompted one of many amusing photographic moments, given all the awkward angles necessary when working on a boat…
With the hole prepped, it was time to get the stove mounted. They used the cannibalized wood from the original pole to frame out the plywood wall at the end of the galley counter, allowing a clever hack in which a routed channel created clearance for a row of 1/4-20 T-nuts. The whole assembly is thus removable without dragging out the refrigerator that’s on the other side of that wall… a process that is complicated further by having to remove the foot pumps under the galley sink to provide enough fridge-movement clearance to get an arm into the cavity. Boats are for contortionists, something I am most emphatically not.
When the shelf was installed, Andrew immediately insisted that I park on it to convince myself that it is sufficiently robust…
With that test passed, he added a stainless heatshield to protect the wood… and then the stove was centered and bolted to the shelf, its tripod legs insuring that no amount of heat-induced casting warpage would cause rocking. A few leveling washers induced general positioning consensus, then it was down to the final steps.
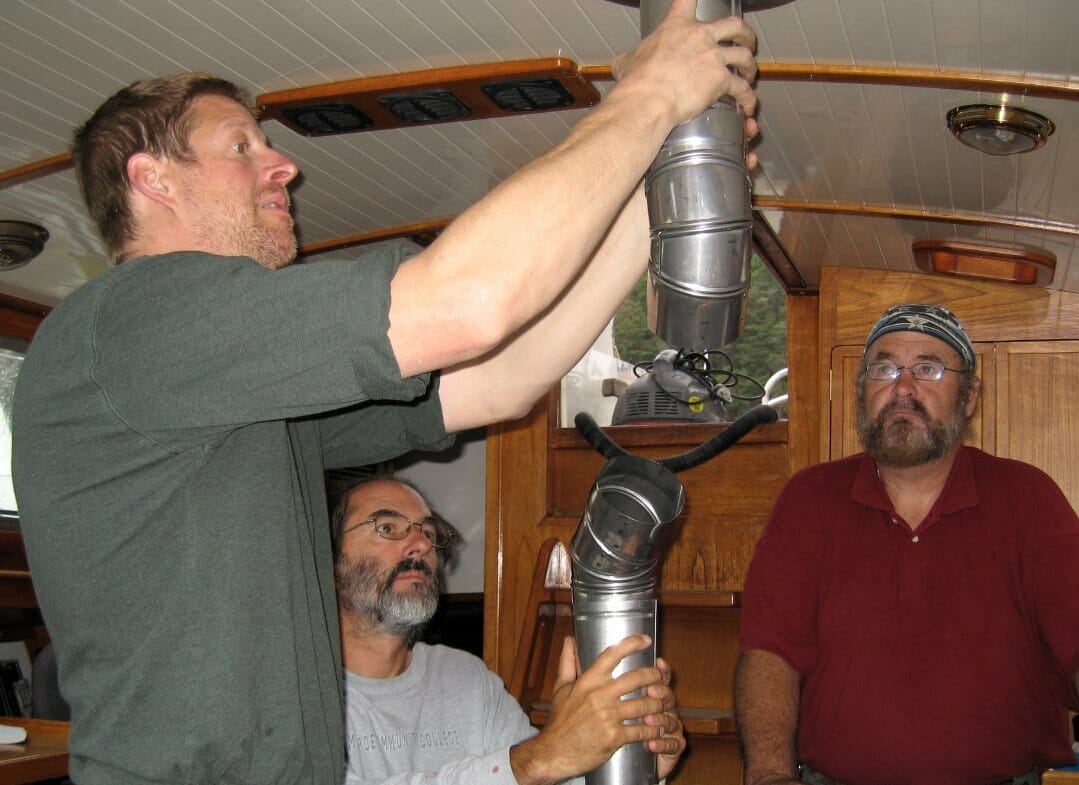
Pipefitting is something of an art, it turns out, and I was surprised at how fiddly this part was… but patience and collective insistence on perfection eventually yielded a smooth and well-considered run. Here we are eyeballin’ and tweakin’…
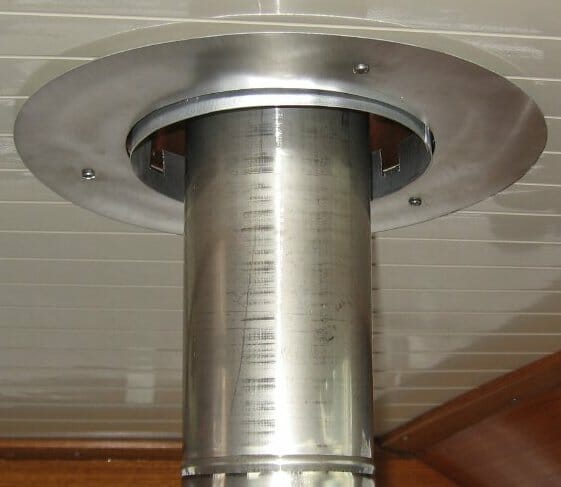
Now you can see the final configuration of the deck-iron interface, with the heat shield spaced away from the headliner giving a strong sense of the etymology of stove-pipe hat:
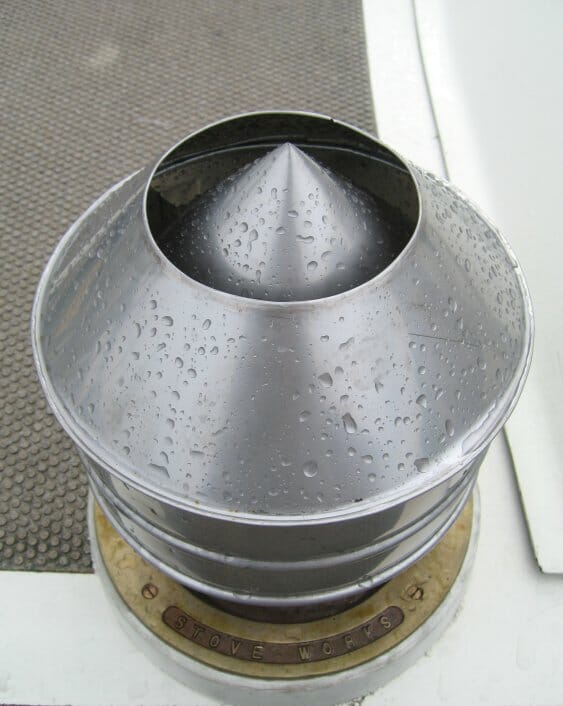
Topside, we have a couple of operational choices. The smoke head can be plugged directly into the deck iron for a low-profile look like this:
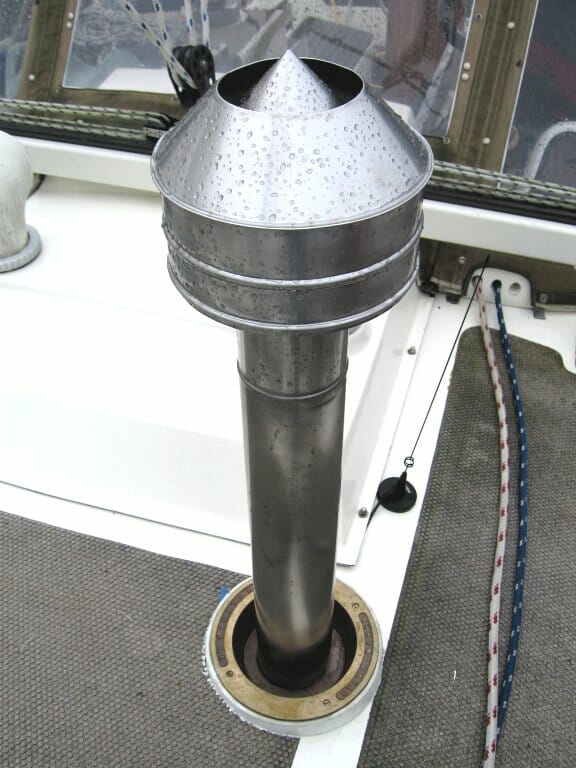
Or, as is the case at the moment in the oppressive wind and rain of an incoming cold front, we can insert a 2-foot pipe section to improve draft and disperse the startup smoke above the level of the dodger:
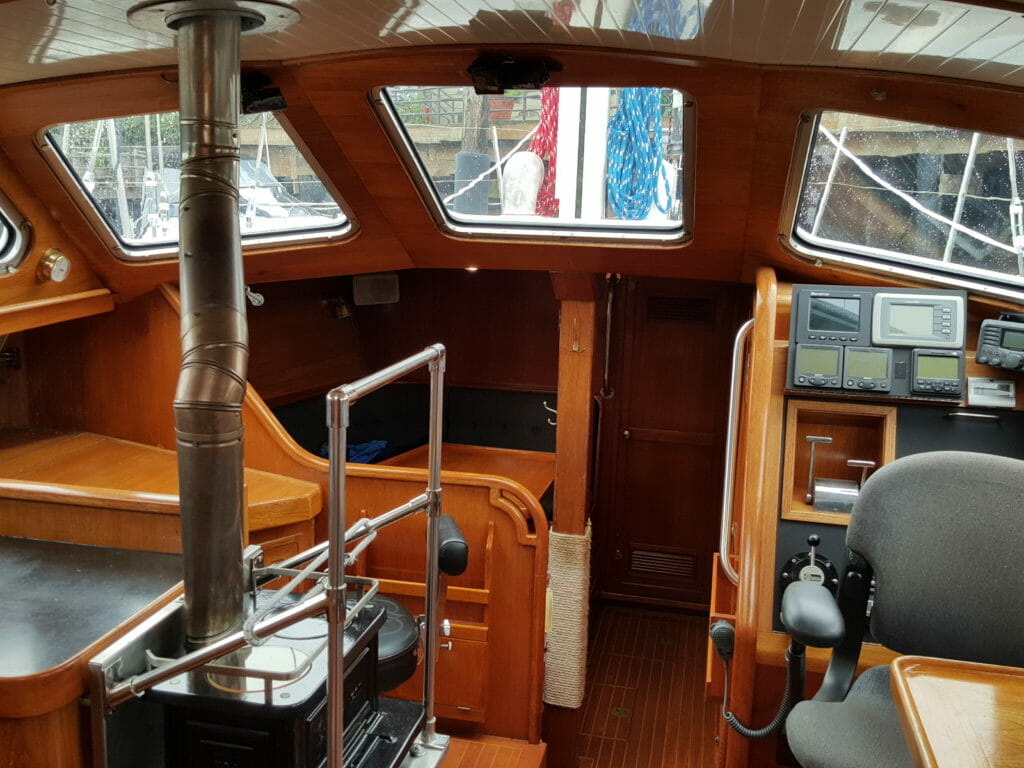
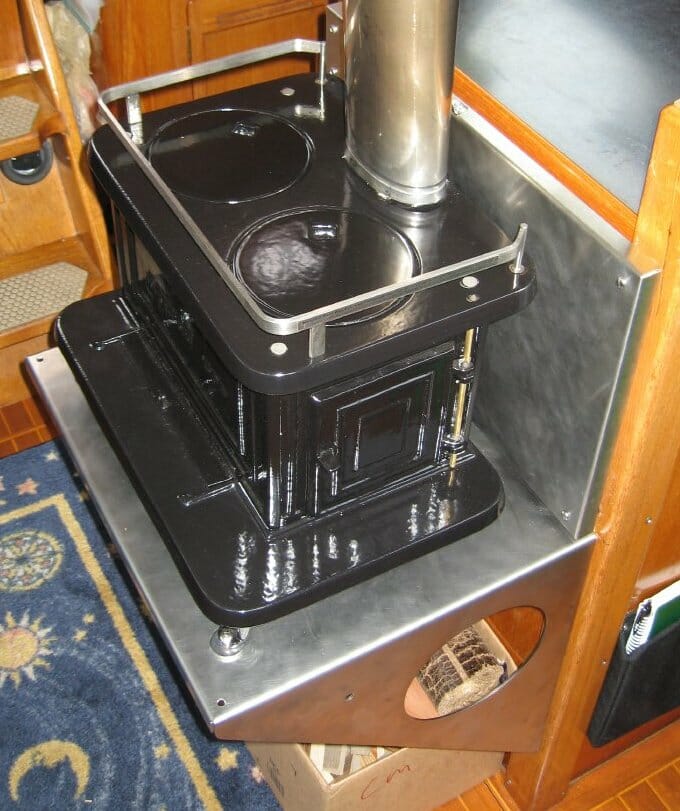
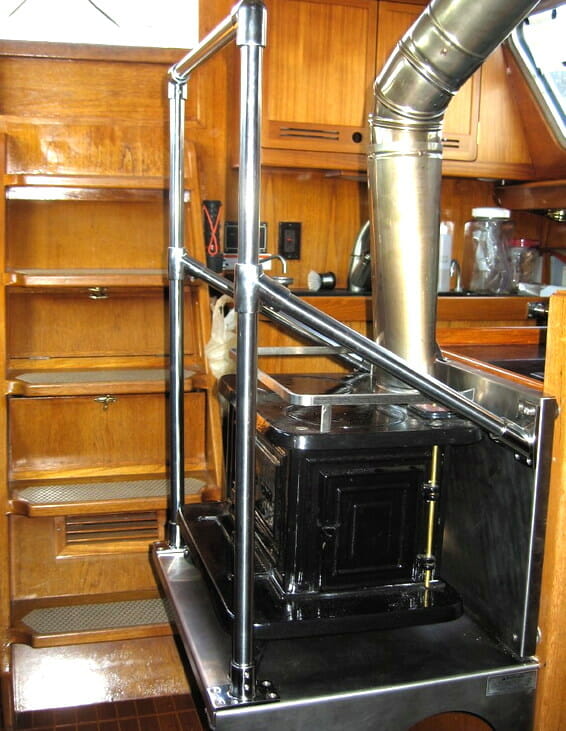
And it’s done! With the pipe all fitted and already showing a patina from the test-firing, here are three views of the finished Little Cod installation on Nomadness. From the passage to the aft cabin:

Lying on the sole looking up (with the draft damper visible in the angled section):

And from the center of the pilothouse, showing the loading door on the end:
And, you see those little holes on the front corners of the top shelf surface? One of the major issues here is safety — not just keeping skin off the dangerously hot stove pipe, but keeping fast-moving knees off the sharp shelf corners, one hand attached to a handhold at all times whilst bounding along in a seaway, and careening bodies off the stove itself. Removing the original pole, which was necessary to allow pipe to pass through the deck in the only available location, complicated the problem; it’s a large enough cabin that one could get thrown off-balance easily without something solid to hold on to at every stage of a traverse from one point to another.
I have added a few more strategically-placed handholds around the boat, but the central fixture is a sort of “caging” of the stove made with 7/8″ stainless rail and Sea Dog stainless fittings.
The other huge issue, actually the biggest trade-off of this whole project, was the impact on engine and generator access. Massive sole panels have always lifted to the 90° position and locked in place with springs, but now they only make it to 60° and have to be held up manually… obviously inadequate, although the most-frequently serviced bits are still easy to reach (Racors, tank-selection valves, oil filters and dipsticks, the sticky shutoff rail on the injector pump that needs an occasional tickle, coolant caps, and so on). The raw-water impeller on the main engine, already a major pain to change, is now more so, and I shudder to think of having to change out the starter with this reduced clearance.
We’ll immediately fashion a couple of latches to support the access panels from the stove shelf, but if serious surgery is necessary, it will be necessary to unscrew the hinges and lift the units completely out (removing the stove as well if major gymnastics are going to be involved). Fortunately, it’s all serviceable by design.
Other than that detail, I am thoroughly delighted with this new life-support component in the technomadic escape pod. An efficient heat source is now readily harvestable, and even a small fire renders the cabin cozy without the Webasto roar or the shore-power requirements of an electric heater. And to anyone who Googled their way to this page whilst contemplating a stove for their boat… I can warmly recommend Andrew and his products. He exudes an old-fashioned sense of quality craftsmanship rarely seen these days, and this little stove of time-tested design is clearly going to outlast the captain of the ship.
Updates…
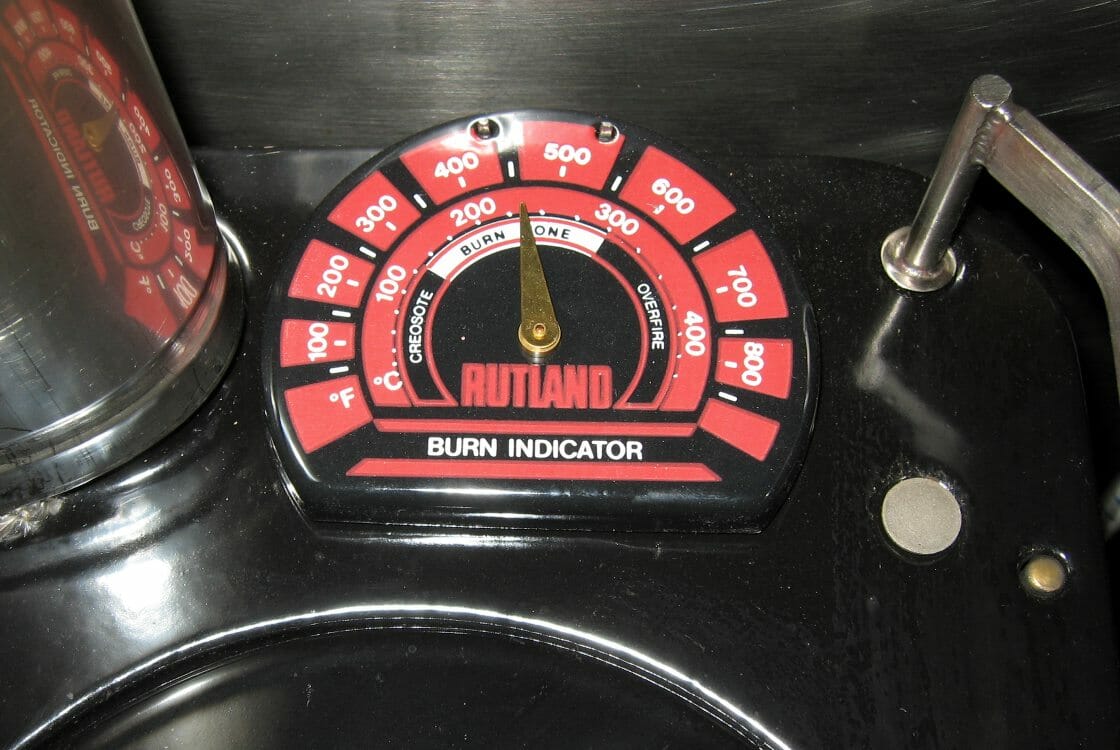
First, in the accessories department, a woodstove thermometer is essential. I use the Rutland one, which I got on Amazon, and it works well (though the Inferno is now getting better reviews):
Second, I finally got around to building the safety cage around the stove, and it has been a surprisingly pleasant addition to the boat… actually better than the post that had to be removed for the installation. I used standard 7/8″ stainless rail and fittings (I bought mine from Defender).
Third, it’s pretty easy to light with the normal methods (paper and little scraps of kindling), but if you want an effective shortcut, try these little fire-starters. Actually, I usually make my own with sawdust and melted wax, poured into egg cartons… but that’s a messy job and kind of a nuisance. The commercial ones work great, store forever, and save a lot of fiddling. The ones at that link should be broken into quarters, good for 144 fires.
The heavy stainless shelf took threads nicely, and where the angled braces meet the thinner heat shield they are bolted deeply into the supporting structure. I haven’t tested it with airborne body weight yet (and hope never to!) but it easily handles the dynamic loads of rough conditions and grabbing it hard to prevent a fall. The height was optimized for leaning, and the top rail will get decorative hitching some rainy night.
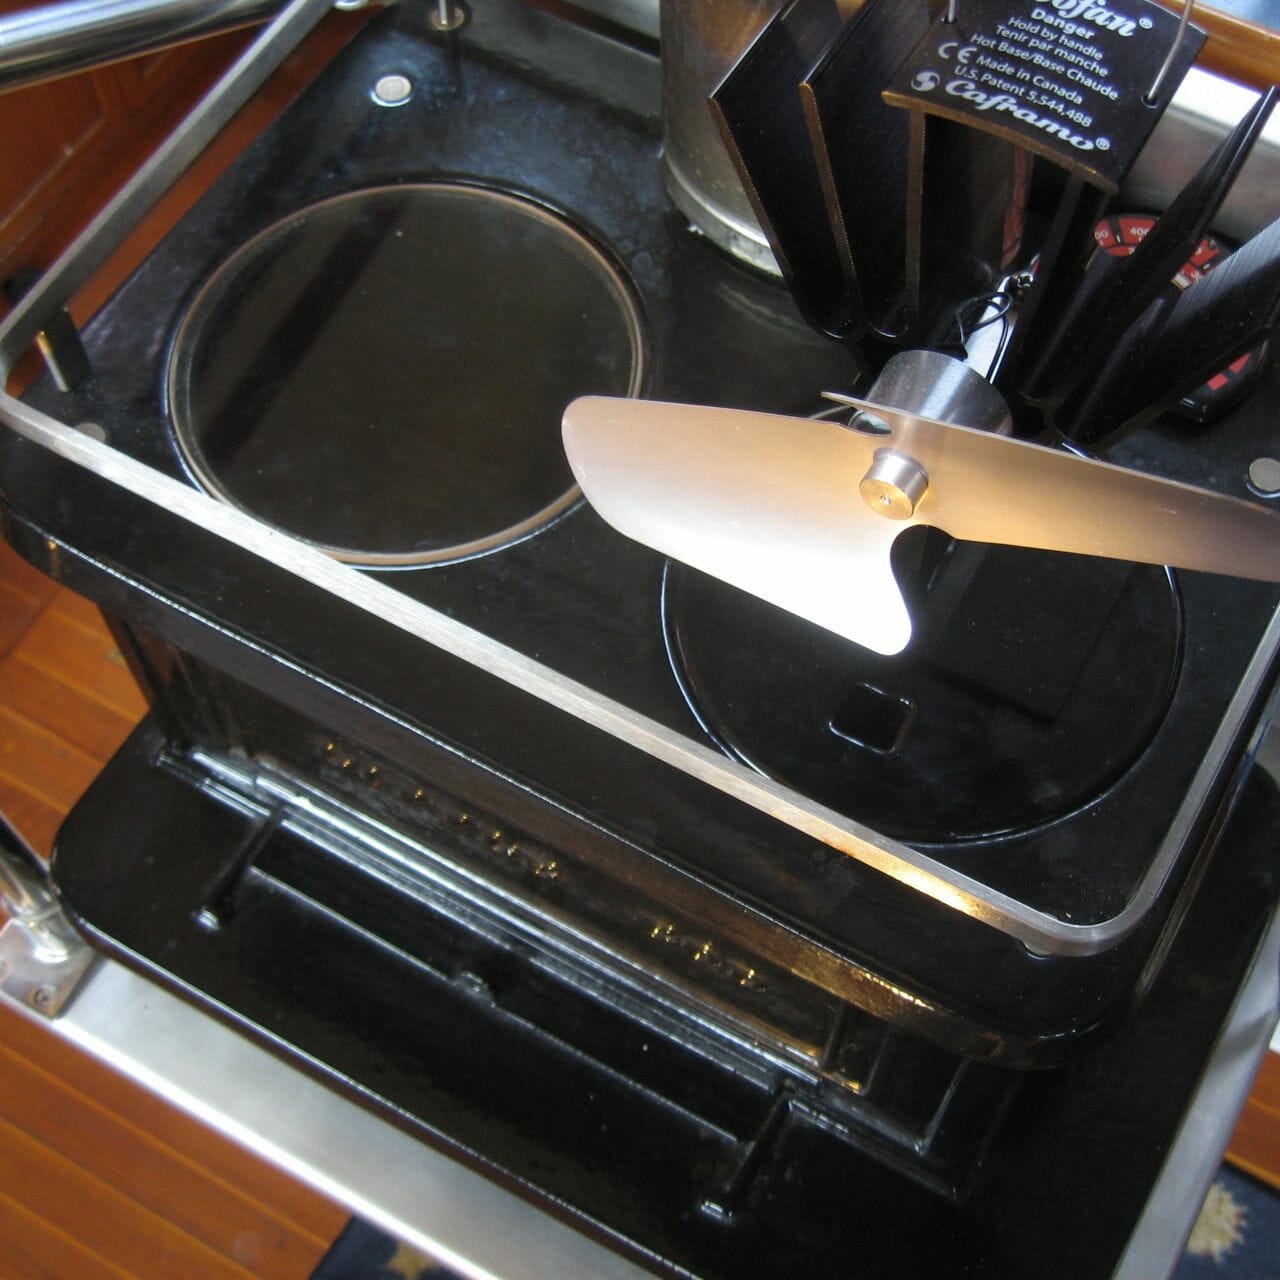
The latest additions (2012) are a Caframo Ecofan and a window! The fan is not as hearty an air-mover as a dedicated DC one, but who wants to cable and listen to another motor? This uses a thermoelectric element to generate power from the difference between the hot base and the relatively cool fins, and does a nice job of gently moving air across the stove and distributing it around a small boat cabin. I had considered mounting mine to one of the disks (with high-temp adhesive, given the enamel), but thought better of it… that’s precious horizontal surface most of the time and the fan lives in a foam nest off-season or underway.
As to the glass window… Andrew now offers a glass-front option when you buy one of these, but quoted me $400 for a retrofit. As much as I wanted one, that was a bit too rich on my current budget for a purely aesthetic item. This launched me on a lengthy quest, culminating at last in a source for custom pyroceramic shapes (not glass) that can take about 1300° F continuous and 10% overtemp for a short time… a healthy margin of error for a wood stove that will probably never see more than 750° F for more than a few YIKES moments as you frantically reduce the draft. It also survives thermal shock very well; here’s mine along with the Caframo fan:
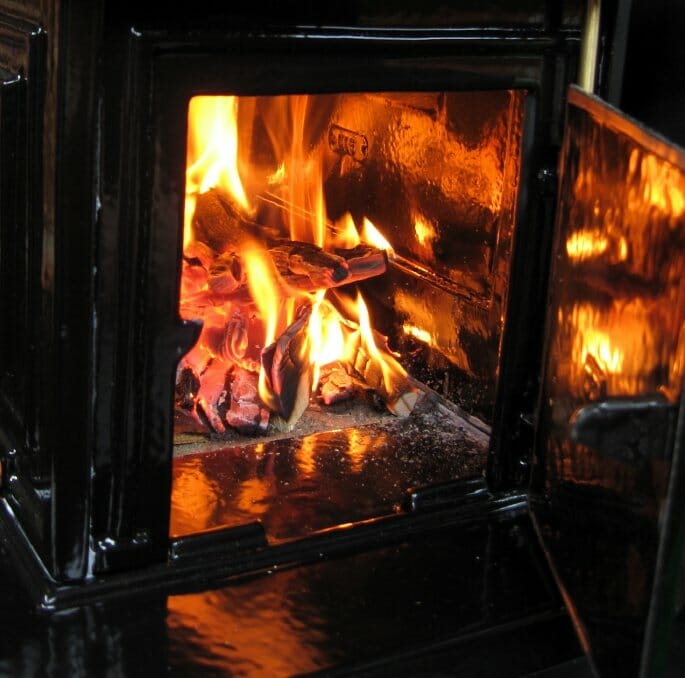
It casts a beautiful warm light around the cabin, reflecting nicely off the overhead, and it’s great to see the fire without having to open the door! I still think it would be better to get the glass front option at the time you buy a new stove, but if you already have a Sardine, Little Cod, or Halibut… you can buy a piece of 3/16″ Neoceram, 6″ diameter, with pencil-grind edges from One Day Glass. (I was reselling them for a while, but don’t really need to be in the loop… gotta choose my battles!) It will pick up soot from the flames, but is easy to clean; just use a wad of wet newspaper and some of the ash from the firebox.
Follow-up (2013) note on fuel
When I had a domestic woodstove, I avoided burning driftwood because of the salt content… mixed with sticky creosote, it leaves a hygroscopic layer that absorbs moisture year-round and can quickly destroy cast iron or non-stainless stovepipe. Since this stove is enameled inside and out, I have not worried too much about that, though it is still not ideal.
Researching this recently for a discussion thread on Facebook, I turned up an interesting article (no longer online) from a chimney sweeping expert that advises against using one of my favorite fuels… mill ends. Clean, dry, neat-stacking, and often free, these cut-off chunks of dimensional lumber are really tempting, though I have noticed that they usually burn insanely hot. Now I know why (and they have other dangers as well, including salt and some nasty chemical).
Also, this classic book is worth having in your library: The Woodburner’s Encyclopedia (1976), usually pretty cheap on Amazon.
2017 Footnote
I sold the lovely Nomadness in 2016, and happily, the Little Cod did not fit the new owner’s cruising plans. I’m now installing it in a project shed near my new mobile digitizing lab, having swallowed the anchor.
Cheers, and stay warm!
-Steve
damn, you cold water, monohull guys really DO like all the comforts of home :-)LOLOL!
OMG. I have become a monohull guy, haven’t I? Never saw that coming.
You may want to have someone who does fuel polishing to come and do a cleaning on your tanks. They treat your remaining fuel with biocide and cleaners and then pipe the fuel through filters to remove the gunk in the tank as well as the algae.
Then a treatment with biocide after that will keep the growth at bay.
Stumblingthunder
Sumblingthunder – yes, I am looking into that. Actually, I can polish onboard (two Racors and a system of valves with a transfer pump lets me move fuel among tanks, or even pickup in one and return to another while the engine is running), and I have been using biocide with the new stuff (the clean aft tank, which I just refilled yesterday). But that’s not as good as a proper tank cleaning… the question is whether or not such an extreme and expensive operation is necessary. I don’t want to wait to find out until the boat is getting thrashed in foul conditions, shaking it loose and clogging the filters…
Thanks for the comment!
-Steve
Hello,
Well its been a little over a month, hows the stove working out? Im looking into one for next year, and my biggest concern is that it can hold a fire overnight. Fatsco makes a tiny tot coal stove that I read an article on Good Old Boat that says it can be banked and they still have hot coals in the morning… whats your experience?
thanks
deryk
Hi Deryk…
I haven’t yet tried a full overnight load… now doing the winter-moorage dance, making weekly trips to work on projects. The fires have been wonderful and the boat cozy… and it’s a great little incinerator. I’ll post when I have done some proper survival-heating!
Cheers,
Steve
Just a thought that occurred regarding access below the stove. Would it work to cut that panel in half, then use a piano hinge on top to put it back together? That would allow you to fold it over itself, then open and should minimize your clearance issues. It should also be strong and fairly inobtrusive. I have brought brass hinge at Home Depot before at a reasonable price. Hope it works better than having to remove the hinges. Best of luck.
Lauren Neher
A few months have passed now, and there have been enough firings for me to have a better sense of performance. The other night it was subfreezing in the harbor, and I kept the stove going at about 450 degrees surface temp all evening. At bedtime, I stoked it full and minimized both intake and stack flow… 8 hours later when I stumbled to the galley for coffee, it was still too hot to rest my hand on (though I did not try to fire it up without kindling, as it was getting sunny).
In short, it works beautifully!
-Steve
Hello,
Just curious what kind of stove pipe you used? I am only finding 4 inch pipe that is for HVAC, and not for wood burning units.
Thanks,
Jon
Jon – I used the pipe provided by the Marinestove folks; here is the accessories page that details the pipe, shielding, bends, smoke heads, and related parts.
Cheers, and stay warm!
Steve
Hello SR,
Glad to see that your install is evolving to suit your needs. Its that element of customization that our spirited customers bring to their particular application which gives me an added boost in the shop every day. Did I mention Idaho Energy Logs to you for super long burn times? A Codger (someone who uses a Little Cod) down at Fisheries Supply in Seattle has reported incredible burn times. I need to try them. When we get into these long burn times it becomes all the more important that everyone heed the smoke/co2 alarm install recommendation. As you have witnessed boats can be tricky with air/chimney flow dynamics. Dorade vents and the like can throw a monkey wrench into the mix. Hence important to have an audible alarm alerting you to a drastic negative change in your flow dynamics. Topic shift. What do you do for hot water ? Any novel designs lurking for integrating the stove into the mix. Folks ask us from time to time and it would be a great option to be able to offer them.
Look forward to your Springtime assessment of life aboard with COD.
Cheers, Andrew / NSW
HI Andrew – great to hear from you! We just had our first burn of the season the other night, and it was quite pleasant to feel that pervasive warmth (so much nicer than the other heat sources aboard).
We picked up some very dense manufactured logs; don't know if they are Idaho. I will try them and let you know my impressions.
Thanks for the reminder on the smoke/CO2 sensors – that is in the plan for the shipnet, but I will get the hardware aboard now. Know of a combined model that is low power?
Hot water: I got rid of the demand water heater that came with the boat, installed with such a short stack that it didn't draft properly and spewed humidity/CO into the cabin. Aboard now is an Isotherm, which uses either AC (700W, well within Inverter range) or engine coolant loop. I don't have much experience with it yet, but would enjoy playing with a preheater coupled to the Cod.
Your stove always elicits admiring comments from visitors, even when just sitting there cold. I'm happy to have it aboard.
Cheers!
Steve
Great job Steve! Great stove!.I am an Italian liveaboard, for 4 years in Venice (freezing cold and humid in winter) and always heating my days and night with an old wood burning stove. It makes the difference aboard.
All my best and sincere compliments for your useful blog
I am definitely linking your blog to mine.
I row and sail to protect the water and invite people to a sustainable way of travelling and living.
Giacomo
Giacomo – Grazie mille!
Steve
Thank you Steve. E' un mio piacere.
I’m building a 200 sf meditation cabin on land, adobe brick. I live in northern New Mexico where worst winter temps rarely go below 0 degrees F. Will the Little Cod heat it adequately? I genuinely hope so, because I’d love to make this work out. I’m interested in the model that is red and has the glass fire door. Should we talk?
Bob
Bob – I certainly think that it would work just fine in that space. The person you should contact is not me, however, but Andrew… the builder of the stoves. Sounds like a great application, and the red would be gorgeous.
How is the draft working on your little cod?
I was considering going with a 4″ to 5″ adapter for a wider draft.
Do you find the 4″ sufficient? Will it get a decent draft even when the setup is in “low profile” (minus the exterior chimney addition) mode?
Just want to know before I finalize my install plans, thanks!
Eric – I have never had any issues related to inadequate draft (if anything, it can be a little hard to turn down if you get it too fired up!). For this size box, I don’t see any advantage to expanding to a 5″ pipe… that’s getting into home-scale stove territory. As to the “low profile” mode, I have not experimented with that enough to answer you. I should! That is certainly how I would like it to be set up if I were in the mode of sailing/anchoring through winter months.
Cheers and stay warm!
Steve
Well if you do get around to trying it, do let me know.
I would much prefer to have it set up that way then have a tall chimney pipe sticking out.
I have no doubt we will both be quite warm this season 🙂
One last question actually. Do you know where they got the spacer hardware that got your pipe through the roof? I have been having a hard time finding one that will connect to 4″ pipe.
Thanks again!
Eric – you mean the deck iron? That is what the pipe connects to; no intermediate hardware. The heat-reflecting disc and hole liner were fabricated…
You can get the deck irons for 3″ or 4″ pipe from Andrew.
http://marinestove.com/Accessories.htm
Hi,
It is a lovely looking stove! How is it working out, say when you’re away from civilization and other heating sources and the temperature is below freezing? Pros and cons?
Does it get much untidy in the cabin from handling and stacking the wood, or coal?
I am surprised it could still be warm after 8 hours. We have a stove in the kitchen of our house, and the wood burns down very quickly, I’d say less than 2 hours, and in the morning it’s chill.
Does the boat get dirty on the outside from the smoke?
-Johan
I just fell in love with the neoceram/pyroceram window concept! We’ve got a Little Cod manufactured by the Enterprise-Fawcett foundry located in Sackville, NB, and instead of two round ports on the top surface its got one large rectangular port (the stove also came with a rectangular grilling rack that can be put in place of the solid rectangular port). I’m going to look into the possibility of getting a piece of neoceram cut to fit in place of the cast iron port but before I do I’d love to know more about your experience with your round pyroceram window. I think I’d personally go the neoceram route given the fact its used for cooktops and looks to be able to take more of a beating than pyroceram, a factor given the large area of our rectangular opening.
So, how’s your’s working out and what thickness of material did you go with (I’m assuming 3/16″)?
Thanks! 🙂
NICE JOB, looking at your page for ideas for an install like this for an airstream trailer, this is great!
Hi Johan, and sorry I took so long to reply! Just got through another winter…
I have been lazily using other heat sources at the dock (mostly), so I can’t report much on day-to-day operation over an extended period. From my casual use, however, I can make a few observations:
Untidy in the cabin: yes. Wood storage is kind of a nuisance, and makes me wish I had more stowage space. Mill ends are neat, but I believe I linked above to an article about their hazards (dang); harvested firewood will need to be mostly kept in a covered place outside with just the current inventory in the cabin.
Below freezing use: no problem. My boat is 44′ and this heats well.
Warm after 8 hours: not in my experience… I am willing to believe that it might be possible with practice, however, though that is pushing it (from my years with daily use of other wood stoves).
Dirty outside: I have not had a problem with that. The smoke head is on the extension pipe, and I tie the boom off to the other side.
Cheers!
Steve
Hello, Kai…
Glad you like the window idea! I did in fact go with neoceram… a 6-inch disc, 3/16″ thick. My only issue has been that with cooler/casual/decorative fires instead of serious hot ones, it blackens with soot. Fortunately, that is easy to clean… no need to buy the special stuff that is available; just use a crumpled wad of newspaper, moisten it, pick up some of the ash in the bottom of the stove, and give it a quick scrub followed by a wipedown with a paper towel.
Cheers!
Steve
Hi, I am interested in installing the “sardine” model wood stove in my first boat (Fisher37). I am concerned about sparks exiting from the chimney and setting my neighbours’ (or my own) sails on fire. Does the spark arrestor (smoke head) completely stop sparks or do you have to be very selective about your solid fuel. Cheers, Glenn
HI Glenn – I have never seen any issues with that except for a little sparkly feistiness during startup (but nothing that would be able to ignite nearby fuels). The Sardine is a sweet unit!